The Cairo Programming Language
by the Cairo Community and its contributors. Special thanks to Starkware through OnlyDust, and Voyager for supporting the creation of this book.
This version of the text assumes you’re using the Cairo Compiler version 2.2.0. See the “Installation” section of Chapter 1 to install or update Cairo.
Foreword
In 2020, StarkWare released Cairo 0, a Turing-complete programming language supporting verifiable computation. Cairo started as an assembly language and gradually became more expressive. The learning curve was initially steep, as Cairo 0.x was a low-level language that did not entirely abstract the underlying cryptographic primitives required to build a proof for the execution of a program.
With the release of Cairo 1, the developer experience has considerably improved, abstracting away the underlying immutable memory model of the Cairo architecture where possible. Strongly inspired by Rust, Cairo 1 has been built to help you create provable programs without specific knowledge of its underlying architecture so that you can focus on the program itself, increasing the overall security of Cairo programs. Powered by a Rust VM, the execution of Cairo programs is now blazingly fast, allowing you to build an extensive test suite without compromising on performance.
Blockchain developers that want to deploy contracts on Starknet will use the Cairo programming language to code their smart contracts. This allows the Starknet OS to generate execution traces for transactions to be proved by a prover, which is then verified on Ethereum L1 prior to updating the state root of Starknet.
However, Cairo is not only for blockchain developers. As a general purpose programming language, it can be used for any computation that would benefit from being proved on one computer and verified on other machines with lower hardware requirements.
This book is designed for developers with a basic understanding of programming concepts. It is a friendly and approachable text intended to help you level up your knowledge of Cairo, but also help you develop your programming skills in general. So, dive in and get ready to learn all there is to know about Cairo!
— The Cairo community
Introduction
What is Cairo?
Cairo is a programming language designed for a virtual CPU of the same name. The unique aspect of this processor is that it was not created for the physical constraints of our world but for cryptographic ones, making it capable of efficiently proving the execution of any program running on it. This means that you can perform time consuming operations on a machine you don't trust, and check the result very quickly on a cheaper machine. While Cairo 0 used to be directly compiled to CASM, the Cairo CPU assembly, Cairo 1 is a more high level language. It first compiles to Sierra, an intermediate representation of Cairo which will compile later down to a safe subset of CASM. The point of Sierra is to ensure your CASM will always be provable, even when the computation fails.
What can you do with it?
Cairo allows you to compute trustworthy values on untrusted machines. One major usecase is Starknet, a solution to Ethereum scaling. Ethereum is a decentralized blockchain platform that enables the creation of decentralized applications where every single interaction between a user and a d-app is verified by all the participants. Starknet is a Layer 2 built on top of Ethereum. Instead of having all the participants of the network to verify all user interactions, only one node, called the prover, executes the programs and generates proofs that the computations were done correctly. These proofs are then verified by an Ethereum smart contract, requiring significantly less computational power compared to executing the interactions themselves. This approach allows for increased throughput and reduced transaction costs while preserving Ethereum security.
What are the differences with other programming languages?
Cairo is quite different from traditional programming languages, especially when it comes to overhead costs and its primary advantages. Your program can be executed in two different ways:
-
When executed by the prover, it is similar to any other language. Because Cairo is virtualized, and because the operations were not specifically designed for maximum efficiency, this can lead to some performance overhead but it is not the most relevant part to optimize.
-
When the generated proof is verified by a verifier, it is a bit different. This has to be as cheap as possible since it could potentially be verified on many very small machines. Fortunately verifying is faster than computing and Cairo has some unique advantages to improve it even more. A notable one is non-determinism. This is a topic you will cover in more detail later in this book, but the idea is that you can theoretically use a different algorithm for verifying than for computing. Currently, writing custom non-deterministic code is not supported for the developers, but the standard library leverages non-determinism for improved performance. For example sorting an array in Cairo costs the same price as copying it. Because the verifier doesn't sort the array, it just checks that it is sorted, which is cheaper.
Another aspect that sets the language apart is its memory model. In Cairo, memory access is immutable, meaning that once a value is written to memory, it cannot be changed. Cairo 1 provides abstractions that help developers work with these constraints, but it does not fully simulate mutability. Therefore, developers must think carefully about how they manage memory and data structures in their programs to optimize performance.
References
- Cairo CPU Architecture: https://eprint.iacr.org/2021/1063
- Cairo, Sierra and Casm: https://medium.com/nethermind-eth/under-the-hood-of-cairo-1-0-exploring-sierra-7f32808421f5
- State of non determinism: https://twitter.com/PapiniShahar/status/1638203716535713798
Getting Started
Installation
Cairo can be installed by simply downloading Scarb. Scarb bundles the Cairo compiler and the Cairo language server together in an easy-to-install package so that you can start writing Cairo code right away.
Scarb is also Cairo's package manager and is heavily inspired by Cargo, Rust’s build system and package manager.
Scarb handles a lot of tasks for you, such as building your code (either pure Cairo or Starknet contracts), downloading the libraries your code depends on, building those libraries, and provides LSP support for the VSCode Cairo 1 extension.
As you write more complex Cairo programs, you might add dependencies, and if you start a project using Scarb, managing external code and dependencies will be a lot easier to do.
Let's start by installing Scarb.
Installing Scarb
Requirements
Scarb requires a Git executable to be available in the PATH environment variable.
Installation
To install Scarb, please refer to the installation instructions. We strongly recommend that you install Scarb via asdf, a CLI tool that can manage multiple language runtime versions on a per-project basis. This will ensure that the version of Scarb you use to work on a project always matches the one defined in the project settings, avoiding problems lead to version mismatch. Otherwise, you can simply run the following command in your terminal, and follow the onscreen instructions. This will install the latest stable release of Scarb.
curl --proto '=https' --tlsv1.2 -sSf https://docs.swmansion.com/scarb/install.sh | sh
-
Verify installation by running the following command in new terminal session, it should print both Scarb and Cairo language versions, e.g:
$ scarb --version
scarb 2.3.0-rc1 (58cc88efb 2023-08-23)
cairo: 2.2.0 (https://crates.io/crates/cairo-lang-compiler/2.2.0)
sierra: 1.3.0
Installing the VSCode extension
Cairo has a VSCode extension that provides syntax highlighting, code completion, and other useful features. You can install it from the VSCode Marketplace.
Once installed, go into the extension settings, and make sure to tick the Enable Language Server and Enable Scarb options.
Hello, World
Now that you’ve installed Cairo through Scarb, it’s time to write your first Cairo program.
It’s traditional when learning a new language to write a little program that
prints the text Hello, world! to the screen, so we’ll do the same here!
Note: This book assumes basic familiarity with the command line. Cairo makes no specific demands about your editing or tooling or where your code lives, so if you prefer to use an integrated development environment (IDE) instead of the command line, feel free to use your favorite IDE. The Cairo team has developed a VSCode extension for the Cairo language that you can use to get the features from the language server and code highlighting. See Appendix D for more details.
Creating a Project Directory
You’ll start by making a directory to store your Cairo code. It doesn’t matter to Cairo where your code lives, but for the exercises and projects in this book, we suggest making a cairo_projects directory in your home directory and keeping all your projects there.
Open a terminal and enter the following commands to make a cairo_projects directory and a directory for the “Hello, world!” project within the cairo_projects directory.
Note: From now on, for each example shown in the book, we assume that you will be working from a Scarb project directory. If you are not using Scarb, and try to run the examples from a different directory, you might need to adjust the commands accordingly or create a Scarb project.
For Linux, macOS, and PowerShell on Windows, enter this:
mkdir ~/cairo_projects
cd ~/cairo_projects
For Windows CMD, enter this:
> mkdir "%USERPROFILE%\cairo_projects"
> cd /d "%USERPROFILE%\cairo_projects"
Creating a Project with Scarb
Let’s create a new project using Scarb.
Navigate to your projects directory (or wherever you decided to store your code). Then run the following:
scarb new hello_world
It creates a new directory and project called hello_world. We’ve named our project hello_world, and Scarb creates its files in a directory of the same name.
Go into the hello_world directory with the command cd hello_world. You’ll see that Scarb has generated two files and one directory for us: a Scarb.toml file and a src directory with a lib.cairo file inside.
It has also initialized a new Git repository along with a .gitignore file
Note: Git is a common version control system. You can stop using version control system by using the
--vcsflag. Runscarb new -helpto see the available options.
Open Scarb.toml in your text editor of choice. It should look similar to the code in Listing 1-2.
Filename: Scarb.toml
[package]
name = "hello_world"
version = "0.1.0"

# See more keys and their definitions at https://docs.swmansion.com/scarb/docs/reference/manifest

[dependencies]
# foo = { path = "vendor/foo" }
Listing 1-2: Contents of Scarb.toml generated by scarb new
This file is in the TOML (Tom’s Obvious, Minimal Language) format, which is Scarb’s configuration format.
The first line, [package], is a section heading that indicates that the following statements are configuring a package. As we add more information to this file, we’ll add other sections.
The next two lines set the configuration information Scarb needs to compile your program: the name and the version of Scarb to use.
The last line, [dependencies], is the start of a section for you to list any of your project’s dependencies. In Cairo, packages of code are referred to as crates. We won’t need any other crates for this project.
Note: If you're building contracts for Starknet, you will need to add the
starknetdependency as mentioned in the Scarb documentation.
The other file created by Scarb is src/lib.cairo, let's delete all the content and put in the following content, we will explain the reason later.
mod hello_world;Then create a new file called src/hello_world.cairo and put the following code in it:
Filename: src/hello_world.cairo
use debug::PrintTrait;
fn main() {
    'Hello, World!'.print();
}
We have just created a file called lib.cairo, which contains a module declaration referencing another module named hello_world, as well as the file hello_world.cairo, containing the implementation details of the hello_world module.
Scarb requires your source files to be located within the src directory.
The top-level project directory is reserved for README files, license information, configuration files, and any other non-code-related content. Scarb ensures a designated location for all project components, maintaining a structured organization.
If you started a project that doesn’t use Scarb, you can convert it to a project that does use Scarb. Move the project code into the src directory and create an appropriate Scarb.toml file.
Building a Scarb Project
From your hello_world directory, build your project by entering the following command:
$ scarb build
   Compiling hello_world v0.1.0 (file:///projects/Scarb.toml)
    Finished release target(s) in 0 seconds
This command creates a sierra file in target/dev, let's ignore the sierra file for now.
If you have installed Cairo correctly, you should be able to run and see the following output:
$ scarb cairo-run
running hello_world ...
[DEBUG] Hello, World!                   (raw: 0x48656c6c6f2c20776f726c6421

Run completed successfully, returning []
Regardless of your operating system, the string Hello, world! should print to
the terminal.
If Hello, world! did print, congratulations! You’ve officially written a Cairo
program. That makes you a Cairo programmer—welcome!
Anatomy of a Cairo Program
Let’s review this “Hello, world!” program in detail. Here’s the first piece of the puzzle:
fn main() {

}
These lines define a function named main. The main function is special: it
is always the first code that runs in every executable Cairo program. Here, the
first line declares a function named main that has no parameters and returns
nothing. If there were parameters, they would go inside the parentheses ().
The function body is wrapped in {}. Cairo requires curly brackets around all
function bodies. It’s good style to place the opening curly bracket on the same
line as the function declaration, adding one space in between.
Note: If you want to stick to a standard style across Cairo projects, you can use the automatic formatter tool available with
scarb fmtto format your code in a particular style (more onscarb fmtin Appendix D). The Cairo team has included this tool with the standard Cairo distribution, ascairo-runis, so it should already be installed on your computer!
Prior to the main function declaration, The line use debug::PrintTrait; is responsible for importing an item defined in another module. In this case, we are importing the PrintTrait item from the Cairo core library. By doing so, we gain the ability to use the print() method on data types that are compatible with printing.
The body of the main function holds the following code:
'Hello, World!'.print();This line does all the work in this little program: it prints text to the screen. There are four important details to notice here.
First, Cairo style is to indent with four spaces, not a tab.
Second, the print() function called is a method from the trait PrintTrait. This trait is imported from the Cairo core library, and it defines how to print values to the screen for different data types. In our case, our text is defined as a "short string", which is an ASCII string that can fit in Cairo's basic data type, which is the felt252 type. By calling Hello, world!'.print(), we're calling the print() method of the felt252 implementation of the PrintTrait trait.
Third, you see the 'Hello, World!' short string. We pass this short string as an argument
to print(), and the short string is printed to the screen.
Fourth, we end the line with a semicolon (;), which indicates that this
expression is over and the next one is ready to begin. Most lines of Cairo code
end with a semicolon.
Running tests
To run all the tests associated with a particular package, you can use the scarb test command.
It is not a test runner by itself, but rather delegates work to a testing solution of choice. Scarb comes with preinstalled scarb cairo-test extension, which bundles Cairo's native test runner. It is the default test runner used by scarb test.
To use third-party test runners, please refer to Scarb's documentation.
Test functions are marked with the #[test] attributes, and running scarb test will run all test functions in your codebase under the src/ directory.
├── Scarb.toml
├── src
│   ├── lib.cairo
│   └── file.cairo
A sample Scarb project structure
Let’s recap what we’ve learned so far about Scarb:
- We can create a project using
scarb new. - We can build a project using
scarb buildto generate the compiled Sierra code. - We can define custom scripts in
Scarb.tomland call them with thescarb runcommand. - We can run tests using the
scarb testcommand.
An additional advantage of using Scarb is that the commands are the same no matter which operating system you’re working on. So, at this point, we’ll no longer provide specific instructions for Linux and macOS versus Windows.
Summary
You’re already off to a great start on your Cairo journey! In this chapter, you’ve learned how to:
- Install the latest stable version of Cairo
- Write and run a “Hello, Scarb!” program using
scarbdirectly - Create and run a new project using the conventions of Scarb
- Execute tests using the
scarb testcommand
This is a great time to build a more substantial program to get used to reading and writing Cairo code.
Common Programming Concepts
This chapter covers concepts that appear in almost every programming language and how they work in Cairo. Many programming languages have much in common at their core. None of the concepts presented in this chapter are unique to Cairo, but we’ll discuss them in the context of Cairo and explain the conventions around using these concepts.
Specifically, you’ll learn about variables, basic types, functions, comments, and control flow. These foundations will be in every Cairo program, and learning them early will give you a strong core to start from.
Variables and Mutability
Cairo uses an immutable memory model, meaning that once a memory cell is written to, it can't be overwritten but only read from. To reflect this immutable memory model, variables in Cairo are immutable by default. However, the language abstracts this model and gives you the option to make your variables mutable. Let’s explore how and why Cairo enforces immutability, and how you can make your variables mutable.
When a variable is immutable, once a variable is bound to a value, you can’t change
that variable. To illustrate this, generate a new project called variables in
your cairo_projects directory by using scarb new variables.
Then, in your new variables directory, open src/lib.cairo and replace its code with the following code, which won’t compile just yet:
Filename: src/lib.cairo
use debug::PrintTrait;
fn main() {
    let x = 5;
    x.print();
    x = 6;
    x.print();
}
Save and run the program using scarb cairo-run. You should receive an error message
regarding an immutability error, as shown in this output:
error: Cannot assign to an immutable variable.
 --> lib.cairo:5:5
    x = 6;
    ^***^

Error: failed to compile: src/lib.cairo
This example shows how the compiler helps you find errors in your programs. Compiler errors can be frustrating, but really they only mean your program isn’t safely doing what you want it to do yet; they do not mean that you’re not a good programmer! Experienced Caironautes still get compiler errors.
You received the error message Cannot assign to an immutable variable.
because you tried to assign a second value to the immutable x variable.
It’s important that we get compile-time errors when we attempt to change a value that’s designated as immutable because this specific situation can lead to bugs. If one part of our code operates on the assumption that a value will never change and another part of our code changes that value, it’s possible that the first part of the code won’t do what it was designed to do. The cause of this kind of bug can be difficult to track down after the fact, especially when the second piece of code changes the value only sometimes.
Cairo, unlike most other languages, has immutable memory. This makes a whole class of bugs impossible, because values will never change unexpectedly. This makes code easier to reason about.
But mutability can be very useful, and can make code more convenient to write.
Although variables are immutable by default, you can make them mutable by
adding mut in front of the variable name. Adding mut also conveys
intent to future readers of the code by indicating that other parts of the code
will be changing the value associated to this variable.
However, you might be wondering at this point what exactly happens when a variable
is declared as mut, as we previously mentioned that Cairo's memory is immutable.
The answer is that the value is immutable, but the variable isn't. What value
the variable points to can be changed. Assigning to a mutable variable in Cairo
is essentially equivalent to redeclaring it to refer to another value in another memory cell,
but the compiler handles that for you, and the keyword mut makes it explicit.
Upon examining the low-level Cairo Assembly code, it becomes clear that
variable mutation is implemented as syntactic sugar, which translates mutation operations
into a series of steps equivalent to variable shadowing. The only difference is that at the Cairo
level, the variable is not redeclared so its type cannot change.
For example, let’s change src/lib.cairo to the following:
Filename: src/lib.cairo
use debug::PrintTrait;
fn main() {
    let mut x = 5;
    x.print();
    x = 6;
    x.print();
}
When we run the program now, we get this:
$ scarb cairo-run
[DEBUG]                                (raw: 5)

[DEBUG]                                (raw: 6)

Run completed successfully, returning []
We’re allowed to change the value bound to x from 5 to 6 when mut is
used. Ultimately, deciding whether to use mutability or not is up to you and
depends on what you think is clearest in that particular situation.
Constants
Like immutable variables, constants are values that are bound to a name and are not allowed to change, but there are a few differences between constants and variables.
First, you aren’t allowed to use mut with constants. Constants aren’t just
immutable by default—they’re always immutable. You declare constants using the
const keyword instead of the let keyword, and the type of the value must
be annotated. We’ll cover types and type annotations in the next section,
“Data Types”, so don’t worry about the details
right now. Just know that you must always annotate the type.
Constants can only be declared in the global scope, which makes them useful for values that many parts of code need to know about.
The last difference is that constants may be set only to a constant expression, not the result of a value that could only be computed at runtime. Only literal constants are currently supported.
Here’s an example of a constant declaration:
const ONE_HOUR_IN_SECONDS: u32 = 3600;Cairo's naming convention for constants is to use all uppercase with underscores between words.
Constants are valid for the entire time a program runs, within the scope in which they were declared. This property makes constants useful for values in your application domain that multiple parts of the program might need to know about, such as the maximum number of points any player of a game is allowed to earn, or the speed of light.
Naming hardcoded values used throughout your program as constants is useful in conveying the meaning of that value to future maintainers of the code. It also helps to have only one place in your code you would need to change if the hardcoded value needed to be updated in the future.
Shadowing
Variable shadowing refers to the declaration of a
new variable with the same name as a previous variable. Caironautes say that the
first variable is shadowed by the second, which means that the second
variable is what the compiler will see when you use the name of the variable.
In effect, the second variable overshadows the first, taking any uses of the
variable name to itself until either it itself is shadowed or the scope ends.
We can shadow a variable by using the same variable’s name and repeating the
use of the let keyword as follows:
Filename: src/lib.cairo
use debug::PrintTrait;
fn main() {
    let x = 5;
    let x = x + 1;
    {
        let x = x * 2;
        'Inner scope x value is:'.print();
        x.print()
    }
    'Outer scope x value is:'.print();
    x.print();
}
This program first binds x to a value of 5. Then it creates a new variable
x by repeating let x =, taking the original value and adding 1 so the
value of x is then 6. Then, within an inner scope created with the curly
brackets, the third let statement also shadows x and creates a new
variable, multiplying the previous value by 2 to give x a value of 12.
When that scope is over, the inner shadowing ends and x returns to being 6.
When we run this program, it will output the following:
scarb cairo-run
[DEBUG] Inner scope x value is:         (raw: 7033328135641142205392067879065573688897582790068499258)

[DEBUG]
                                       (raw: 12)

[DEBUG] Outer scope x value is:         (raw: 7610641743409771490723378239576163509623951327599620922)

[DEBUG]                                (raw: 6)

Run completed successfully, returning []
Shadowing is different from marking a variable as mut because we’ll get a
compile-time error if we accidentally try to reassign to this variable without
using the let keyword. By using let, we can perform a few transformations
on a value but have the variable be immutable after those transformations have
been completed.
Another distinction between mut and shadowing is that when we use the let keyword again,
we are effectively creating a new variable, which allows us to change the type of the
value while reusing the same name. As mentioned before, variable shadowing and mutable variables
are equivalent at the lower level.
The only difference is that by shadowing a variable, the compiler will not complain
if you change its type. For example, say our program performs a type conversion between the
u64 and felt252 types.
use debug::PrintTrait;

fn main() {
    let x: u64 = 2;
    x.print();
    let x: felt252 = x.into(); // converts x to a felt, type annotation is required.
    x.print()
}
The first x variable has a u64 type while the second x variable has a felt252 type.
Shadowing thus spares us from having to come up with different names, such as x_u64
and x_felt252; instead, we can reuse the simpler x name. However, if we try to use
mut for this, as shown here, we’ll get a compile-time error:
use debug::PrintTrait;

fn main() {
    let mut x: u64 = 2;
    x.print();
    x = 100_felt252;
    x.print()
}
The error says we were expecting a u64 (the original type) but we got a different type:
$ scarb cairo-run
error: Unexpected argument type. Expected: "core::integer::u64", found: "core::felt252".
 --> lib.cairo:9:9
    x = 100_felt252;
        ^*********^

Error: failed to compile: src/lib.cairo
Now that we’ve explored how variables work, let’s look at more data types they can have.
Data Types
Every value in Cairo is of a certain data type, which tells Cairo what kind of data is being specified so it knows how to work with that data. This section covers two subsets of data types: scalars and compounds.
Keep in mind that Cairo is a statically typed language, which means that it must know the types of all variables at compile time. The compiler can usually infer the desired type based on the value and its usage. In cases when many types are possible, we can use a cast method where we specify the desired output type.
fn main() {
    let x: felt252 = 3;
    let y: u32 = x.try_into().unwrap();
}
You’ll see different type annotations for other data types.
Scalar Types
A scalar type represents a single value. Cairo has three primary scalar types: felts, integers, and booleans. You may recognize these from other programming languages. Let’s jump into how they work in Cairo.
Felt Type
In Cairo, if you don't specify the type of a variable or argument, its type defaults to a field element, represented by the keyword felt252. In the context of Cairo, when we say “a field element” we mean an integer in the range 0 <= x < P,
where P is a very large prime number currently equal to P = 2^{251} + 17 * 2^{192}+1. When adding, subtracting, or multiplying, if the result falls outside the specified range of the prime number, an overflow occurs, and an appropriate multiple of P is added or subtracted to bring the result back within the range (i.e., the result is computed modulo P).
The most important difference between integers and field elements is division: Division of field elements (and therefore division in Cairo) is unlike regular CPUs division, where
integer division x / y is defined as [x/y] where the integer part of the quotient is returned (so you get 7 / 3 = 2) and it may or may not satisfy the equation (x / y) * y == x,
depending on the divisibility of x by y.
In Cairo, the result of x/y is defined to always satisfy the equation (x / y) * y == x. If y divides x as integers, you will get the expected result in Cairo (for example 6 / 2
will indeed result in 3).
But when y does not divide x, you may get a surprising result: For example, since 2 * ((P+1)/2) = P+1 ≡ 1 mod[P], the value of 1 / 2 in Cairo is (P+1)/2 (and not 0 or 0.5), as it satisfies the above equation.
Integer Types
The felt252 type is a fundamental type that serves as the basis for creating all types in the core library.
However, it is highly recommended for programmers to use the integer types instead of the felt252 type whenever possible, as the integer types come with added security features that provide extra protection against potential vulnerabilities in the code, such as overflow checks. By using these integer types, programmers can ensure that their programs are more secure and less susceptible to attacks or other security threats.
An integer is a number without a fractional component. This type declaration indicates the number of bits the programmer can use to store the integer.
Table 3-1 shows
the built-in integer types in Cairo. We can use any of these variants to declare
the type of an integer value.
Table 3-1: Integer Types in Cairo
| Length | Unsigned |
|---|---|
| 8-bit | u8 |
| 16-bit | u16 |
| 32-bit | u32 |
| 64-bit | u64 |
| 128-bit | u128 |
| 256-bit | u256 |
| 32-bit | usize |
Each variant has an explicit size. Note that for now, the usize type is just an alias for u32; however, it might be useful when in the future Cairo can be compiled to MLIR.
As variables are unsigned, they can't contain a negative number. This code will cause the program to panic:
fn sub_u8s(x: u8, y: u8) -> u8 {
    x - y
}

fn main() {
    sub_u8s(1, 3);
}
All integer types previously mentioned fit into a felt252, except for u256 which needs 4 more bits to be stored. Under the hood, u256 is basically a struct with 2 fields: u256 {low: u128, high: u128}
You can write integer literals in any of the forms shown in Table 3-2. Note
that number literals that can be multiple numeric types allow a type suffix,
such as 57_u8, to designate the type.
Table 3-2: Integer Literals in Cairo
| Numeric literals | Example |
|---|---|
| Decimal | 98222 |
| Hex | 0xff |
| Octal | 0o04321 |
| Binary | 0b01 |
So how do you know which type of integer to use? Try to estimate the max value your int can have and choose the good size.
The primary situation in which you’d use usize is when indexing some sort of collection.
Numeric Operations
Cairo supports the basic mathematical operations you’d expect for all the integer
types: addition, subtraction, multiplication, division, and remainder. Integer
division truncates toward zero to the nearest integer. The following code shows
how you’d use each numeric operation in a let statement:
fn main() {
    // addition
    let sum = 5_u128 + 10_u128;

    // subtraction
    let difference = 95_u128 - 4_u128;

    // multiplication
    let product = 4_u128 * 30_u128;

    // division
    let quotient = 56_u128 / 32_u128; //result is 1
    let quotient = 64_u128 / 32_u128; //result is 2

    // remainder
    let remainder = 43_u128 % 5_u128; // result is 3
}
Each expression in these statements uses a mathematical operator and evaluates to a single value, which is then bound to a variable.
Appendix B contains a list of all operators that Cairo provides.
The Boolean Type
As in most other programming languages, a Boolean type in Cairo has two possible
values: true and false. Booleans are one felt252 in size. The Boolean type in
Cairo is specified using bool. For example:
fn main() {
    let t = true;

    let f: bool = false; // with explicit type annotation
}
The main way to use Boolean values is through conditionals, such as an if
expression. We’ll cover how if expressions work in Cairo in the “Control
Flow” section.
The Short String Type
Cairo doesn't have a native type for strings, but you can store characters forming what we call a "short string" inside felt252s. A short string has a max length of 31 chars. This is to ensure that it can fit in a single felt (a felt is 252 bits, one ASCII char is 8 bits).
Here are some examples of declaring values by putting them between single quotes:
fn main() {
    let my_first_char = 'C';
    let my_first_string = 'Hello world';
}
Type casting
In Cairo, you can convert types scalar types from one type to another by using the try_into and into methods provided by the TryInto and Into traits, respectively.
The try_into method allows for safe type casting when the target type might not fit the source value. Keep in mind that try_into returns an Option<T> type, which you'll need to unwrap to access the new value.
On the other hand, the into method can be used for type casting when success is guaranteed, such as when the source type is smaller than the destination type.
To perform the conversion, call var.into() or var.try_into() on the source value to cast it to another type. The new variable's type must be explicitly defined, as demonstrated in the example below.
fn main() {
    let my_felt252 = 10;
    // Since a felt252 might not fit in a u8, we need to unwrap the Option<T> type
    let my_u8: u8 = my_felt252.try_into().unwrap();
    let my_u16: u16 = my_u8.into();
    let my_u32: u32 = my_u16.into();
    let my_u64: u64 = my_u32.into();
    let my_u128: u128 = my_u64.into();
    // As a felt252 is smaller than a u256, we can use the into() method
    let my_u256: u256 = my_felt252.into();
    let my_usize: usize = my_felt252.try_into().unwrap();
    let my_other_felt252: felt252 = my_u8.into();
    let my_third_felt252: felt252 = my_u16.into();
}
The Tuple Type
A tuple is a general way of grouping together a number of values with a variety of types into one compound type. Tuples have a fixed length: once declared, they cannot grow or shrink in size.
We create a tuple by writing a comma-separated list of values inside parentheses. Each position in the tuple has a type, and the types of the different values in the tuple don’t have to be the same. We’ve added optional type annotations in this example:
fn main() {
    let tup: (u32, u64, bool) = (10, 20, true);
}
The variable tup binds to the entire tuple because a tuple is considered a
single compound element. To get the individual values out of a tuple, we can
use pattern matching to destructure a tuple value, like this:
use debug::PrintTrait;
fn main() {
    let tup = (500, 6, true);

    let (x, y, z) = tup;

    if y == 6 {
        'y is six!'.print();
    }
}
This program first creates a tuple and binds it to the variable tup. It then
uses a pattern with let to take tup and turn it into three separate
variables, x, y, and z. This is called destructuring because it breaks
the single tuple into three parts. Finally, the program prints y is six as the value of
y is 6.
We can also declare the tuple with value and types at the same time. For example:
fn main() {
    let (x, y): (felt252, felt252) = (2, 3);
}
The unit type ()
A unit type is a type which has only one value ().
It is represented by a tuple with no elements.
Its size is always zero, and it is guaranteed to not exist in the compiled code.
Functions
Functions are prevalent in Cairo code. You’ve already seen one of the most
important functions in the language: the main function, which is the entry
point of many programs. You’ve also seen the fn keyword, which allows you to
declare new functions.
Cairo code uses snake case as the conventional style for function and variable names, in which all letters are lowercase and underscores separate words. Here’s a program that contains an example function definition:
use debug::PrintTrait;

fn another_function() {
    'Another function.'.print();
}

fn main() {
    'Hello, world!'.print();
    another_function();
}
We define a function in Cairo by entering fn followed by a function name and a
set of parentheses. The curly brackets tell the compiler where the function
body begins and ends.
We can call any function we’ve defined by entering its name followed by a set
of parentheses. Because another_function is defined in the program, it can be
called from inside the main function. Note that we defined another_function
before the main function in the source code; we could have defined it after
as well. Cairo doesn’t care where you define your functions, only that they’re
defined somewhere in a scope that can be seen by the caller.
Let’s start a new project with Scarb named functions to explore functions
further. Place the another_function example in src/lib.cairo and run it. You
should see the following output:
$ scarb cairo-run
[DEBUG] Hello, world!                (raw: 5735816763073854953388147237921)
[DEBUG] Another function.            (raw: 22265147635379277118623944509513687592494)
The lines execute in the order in which they appear in the main function.
First the “Hello, world!” message prints, and then another_function is called
and its message is printed.
Parameters
We can define functions to have parameters, which are special variables that are part of a function’s signature. When a function has parameters, you can provide it with concrete values for those parameters. Technically, the concrete values are called arguments, but in casual conversation, people tend to use the words parameter and argument interchangeably for either the variables in a function’s definition or the concrete values passed in when you call a function.
In this version of another_function we add a parameter:
use debug::PrintTrait;

fn main() {
    another_function(5);
}

fn another_function(x: felt252) {
    x.print();
}
Try running this program; you should get the following output:
$ scarb cairo-run
[DEBUG]                                 (raw: 5)
The declaration of another_function has one parameter named x. The type of
x is specified as felt252. When we pass 5 in to another_function, the
.print() function outputs 5 in the console.
In function signatures, you must declare the type of each parameter. This is a deliberate decision in Cairo’s design: requiring type annotations in function definitions means the compiler almost never needs you to use them elsewhere in the code to figure out what type you mean. The compiler is also able to give more helpful error messages if it knows what types the function expects.
When defining multiple parameters, separate the parameter declarations with commas, like this:
use debug::PrintTrait;

fn main() {
    another_function(5, 6);
}

fn another_function(x: felt252, y: felt252) {
    x.print();
    y.print();
}
This example creates a function named another_function with two
parameters. The first parameter is named x and is an felt252. The second is
named y and is type felt252 too. The function then prints the content of the felt x and then the content of the felt y.
Let’s try running this code. Replace the program currently in your functions
project’s src/lib.cairo file with the preceding example and run it using scarb cairo-run:
$ scarb cairo-run
[DEBUG]                                 (raw: 5)
[DEBUG]                                 (raw: 6)
Because we called the function with 5 as the value for x and 6 as
the value for y, the program output contains those values.
Named parameters
In Cairo, named parameters allow you to specify the names of arguments when you call a function. This makes the function calls more readable and self-descriptive.
If you want to use named parameters, you need to specify the name of the parameter and the value you want to pass to it. The syntax is parameter_name: value. If you pass a variable that has the same name as the parameter, you can simply write :parameter_name instead of parameter_name: variable_name.
Here is an example:
fn foo(x: u8, y: u8) {}

fn main() {
    let first_arg = 3;
    let second_arg = 4;
    foo(x: first_arg, y: second_arg);
    let x = 1;
    let y = 2;
    foo(:x, :y)
}
Statements and Expressions
Function bodies are made up of a series of statements optionally ending in an expression. So far, the functions we’ve covered haven’t included an ending expression, but you have seen an expression as part of a statement. Because Cairo is an expression-based language, this is an important distinction to understand. Other languages don’t have the same distinctions, so let’s look at what statements and expressions are and how their differences affect the bodies of functions.
- Statements are instructions that perform some action and do not return a value.
- Expressions evaluate to a resultant value. Let’s look at some examples.
We’ve actually already used statements and expressions. Creating a variable and
assigning a value to it with the let keyword is a statement. In Listing 2-1,
let y = 6; is a statement.
fn main() {
    let y = 6;
}
Listing 2-1: A main function declaration containing one statement
Function definitions are also statements; the entire preceding example is a statement in itself.
Statements do not return values. Therefore, you can’t assign a let statement
to another variable, as the following code tries to do; you’ll get an error:
fn main() {
    let x = (let y = 6);
}
When you run this program, the error you’ll get looks like this:
$ scarb cairo-run
error: Missing token TerminalRParen.
 --> src/lib.cairo:2:14
    let x = (let y = 6);
             ^

error: Missing token TerminalSemicolon.
 --> src/lib.cairo:2:14
    let x = (let y = 6);
             ^

error: Missing token TerminalSemicolon.
 --> src/lib.cairo:2:14
    let x = (let y = 6);
                      ^

error: Skipped tokens. Expected: statement.
 --> src/lib.cairo:2:14
    let x = (let y = 6);
The let y = 6 statement does not return a value, so there isn’t anything for
x to bind to. This is different from what happens in other languages, such as
C and Ruby, where the assignment returns the value of the assignment. In those
languages, you can write x = y = 6 and have both x and y have the value
6; that is not the case in Cairo.
Expressions evaluate to a value and make up most of the rest of the code that
you’ll write in Cairo. Consider a math operation, such as 5 + 6, which is an
expression that evaluates to the value 11. Expressions can be part of
statements: in Listing 2-1, the 6 in the statement let y = 6; is an
expression that evaluates to the value 6. Calling a function is an
expression. A new scope block created with
curly brackets is an expression, for example:
use debug::PrintTrait;
fn main() {
    let y = {
        let x = 3;
        x + 1
    };

    y.print();
}
This expression:
    let y = {
        let x = 3;
        x + 1
    };
is a block that, in this case, evaluates to 4. That value gets bound to y
as part of the let statement. Note that the x + 1 line doesn’t have a
semicolon at the end, which is unlike most of the lines you’ve seen so far.
Expressions do not include ending semicolons. If you add a semicolon to the end
of an expression, you turn it into a statement, and it will then not return a
value. Keep this in mind as you explore function return values and expressions
next.
Functions with Return Values
Functions can return values to the code that calls them. We don’t name return
values, but we must declare their type after an arrow (->). In Cairo, the
return value of the function is synonymous with the value of the final
expression in the block of the body of a function. You can return early from a
function by using the return keyword and specifying a value, but most
functions return the last expression implicitly. Here’s an example of a
function that returns a value:
use debug::PrintTrait;

fn five() -> u32 {
    5
}

fn main() {
    let x = five();
    x.print();
}
There are no function calls, or even let statements in the five
function—just the number 5 by itself. That’s a perfectly valid function in
Cairo. Note that the function’s return type is specified too, as -> u32. Try
running this code; the output should look like this:
$ scarb cairo-run
[DEBUG]                                 (raw: 5)
The 5 in five is the function’s return value, which is why the return type
is u32. Let’s examine this in more detail. There are two important bits:
first, the line let x = five(); shows that we’re using the return value of a
function to initialize a variable. Because the function five returns a 5,
that line is the same as the following:
let x = 5;Second, the five function has no parameters and defines the type of the
return value, but the body of the function is a lonely 5 with no semicolon
because it’s an expression whose value we want to return.
Let’s look at another example:
use debug::PrintTrait;

fn main() {
    let x = plus_one(5);

    x.print();
}

fn plus_one(x: u32) -> u32 {
    x + 1
}
Running this code will print [DEBUG] (raw: 6). But if we place a
semicolon at the end of the line containing x + 1, changing it from an
expression to a statement, we’ll get an error:
use debug::PrintTrait;

fn main() {
    let x = plus_one(5);

    x.print();
}

fn plus_one(x: u32) -> u32 {
    x + 1;
}
Compiling this code produces an error, as follows:
error: Unexpected return type. Expected: "core::integer::u32", found: "()".
The main error message, Unexpected return type, reveals the core issue with this
code. The definition of the function plus_one says that it will return an
u32, but statements don’t evaluate to a value, which is expressed by (),
the unit type. Therefore, nothing is returned, which contradicts the function
definition and results in an error.
Comments
In Cairo programs, you can include explanatory text within the code using comments. To create a comment, use the // syntax, after which any text on the same line will be ignored by the compiler.
fn main() -> felt252 {
    // start of the function
    1 + 4 // return the sum of 1 and 4
}
Control Flow
The ability to run some code depending on whether a condition is true and to run some code repeatedly while a condition is true are basic building blocks in most programming languages. The most common constructs that let you control the flow of execution of Cairo code are if expressions and loops.
if Expressions
An if expression allows you to branch your code depending on conditions. You provide a condition and then state, “If this condition is met, run this block of code. If the condition is not met, do not run this block of code.”
Filename: src/lib.cairo
use debug::PrintTrait;

fn main() {
    let number = 3;

    if number == 5 {
        'condition was true'.print();
    } else {
        'condition was false'.print();
    }
}
All if expressions start with the keyword if, followed by a condition. In this case, the condition checks whether or not the variable number has a value equal to 5. We place the block of code to execute if the condition is true immediately after the condition inside curly brackets.
Optionally, we can also include an else expression, which we chose to do here, to give the program an alternative block of code to execute should the condition evaluate to false. If you don’t provide an else expression and the condition is false, the program will just skip the if block and move on to the next bit of code.
Try running this code; you should see the following output:
$ cairo-run main.cairo
[DEBUG]	condition was false
Let’s try changing the value of number to a value that makes the condition true to see what happens:
let number = 5;$ cairo-run main.cairo
condition was true
It’s also worth noting that the condition in this code must be a bool. If the condition isn’t a bool, we’ll get an error.
$ cairo-run main.cairo
thread 'main' panicked at 'Failed to specialize: `enum_match<felt252>`. Error: Could not specialize libfunc `enum_match` with generic_args: [Type(ConcreteTypeId { id: 1, debug_name: None })]. Error: Provided generic argument is unsupported.', crates/cairo-lang-sierra-generator/src/utils.rs:256:9
Handling Multiple Conditions with else if
You can use multiple conditions by combining if and else in an else if expression. For example:
Filename: src/lib.cairo
use debug::PrintTrait;

fn main() {
    let number = 3;

    if number == 12 {
        'number is 12'.print();
    } else if number == 3 {
        'number is 3'.print();
    } else if number - 2 == 1 {
        'number minus 2 is 1'.print();
    } else {
        'number not found'.print();
    }
}
This program has four possible paths it can take. After running it, you should see the following output:
[DEBUG] number is 3
When this program executes, it checks each if expression in turn and executes the first body for which the condition evaluates to true. Note that even though number - 2 == 1 is true, we don’t see the output number minus 2 is 1'.print(), nor do we see the number not found text from the else block. That’s because Cairo only executes the block for the first true condition, and once it finds one, it doesn’t even check the rest. Using too many else if expressions can clutter your code, so if you have more than one, you might want to refactor your code. Chapter 6 describes a powerful Cairo branching construct called match for these cases.
Using if in a let statement
Because if is an expression, we can use it on the right side of a let statement to assign the outcome to a variable.
Filename: src/lib.cairo
use debug::PrintTrait;

fn main() {
    let condition = true;
    let number = if condition {
        5
    } else {
        6
    };

    if number == 5 {
        'condition was true'.print();
    }
}
$ cairo-run main.cairo
[DEBUG]	condition was true
The number variable will be bound to a value based on the outcome of the if expression. Which will be 5 here.
Repetition with Loops
It’s often useful to execute a block of code more than once. For this task, Cairo provides a simple loop syntax, which will run through the code inside the loop body to the end and then start immediately back at the beginning. To experiment with loops, let’s create a new project called loops.
Cairo only has one kind of loop for now: loop.
Repeating Code with loop
The loop keyword tells Cairo to execute a block of code over and over again
forever or until you explicitly tell it to stop.
As an example, change the src/lib.cairo file in your loops directory to look like this:
Filename: src/lib.cairo
use debug::PrintTrait;
fn main() {
    let mut i: usize = 0;
    loop {
        if i > 10 {
            break;
        }
        'again!'.print();
    }
}
When we run this program, we’ll see again! printed over and over continuously
until we stop the program manually, because the stop condition is never reached.
While the compiler prevents us from writing programs without a stop condition (break statement),
the stop condition might never be reached, resulting in an infinite loop.
Most terminals support the keyboard shortcut ctrl-c to interrupt a program that is
stuck in a continual loop. Give it a try:
$ scarb cairo-run --available-gas=20000000
[DEBUG]	again                          	(raw: 418346264942)

[DEBUG]	again                          	(raw: 418346264942)

[DEBUG]	again                          	(raw: 418346264942)

[DEBUG]	again                          	(raw: 418346264942)

Run panicked with err values: [375233589013918064796019]
Remaining gas: 1050
Note: Cairo prevents us from running program with infinite loops by including a gas meter. The gas meter is a mechanism that limits the amount of computation that can be done in a program. By setting a value to the
--available-gasflag, we can set the maximum amount of gas available to the program. Gas is a unit of measurement that expresses the computation cost of an instruction. When the gas meter runs out, the program will stop. In this case, the program panicked because it ran out of gas, as the stop condition was never reached. It is particularly important in the context of smart contracts deployed on Starknet, as it prevents from running infinite loops on the network. If you're writing a program that needs to run a loop, you will need to execute it with the--available-gasflag set to a value that is large enough to run the program.
To break out of a loop, you can place the break statement within the loop to tell the program when to stop
executing the loop. Let's fix the infinite loop by adding a making the stop condition i > 10 reachable.
use debug::PrintTrait;
fn main() {
    let mut i: usize = 0;
    loop {
        if i > 10 {
            break;
        }
        'again'.print();
        i += 1;
    }
}
The continue keyword tells the program to go to the next iteration of the loop and to skip the rest of the code in this iteration. Let's add a continue statement to our loop to skip the print statement when i is equal to 5.
use debug::PrintTrait;
fn main() {
    let mut i: usize = 0;
    loop {
        if i > 10 {
            break;
        }
        if i == 5 {
            i += 1;
            continue;
        }
        i.print();
        i += 1;
    }
}
Executing this program will not print the value of i when it is equal to 5.
Returning Values from Loops
One of the uses of a loop is to retry an operation you know might fail, such
as checking whether an operation has succeeded. You might also need to pass
the result of that operation out of the loop to the rest of your code. To do
this, you can add the value you want returned after the break expression you
use to stop the loop; that value will be returned out of the loop so you can
use it, as shown here:
use debug::PrintTrait;
fn main() {
    let mut counter = 0;

    let result = loop {
        if counter == 10 {
            break counter * 2;
        }
        counter += 1;
    };

    'The result is '.print();
    result.print();
}
Before the loop, we declare a variable named counter and initialize it to
0. Then we declare a variable named result to hold the value returned from
the loop. On every iteration of the loop, we check whether the counter is equal to 10, and then add 1 to the counter variable.
When the condition is met, we use the break keyword with the value counter * 2. After the loop, we use a
semicolon to end the statement that assigns the value to result. Finally, we
print the value in result, which in this case is 20.
Summary
You made it! This was a sizable chapter: you learned about variables, data types, functions, comments,
if expressions and loops! To practice with the concepts discussed in this chapter,
try building programs to do the following:
- Generate the n-th Fibonacci number.
- Compute the factorial of a number n.
Now, we’ll review the common collection types in Cairo in the next chapter.
Common Collections
Cairo provides a set of common collection types that can be used to store and manipulate data. These collections are designed to be efficient, flexible, and easy to use. This section introduces the primary collection types available in Cairo: Arrays and Dictionaries.
Arrays
An array is a collection of elements of the same type. You can create and use array methods by importing the array::ArrayTrait trait.
An important thing to note is that arrays have limited modification options. Arrays are, in fact, queues whose values can't be modified.
This has to do with the fact that once a memory slot is written to, it cannot be overwritten, but only read from it. You can only append items to the end of an array and remove items from the front using pop_front.
Creating an Array
Creating an Array is done with the ArrayTrait::new() call. Here is an example of the creation of an array to which we append 3 elements:
fn main() {
    let mut a = ArrayTrait::new();
    a.append(0);
    a.append(1);
    a.append(2);
}
When required, you can pass the expected type of items inside the array when instantiating the array like this, or explicitly define the type of the variable.
let mut arr = ArrayTrait::<u128>::new();let mut arr:Array<u128> = ArrayTrait::new();Updating an Array
Adding Elements
To add an element to the end of an array, you can use the append() method:
fn main() {
    let mut a = ArrayTrait::new();
    a.append(0);
    a.append(1);
    a.append(2);
}
Removing Elements
You can only remove elements from the front of an array by using the pop_front() method.
This method returns an Option containing the removed element, or Option::None if the array is empty.
use debug::PrintTrait;

fn main() {
    let mut a = ArrayTrait::new();
    a.append(10);
    a.append(1);
    a.append(2);

    let first_value = a.pop_front().unwrap();
    first_value.print(); // print '10'
}
The above code will print 10 as we remove the first element that was added.
In Cairo, memory is immutable, which means that it is not possible to modify the elements of an array once they've been added. You can only add elements to the end of an array and remove elements from the front of an array. These operations do not require memory mutation, as they involve updating pointers rather than directly modifying the memory cells.
Reading Elements from an Array
To access array elements, you can use get() or at() array methods that return different types. Using arr.at(index) is equivalent to using the subscripting operator arr[index].
The get function returns an Option<Box<@T>>, which means it returns an option to a Box type (Cairo's smart-pointer type) containing a snapshot to the element at the specified index if that element exists in the array. If the element doesn't exist, get returns None. This method is useful when you expect to access indices that may not be within the array's bounds and want to handle such cases gracefully without panics. Snapshots will be explained in more detail in the References and Snapshots chapter.
The at function, on the other hand, directly returns a snapshot to the element at the specified index using the unbox() operator to extract the value stored in a box. If the index is out of bounds, a panic error occurs. You should only use at when you want the program to panic if the provided index is out of the array's bounds, which can prevent unexpected behavior.
In summary, use at when you want to panic on out-of-bounds access attempts, and use get when you prefer to handle such cases gracefully without panicking.
fn main() {
    let mut a = ArrayTrait::new();
    a.append(0);
    a.append(1);

    let first = *a.at(0);
    let second = *a.at(1);
}
In this example, the variable named first will get the value 0 because that
is the value at index 0 in the array. The variable named second will get
the value 1 from index 1 in the array.
Here is an example with the get() method:
fn main() -> u128 {
    let mut arr = ArrayTrait::<u128>::new();
    arr.append(100);
    let index_to_access =
        1; // Change this value to see different results, what would happen if the index doesn't exist?
    match arr.get(index_to_access) {
        Option::Some(x) => {
            *x
                .unbox() // Don't worry about * for now, if you are curious see Chapter 4.2 #desnap operator
        // It basically means "transform what get(idx) returned into a real value"
        },
        Option::None => {
            let mut data = ArrayTrait::new();
            data.append('out of bounds');
            panic(data)
        }
    }
}
Size related methods
To determine the number of elements in an array, use the len() method. The return is of type usize.
If you want to check if an array is empty or not, you can use the is_empty() method, which returns true if the array is empty and false otherwise.
Storing multiple types with Enums
If you want to store elements of different types in an array, you can use an Enum to define a custom data type that can hold multiple types. Enums will be explained in more detail in the Enums and Pattern Matching chapter.
#[derive(Copy, Drop)]
enum Data {
    Integer: u128,
    Felt: felt252,
    Tuple: (u32, u32),
}

fn main() {
    let mut messages: Array<Data> = ArrayTrait::new();
    messages.append(Data::Integer(100));
    messages.append(Data::Felt('hello world'));
    messages.append(Data::Tuple((10, 30)));
}
Span
Span is a struct that represents a snapshot of an Array. It is designed to provide safe and controlled access to the elements of an array without modifying the original array. Span is particularly useful for ensuring data integrity and avoiding borrowing issues when passing arrays between functions or when performing read-only operations (cf. References and Snapshots)
All methods provided by Array can also be used with Span, with the exception of the append() method.
Turning an Array into span
To create a Span of an Array, call the span() method:
fn main() {
    let mut array: Array<u8> = ArrayTrait::new();
    array.span();
}
Dictionaries
Cairo provides in its core library a dictionary-like type. The Felt252Dict<T> data type represents a collection of key-value pairs where each key is unique and associated with a corresponding value. This type of data structure is known differently across different programming languages such as maps, hash tables, associative arrays and many others.
The Felt252Dict<T> type is useful when you want to organize your data in a certain way for which using an Array<T> and indexing doesn't suffice. Cairo dictionaries also allow the programmer to easily simulate the existence of mutable memory when there is none.
Basic Use of Dictionaries
It is normal in other languages when creating a new dictionary to define the data types of both key and value. In Cairo, the key type is restricted to felt252 leaving only the possibility to specify the value data type, represented by T in Felt252Dict<T>.
The core functionality of a Felt252Dict<T> is implemented in the trait Felt252DictTrait which includes all basic operations. Among them we can find:
insert(felt252, T) -> ()to write values to a dictionary instance andget(felt252) -> Tto read values from it.
These functions allow us to manipulate dictionaries like in any other language. In the following example, we create a dictionary to represent a mapping between individuals and their balance:
fn main() {
    let mut balances: Felt252Dict<u64> = Default::default();

    balances.insert('Alex', 100);
    balances.insert('Maria', 200);

    let alex_balance = balances.get('Alex');
    assert(alex_balance == 100, 'Balance is not 100');

    let maria_balance = balances.get('Maria');
    assert(maria_balance == 200, 'Balance is not 200');
}
The first thing we do is import Felt252DictTrait which brings to scope all the methods we need to interact with the dictionary. Next, we create a new instance of Felt252Dict<u64> by using the default method of the Default trait and added two individuals, each one with their own balance, using the insert method. Finally, we checked the balance of our users with the get method.
Throughout the book we have talked about how Cairo's memory is immutable, meaning you can only write to a memory cell once but the Felt252Dict<T> type represents a way to overcome this obstacle. We will explain how this is implemented later on in Dictionaries Underneath.
Building upon our previous example, let us show a code example where the balance of the same user changes:
fn main() {
    let mut balances: Felt252Dict<u64> = Default::default();

    // Insert Alex with 100 balance
    balances.insert('Alex', 100);
    // Check that Alex has indeed 100 associated with him
    let alex_balance = balances.get('Alex');
    assert(alex_balance == 100, 'Alex balance is not 100');

    // Insert Alex again, this time with 200 balance
    balances.insert('Alex', 200);
    // Check the new balance is correct
    let alex_balance_2 = balances.get('Alex');
    assert(alex_balance_2 == 200, 'Alex balance is not 200');
}
Notice how in this example we added the Alex individual twice, each time using a different balance and each time that we checked for its balance it had the last value inserted! Felt252Dict<T> effectively allows us to "rewrite" the stored value for any given key.
Before heading on and explaining how dictionaries are implemented it is worth mentioning that once you instantiate a Felt252Dict<T>, behind the scenes all keys have their associated values initialized as zero. This means that if for example, you tried to get the balance of an inexistent user you will get 0 instead of an error or an undefined value. This also means there is no way to delete data from a dictionary. Something to take into account when incorporating this structure into your code.
Until this point, we have seen all the basic features of Felt252Dict<T> and how it mimics the same behavior as the corresponding data structures in any other language, that is, externally of course. Cairo is at its core a non-deterministic Turing-complete programming language, very different from any other popular language in existence, which as a consequence means that dictionaries are implemented very differently as well!
In the following sections, we are going to give some insights about Felt252Dict<T> inner mechanisms and the compromises that were taken to make them work. After that, we are going to take a look at how to use dictionaries with other data structures as well as use the entry method as another way to interact with them.
Dictionaries Underneath
One of the constraints of Cairo's non-deterministic design is that its memory system is immutable, so in order to simulate mutability, the language implements Felt252Dict<T> as a list of entries. Each of the entries represents a time when a dictionary was accessed for reading/updating/writing purposes. An entry has three fields:
- A
keyfield that identifies the value for this key-value pair of the dictionary. - A
previous_valuefield that indicates which previous value was held atkey. - A
new_valuefield that indicates the new value that is held atkey.
If we try implementing Felt252Dict<T> using high-level structures we would internally define it as Array<Entry<T>> where each Entry<T> has information about what key-value pair it represents and the previous and new values it holds. The definition of Entry<T> would be:
struct Entry<T> {
    key: felt252,
    previous_value: T,
    new_value: T,
}
For each time we interact with a Felt252Dict<T> a new Entry<T> will be registered:
- A
getwould register an entry where there is no change in state, and previous and new values are stored with the same value. - An
insertwould register a newEntry<T>where thenew_valuewould be the element being inserted, and theprevious_valuethe last element inserted before this. In case it is the first entry for a certain key, then the previous value will be zero.
The use of this entry list shows how there isn't any rewriting, just the creation of new memory cells per Felt252Dict<T> interaction. Let's show an example of this using the balances dictionary from the previous section and inserting the users 'Alex' and 'Maria':
struct Entry<T> {
    key: felt252,
    previous_value: T,
    new_value: T,
}

fn main() {
    let mut balances: Felt252Dict<u64> = Default::default();
    balances.insert('Alex', 100_u64);
    balances.insert('Maria', 50_u64);
    balances.insert('Alex', 200_u64);
    balances.get('Maria');
}
These instructions would then produce the following list of entries:
| key | previous | new |
|---|---|---|
| Alex | 0 | 100 |
| Maria | 0 | 50 |
| Alex | 100 | 200 |
| Maria | 50 | 50 |
Notice that since 'Alex' was inserted twice, it appears twice and the previous and current values are set properly. Also reading from 'Maria' registered an entry with no change from previous to current values.
This approach to implementing Felt252Dict<T> means that for each read/write operation, there is a scan for the whole entry list in search of the last entry with the same key. Once the entry has been found, its new_value is extracted and used on the new entry to be added as the previous_value. This means that interacting with Felt252Dict<T> has a worst-case time complexity of O(n) where n is the number of entries in the list.
If you pour some thought into alternate ways of implementing Felt252Dict<T> you'd surely find them, probably even ditching completely the need for a previous_value field, nonetheless, since Cairo is not your normal language this won't work.
One of the purposes of Cairo is, with the STARK proof system, to generate proofs of computational integrity. This means that you need to verify that program execution is correct and inside the boundaries of Cairo restrictions. One of those boundary checks consists of "dictionary squashing" and that requires information on both previous and new values for every entry.
Squashing Dictionaries
To verify that the proof generated by a Cairo program execution that used a Felt252Dict<T> is correct we need to check that there wasn't any illegal tampering with the dictionary. This is done through a method called squash_dict that reviews each entry of the entry list and checks that access to the dictionary remains coherent throughout the execution.
The process of squashing is as follows: given all entries with certain key k, taken in the same order as they were inserted, verify that the ith entry new_value is equal to the ith + 1 entry previous_value.
For example, given the following entry list:
| key | previous | new |
|---|---|---|
| Alex | 0 | 150 |
| Maria | 0 | 100 |
| Charles | 0 | 70 |
| Maria | 100 | 250 |
| Alex | 150 | 40 |
| Alex | 40 | 300 |
| Maria | 250 | 190 |
| Alex | 300 | 90 |
After squashing, the entry list would be reduced to:
| key | previous | new |
|---|---|---|
| Alex | 0 | 90 |
| Maria | 0 | 190 |
| Charles | 0 | 70 |
In case of a change on any of the values of the first table, squashing would have failed during runtime.
Dictionary Destruction
If you run the examples from Basic Use of Dictionaries you'd notice that there was never a call to squash dictionary, but the program compiled successfully nonetheless. What happened behind the scene was that squash was called automatically via the Felt252Dict<T> implementation of the Destruct<T> trait. This call occurred just before the balance dictionary went out of scope.
The Destruct<T> trait represents another way of removing instances out of scope apart from Drop<T>. The main difference between these two is that Drop<T> is treated as a no-op operation, meaning it does not generate new CASM while Destruct<T> does not have this restriction. The only type which actively uses the Destruct<T> trait is Felt252Dict<T>, for every other type Destruct<T> and Drop<T> are synonyms. You can read more about these traits in Drop and Destruct.
Later in Dictionaries as Struct Members, we will have a hands-on example where we implement the Destruct<T> trait for a custom type.
More Dictionaries
Up to this point, we have given a comprehensive overview of the functionality of Felt252Dict<T> as well as how and why it is implemented in a certain way. If you haven't understood all of it, don't worry because in this section we will have some more examples using dictionaries.
We will start by explaining the entry method which is part of a dictionary basic functionality included in Felt252DictTrait<T> which we didn't mention at the beginning. Soon after, we will see examples of how Felt252Dict<T> interacts with other complex types such as Array<T> and how to implement a struct with a dictionary as a member.
Entry and Finalize
In the Dictionaries Underneath section, we explained how Felt252Dict<T> internally worked. It was a list of entries for each time the dictionary was accessed in any manner. It would first find the last entry given a certain key and then update it accordingly to whatever operation it was executing. The Cairo language gives us the tools to replicate this ourselves through the entry and finalize methods.
The entry method comes as part of Felt252DictTrait<T> with the purpose of creating a new entry given a certain key. Once called, this method takes ownership of the dictionary and returns the entry to update. The method signature is as follows:
fn entry(self: Felt252Dict<T>, key: felt252) -> (Felt252DictEntry<T>, T) nopanicThe first input parameter takes ownership of the dictionary while the second one is used to create the appropriate entry. It returns a tuple containing a Felt252DictEntry<T>, which is the type used by Cairo to represent dictionary entries, and a T representing the value held previously.
The next thing to do is to update the entry with the new value. For this, we use the finalize method which inserts the entry and returns ownership of the dictionary:
fn finalize(self: Felt252DictEntry<T>, new_value: T) -> Felt252Dict<T> {This method receives the entry and the new value as a parameter and returns the updated dictionary.
Let us see an example using entry and finalize. Imagine we would like to implement our own version of the get method from a dictionary. We should then do the following:
- Create the new entry to add using the
entrymethod - Insert back the entry where the
new_valueequals theprevious_value. - Return the value.
Implementing our custom get would look like this:
use dict::Felt252DictEntryTrait;

fn custom_get<T, +Felt252DictValue<T>, +Drop<T>, +Copy<T>>(
    ref dict: Felt252Dict<T>, key: felt252
) -> T {
    // Get the new entry and the previous value held at `key`
    let (entry, prev_value) = dict.entry(key);

    // Store the value to return
    let return_value = prev_value;

    // Update the entry with `prev_value` and get back ownership of the dictionary
    dict = entry.finalize(prev_value);

    // Return the read value
    return_value
}
Implementing the insert method would follow a similar workflow, except for inserting a new value when finalizing. If we were to implement it, it would look like the following:
use dict::Felt252DictEntryTrait;

fn custom_insert<T, +Felt252DictValue<T>, +Destruct<T>, +PrintTrait<T>, +Drop<T>>(
    ref dict: Felt252Dict<T>, key: felt252, value: T
) {
    // Get the last entry associated with `key`
    // Notice that if `key` does not exists, _prev_value will
    // be the default value of T.
    let (entry, _prev_value) = dict.entry(key);

    // Insert `entry` back in the dictionary with the updated value,
    // and receive ownership of the dictionary
    dict = entry.finalize(value);
}
As a finalizing note, these two methods are implemented in a similar way to how insert and get are implemented for Felt252Dict<T>. This code shows some example usage:
use dict::Felt252DictEntryTrait;

use debug::PrintTrait;

fn custom_get<T, +Felt252DictValue<T>, +Drop<T>, +Copy<T>>(
    ref dict: Felt252Dict<T>, key: felt252
) -> T {
    // Get the new entry and the previous value held at `key`
    let (entry, prev_value) = dict.entry(key);

    // Store the value to return
    let return_value = prev_value;

    // Update the entry with `prev_value` and get back ownership of the dictionary
    dict = entry.finalize(prev_value);

    // Return the read value
    return_value
}

fn custom_insert<T, +Felt252DictValue<T>, +Destruct<T>, +PrintTrait<T>, +Drop<T>>(
    ref dict: Felt252Dict<T>, key: felt252, value: T
) {
    // Get the last entry associated with `key`
    // Notice that if `key` does not exists, _prev_value will
    // be the default value of T.
    let (entry, _prev_value) = dict.entry(key);

    // Insert `entry` back in the dictionary with the updated value,
    // and receive ownership of the dictionary
    dict = entry.finalize(value);
}

fn main() {
    let mut dict: Felt252Dict<u64> = Default::default();

    custom_insert(ref dict, '0', 100);

    let val = custom_get(ref dict, '0');

    assert(val == 100, 'Expecting 100');
}
Dictionaries of types not supported natively
One restriction of Felt252Dict<T> that we haven't talked about is the trait Felt252DictValue<T>.
This trait defines the zero_default method which is the one that gets called when a value does not exist in the dictionary.
This is implemented by some common data types, such as most unsigned integers, bool and felt252 - but it is not implemented for more complex ones types such as arrays, structs (including u256), and other types from the core library.
This means that making a dictionary of types not natively supported is not a straightforward task, because you would need to write a couple of trait implementations in order to make the data type a valid dictionary value type.
To compensate this, you can wrap your type inside a Nullable<T>.
Nullable<T> is a smart pointer type that can either point to a value or be null in the absence of value. It is usually used in Object Oriented Programming Languages when a reference doesn't point anywhere. The difference with Option is that the wrapped value is stored inside a Box<T> data type. The Box<T> type, inspired by Rust, allows us to allocate a new memory segment for our type, and access this segment using a pointer that can only be manipulated in one place at a time.
Let's show using an example. We will try to store a Span<felt252> inside a dictionary. For that, we will use Nullable<T> and Box<T>. Also, we are storing a Span<T> and not an Array<T> because the latter does not implement the Copy<T> trait which is required for reading from a dictionary.
use dict::Felt252DictTrait;
use nullable::{nullable_from_box, match_nullable, FromNullableResult};

fn main() {
    // Create the dictionary
    let mut d: Felt252Dict<Nullable<Span<felt252>>> = Default::default();

    // Crate the array to insert
    let mut a = ArrayTrait::new();
    a.append(8);
    a.append(9);
    a.append(10);

    // Insert it as a `Span`
    d.insert(0, nullable_from_box(BoxTrait::new(a.span())));

//...
In this code snippet, the first thing we did was to create a new dictionary d. We want it to hold a Nullable<Span>. After that, we created an array and filled it with values.
The last step is inserting the array as a span inside the dictionary. Notice that we didn't do that directly, but instead, we took some steps in between:
- We wrapped the array inside a
Boxusing thenewmethod fromBoxTrait. - We wrapped the
Boxinside a nullable using thenullable_from_boxfunction. - Finally, we inserted the result.
Once the element is inside the dictionary, and we want to get it, we follow the same steps but in reverse order. The following code shows how to achieve that:
//...

    // Get value back
    let val = d.get(0);

    // Search the value and assert it is not null
    let span = match match_nullable(val) {
        FromNullableResult::Null(()) => panic_with_felt252('No value found'),
        FromNullableResult::NotNull(val) => val.unbox(),
    };

    // Verify we are having the right values
    assert(*span.at(0) == 8, 'Expecting 8');
    assert(*span.at(1) == 9, 'Expecting 9');
    assert(*span.at(2) == 10, 'Expecting 10');
}
Here we:
- Read the value using
get. - Verified it is non-null using the
match_nullablefunction. - Unwrapped the value inside the box and asserted it was correct.
The complete script would look like this:
use dict::Felt252DictTrait;
use nullable::{nullable_from_box, match_nullable, FromNullableResult};

fn main() {
    // Create the dictionary
    let mut d: Felt252Dict<Nullable<Span<felt252>>> = Default::default();

    // Crate the array to insert
    let mut a = ArrayTrait::new();
    a.append(8);
    a.append(9);
    a.append(10);

    // Insert it as a `Span`
    d.insert(0, nullable_from_box(BoxTrait::new(a.span())));

    // Get value back
    let val = d.get(0);

    // Search the value and assert it is not null
    let span = match match_nullable(val) {
        FromNullableResult::Null(()) => panic_with_felt252('No value found'),
        FromNullableResult::NotNull(val) => val.unbox(),
    };

    // Verify we are having the right values
    assert(*span.at(0) == 8, 'Expecting 8');
    assert(*span.at(1) == 9, 'Expecting 9');
    assert(*span.at(2) == 10, 'Expecting 10');
}
Dictionaries as Struct Members
Defining dictionaries as struct members is possible in Cairo but correctly interacting with them may not be entirely seamless. Let's try implementing a custom user database that will allow us to add users and query them. We will need to define a struct to represent the new type and a trait to define its functionality:
struct UserDatabase<T> {
    users_amount: u64,
    balances: Felt252Dict<T>,
}

trait UserDatabaseTrait<T> {
    fn new() -> UserDatabase<T>;
    fn add_user<+Drop<T>>(ref self: UserDatabase<T>, name: felt252, balance: T);
    fn get_balance<+Copy<T>>(ref self: UserDatabase<T>, name: felt252) -> T;
}
Our new type UserDatabase<T> represents a database of users. It is generic over the balances of the users, giving major flexibility to whoever uses our data type. Its two members are:
users_amount, the number of users currently inserted andbalances, a mapping of each user to its balance.
The database core functionality is defined by UserDatabaseTrait. The following methods are defined:
newfor easily creating newUserDatabasetypes.add_userto insert users in the database.get_balanceto find user's balance in the database.
The only remaining step is to implement each of the methods in UserDatabaseTrait, but since we are working with generic types we also need to correctly establish the requirements of T so it can be a valid Felt252Dict<T> value type:
Tshould implement theCopy<T>since it's required for getting values from aFelt252Dict<T>.- All value types of a dictionary implement the
Felt252DictValue<T>, our generic type should do as well. - To insert values,
Felt252DictTrait<T>requires all value types to be destructible.
The implementation, with all restriction in place, would be as follow:
impl UserDatabaseImpl<T, +Felt252DictValue<T>> of UserDatabaseTrait<T> {
    // Creates a database
    fn new() -> UserDatabase<T> {
        UserDatabase { users_amount: 0, balances: Default::default() }
    }

    // Get the user's balance
    fn get_balance<+Copy<T>>(ref self: UserDatabase<T>, name: felt252) -> T {
        self.balances.get(name)
    }

    // Add a user
    fn add_user<+Drop<T>>(ref self: UserDatabase<T>, name: felt252, balance: T) {
        self.balances.insert(name, balance);
        self.users_amount += 1;
    }
}
Our database implementation is almost complete, except for one thing: the compiler doesn't know how to make a UserDatabase<T> go out of scope, since it doesn't implement the Drop<T> trait, nor the Destruct<T> trait.
Since it has a Felt252Dict<T> as a member, it cannot be dropped, so we are forced to implement the Destruct<T> trait manually (refer to the Ownership chapter for more information).
Using #[derive(Destruct)] on top of the UserDatabase<T> definition won't work because of the use of genericity in the struct definition. We need to code the Destruct<T> trait implementation by ourselves:
impl UserDatabaseDestruct<T, +Drop<T>, +Felt252DictValue<T>> of Destruct<UserDatabase<T>> {
    fn destruct(self: UserDatabase<T>) nopanic {
        self.balances.squash();
    }
}
Implementing Destruct<T> for UserDatabase was our last step to get a fully functional database. We can now try it out:
struct UserDatabase<T> {
    users_amount: u64,
    balances: Felt252Dict<T>,
}

trait UserDatabaseTrait<T> {
    fn new() -> UserDatabase<T>;
    fn add_user<+Drop<T>>(ref self: UserDatabase<T>, name: felt252, balance: T);
    fn get_balance<+Copy<T>>(ref self: UserDatabase<T>, name: felt252) -> T;
}

impl UserDatabaseImpl<T, +Felt252DictValue<T>> of UserDatabaseTrait<T> {
    // Creates a database
    fn new() -> UserDatabase<T> {
        UserDatabase { users_amount: 0, balances: Default::default() }
    }

    // Get the user's balance
    fn get_balance<+Copy<T>>(ref self: UserDatabase<T>, name: felt252) -> T {
        self.balances.get(name)
    }

    // Add a user
    fn add_user<+Drop<T>>(ref self: UserDatabase<T>, name: felt252, balance: T) {
        self.balances.insert(name, balance);
        self.users_amount += 1;
    }
}

impl UserDatabaseDestruct<T, +Drop<T>, +Felt252DictValue<T>> of Destruct<UserDatabase<T>> {
    fn destruct(self: UserDatabase<T>) nopanic {
        self.balances.squash();
    }
}

fn main() {
    let mut db = UserDatabaseTrait::new();

    db.add_user('Alex', 100);
    db.add_user('Maria', 80);

    db.add_user('Alex', 40);
    db.add_user('Maria', 0);

    let alex_latest_balance = db.get_balance('Alex');
    let maria_latest_balance = db.get_balance('Maria');

    assert(alex_latest_balance == 40, 'Expected 40');
    assert(maria_latest_balance == 0, 'Expected 0');
}
Summary
Well done! You finished this chapter on arrays and dictionaries in Cairo. These data structures may be a bit challenging to grasp, but they are really useful.
When you’re ready to move on, we’ll talk about a concept that Cairo shares with Rust and that doesn’t commonly exist in other programming languages: ownership.
Custom Data Structures
When you first start programming in Cairo, you'll likely want to use arrays
(Array<T>) to store collections of data. However, you will quickly realize
that arrays have one big limitation - the data stored in them is immutable. Once
you append a value to an array, you can't modify it.
This can be frustrating when you want to use a mutable data structure. For example, say you're making a game where the players have a level, and they can level up. You might try to store the level of the players in an array:
let mut level_players = Array::new();
level_players.append(5);
level_players.append(1);
level_players.append(10);
But then you realize you can't increase the level at a specific index once it's set. If a player dies, you cannot remove it from the array unless he happens to be in the first position.
Fortunately, Cairo provides a handy built-in dictionary
type called Felt252Dict<T> that allows us to
simulate the behavior of mutable data structures. Let's first explore how to use
it to create a dynamic array implementation.
Note: Several concepts used in this chapter are presented in later parts of the book. We recommend you to check out the following chapter first: Structs, Methods, Generic types, Traits
Simulating a dynamic array with dicts
First, let's think about how we want our mutable dynamic array to behave. What operations should it support?
It should:
- Allow us to append items at the end
- Let us access any item by index
- Allow setting the value of an item at a specific index
- Return the current length
We can define this interface in Cairo like:
#![allow(unused)]
fn main() {
trait VecTrait<V, T> {
    fn new() -> V;
    fn get(ref self: V, index: usize) -> Option<T>;
    fn at(ref self: V, index: usize) -> T;
    fn push(ref self: V, value: T) -> ();
    fn set(ref self: V, index: usize, value: T);
    fn len(self: @V) -> usize;
}
}
This provides a blueprint for the implementation of our dynamic array. We named
it Vec as it is similar to the Vec<T> data structure in Rust.
Implementing a dynamic array in Cairo
To store our data, we'll use a Felt252Dict<T> which maps index numbers (felts)
to values. We'll also store a separate len field to track the length.
Here is what our struct looks like. We wrap the type T inside Nullable
pointer to allow using any type T in our data structure, as explained in the
Dictionaries
section:
#![allow(unused)]
fn main() {
struct NullableVec<T> {
    data: Felt252Dict<Nullable<T>>,
    len: usize
}
}
The key thing that makes this vector mutable is that we can insert values into the dictionary to set or update values in our data structure. For example, to update a value at a specific index, we do:
    fn set(ref self: NullableVec<T>, index: usize, value: T) {
        assert(index < self.len(), 'Index out of bounds');
        self.data.insert(index.into(), nullable_from_box(BoxTrait::new(value)));
    }
This overwrites the previously existing value at that index in the dictionary.
While arrays are immutable, dictionaries provide the flexibility we need for modifiable data structures like vectors.
The implementation of the rest of the interface is straightforward. The implementation of all the methods defined in our interface can be done as follow :
#![allow(unused)]
fn main() {
impl NullableVecImpl<T, +Drop<T>, +Copy<T>> of VecTrait<NullableVec<T>, T> {
    fn new() -> NullableVec<T> {
        NullableVec { data: Default::default(), len: 0 }
    }

    fn get(ref self: NullableVec<T>, index: usize) -> Option<T> {
        if index < self.len() {
            Option::Some(self.data.get(index.into()).deref())
        } else {
            Option::None
        }
    }

    fn at(ref self: NullableVec<T>, index: usize) -> T {
        assert(index < self.len(), 'Index out of bounds');
        self.data.get(index.into()).deref()
    }

    fn push(ref self: NullableVec<T>, value: T) -> () {
        self.data.insert(self.len.into(), nullable_from_box(BoxTrait::new(value)));
        self.len = integer::u32_wrapping_add(self.len, 1_usize);
    }
    fn set(ref self: NullableVec<T>, index: usize, value: T) {
        assert(index < self.len(), 'Index out of bounds');
        self.data.insert(index.into(), nullable_from_box(BoxTrait::new(value)));
    }
    fn len(self: @NullableVec<T>) -> usize {
        *self.len
    }
}
}
The full implementation of the Vec structure can be found in the
community-maintained library
Alexandria.
Simulating a Stack with dicts
We will now look at a second example and its implementation details: a Stack.
A Stack is a LIFO (Last-In, First-Out) collection. The insertion of a new element and removal of an existing element takes place at the same end, represented as the top of the stack.
Let us define what operations we need to create a stack :
- Push an item to the top of the stack
- Pop an item from the top of the stack
- Check whether there are still any elements in the stack.
From these specifications we can define the following interface :
#![allow(unused)]
fn main() {
trait StackTrait<S, T> {
    fn push(ref self: S, value: T);
    fn pop(ref self: S) -> Option<T>;
    fn is_empty(self: @S) -> bool;
}
}
Implementing a Mutable Stack in Cairo
To create a stack data structure in Cairo, we can again use a Felt252Dict<T>
to store the values of the stack along with a usize field to keep track of the
length of the stack to iterate over it.
The Stack struct is defined as:
#![allow(unused)]
fn main() {
struct NullableStack<T> {
    data: Felt252Dict<Nullable<T>>,
    len: usize,
}
}
Next, let's see how our main functions push and pop are implemented.
#![allow(unused)]
fn main() {
impl NullableStackImpl<T, +Drop<T>, +Copy<T>> of StackTrait<NullableStack<T>, T> {
    fn push(ref self: NullableStack<T>, value: T) {
        self.data.insert(self.len.into(), nullable_from_box(BoxTrait::new(value)));
        self.len += 1;
    }

    fn pop(ref self: NullableStack<T>) -> Option<T> {
        if self.is_empty() {
            return Option::None;
        }
        self.len -= 1;
        Option::Some(self.data.get(self.len.into()).deref())
    }

    fn is_empty(self: @NullableStack<T>) -> bool {
        *self.len == 0
    }
}
}
The code uses the insert and get methods to access the values in the
Felt252Dict<T>. To push an element at the top of the stack, the push
function inserts the element in the dict at index len - and increases the
len field of the stack to keep track of the position of the stack top. To
remove a value, the pop function retrieves the last value at position len-1
and then decreases the value of len to update the position of the stack top
accordingly.
The full implementation of the Stack, along with more data structures that you can use in your code, can be found in the community-maintained Alexandria library, in the "data_structures" crate.
Summary
While Cairo's memory model is immutable and can make it difficult to implement
mutable data structures, we can fortunately use the Felt252Dict<T> type to
simulate mutable data structures. This allows us to implement a wide range of
data structures that are useful for many applications, effectively hiding the
complexity of the underlying memory model.
Understanding Cairo's Ownership system
Cairo is a language built around a linear type system that allows us to statically ensure that in every Cairo program, a value is used exactly once. This linear type system helps preventing runtime errors by ensuring that operations that could cause such errors, such as writing twice to a memory cell, are detected at compile time. This is achieved by implementing an ownership system and forbidding copying and dropping values by default. In this chapter, we’ll talk about Cairo's ownership system as well as references and snapshots.
Ownership Using a Linear Type System
Cairo uses a linear type system. In such a type system, any value (a basic type, a struct, an enum) must be used and must only be used once. 'Used' here means that the value is either destroyed or moved.
Destruction can happen in several ways:
- a variable goes out of scope
- a struct is destructured
- explicit destruction using destruct()
Moving a value simply means passing that value to another function.
This results in somewhat similar constraints to the Rust ownership model, but there are some differences. In particular, the rust ownership model exists (in part) to avoid data races and concurrent mutable access to a memory value. This is obviously impossible in Cairo since the memory is immutable. Instead, Cairo leverages its linear type system for two main purposes:
- Ensuring that all code is provable and thus verifiable.
- Abstracting away the immutable memory of the Cairo VM.
Ownership
In Cairo, ownership applies to variables and not to values. A value can safely be referred to by many different variables (even if they are mutable variables), as the value itself is always immutable. Variables however can be mutable, so the compiler must ensure that constant variables aren't accidentally modified by the programmer. This makes it possible to talk about ownership of a variable: the owner is the code that can read (and write if mutable) the variable.
This means that variables (not values) follow similar rules to Rust values:
- Each variable in Cairo has an owner.
- There can only be one owner at a time.
- When the owner goes out of scope, the variable is destroyed.
Now that we’re past basic Cairo syntax, we won’t include all the fn main() {
examples inside a main function manually. As a result, our examples will be a
code in examples, so if you’re following along, make sure to put the following
bit more concise, letting us focus on the actual details rather than
boilerplate code.
Variable Scope
As a first example of the linear type system, we’ll look at the scope of some variables. A scope is the range within a program for which an item is valid. Take the following variable:
let s = 'hello';The variable s refers to a short string. The variable is valid from the point at
which it’s declared until the end of the current scope. Listing 4-1 shows a
program with comments annotating where the variable s would be valid.
//TAG: ignore_fmt
fn main() {
    {                      // s is not valid here, it’s not yet declared
        let s = 'hello';   // s is valid from this point forward

        // do stuff with s
    }                      // this scope is now over, and s is no longer valid
}
Listing 4-1: A variable and the scope in which it is valid
In other words, there are two important points in time here:
- When
scomes into scope, it is valid. - It remains valid until it goes out of scope.
At this point, the relationship between scopes and when variables are valid is similar to that in other programming languages. Now we’ll build on top of this understanding by using the Array type we introduced in the previous chapter.
Moving values - example with Array
As said earlier, moving a value simply means passing that value to another function. When that happens, the variable referring to that value in the original scope is destroyed and can no longer be used, and a new variable is created to hold the same value.
Arrays are an example of a complex type that is moved when passing it to another function. Here is a short reminder of what an array looks like:
fn main() {
    let mut arr = ArrayTrait::<u128>::new();
    arr.append(1);
    arr.append(2);
}
How does the type system ensure that the Cairo program never tries to write to the same memory cell twice? Consider the following code, where we try to remove the front of the array twice:
fn foo(mut arr: Array<u128>) {
    arr.pop_front();
}

fn main() {
    let mut arr = ArrayTrait::<u128>::new();
    foo(arr);
    foo(arr);
}
In this case, we try to pass the same value (the array in the arr variable) to both function calls. This means our code tries to remove the first element twice, which would try to write to the same memory cell twice - which is forbidden by the Cairo VM, leading to a runtime error.
Thankfully, this code does not actually compile. Once we have passed the array to the foo function, the variable arr is no longer usable. We get this compile-time error, telling us that we would need Array to implement the Copy Trait:
error: Variable was previously moved. Trait has no implementation in context: core::traits::Copy::<core::array::Array::<core::integer::u128>>
 --> array.cairo:6:9
    let mut arr = ArrayTrait::<u128>::new();
        ^*****^
The Copy trait
If a type implements the Copy trait, passing a value of that type to a function does not move the value. Instead, a new variable is created, referring to the same value.
The important thing to note here is that this is a completely free operation, because variables are a cairo abstraction only and because values in Cairo are always immutable. This, in particular, conceptually differs from the rust version of the Copy trait, where the value is potentially copied in memory.
You can implement the Copy trait on your type by adding the #[derive(Copy)] annotation to your type definition. However, Cairo won't allow a type to be annotated with Copy if the type itself or any of its components don't implement the Copy trait.
While Arrays and Dictionaries can't be copied, custom types that don't contain either of them can be.
#[derive(Copy, Drop)]
struct Point {
    x: u128,
    y: u128,
}

fn main() {
    let p1 = Point { x: 5, y: 10 };
    foo(p1);
    foo(p1);
}

fn foo(p: Point) { // do something with p
}
In this example, we can pass p1 twice to the foo function because the Point type implements the Copy trait. This means that when we pass p1 to foo, we are actually passing a copy of p1, so p1 remains valid. In ownership terms, this means that the ownership of p1 remains with the main function.
If you remove the Copy trait derivation from the Point type, you will get a compile-time error when trying to compile the code.
Don't worry about the Struct keyword. We will introduce this in Chapter 5.
Destroying values - example with FeltDict
The other way linear types can be used is by being destroyed. Destruction must ensure that the 'resource' is now correctly released. In rust for example, this could be closing the access to a file, or locking a mutex.
In Cairo, one type that has such behaviour is Felt252Dict. For provability, dicts must be 'squashed' when they are destructed.
This would be very easy to forget, so it is enforced by the type system and the compiler.
No-op destruction: the Drop Trait
You may have noticed that the Point type in the previous example also implements the Drop trait.
For example, the following code will not compile, because the struct A is not moved or destroyed before it goes out of scope:
struct A {}

fn main() {
    A {}; // error: Value not dropped.
}
However, types that implement the Drop trait are automatically destroyed when going out of scope. This destruction does nothing, it is a no-op - simply a hint to the compiler that this type can safely be destroyed once it's no longer useful. We call this "dropping" a value.
At the moment, the Drop implementation can be derived for all types, allowing them to be dropped when going out of scope, except for dictionaries (Felt252Dict) and types containing dictionaries.
For example, the following code compiles:
#[derive(Drop)]
struct A {}

fn main() {
    A {}; // Now there is no error.
}
Destruction with a side-effect: the Destruct trait
When a value is destroyed, the compiler first tries to call the drop method on that type. If it doesn't exist, then the compiler tries to call destruct instead. This method is provided by the Destruct trait.
As said earlier, dictionaries in Cairo are types that must be "squashed" when destructed, so that the sequence of access can be proven. This is easy for developers to forget, so instead dictionaries implement the Destruct trait to ensure that all dictionaries are squashed when going out of scope.
As such, the following example will not compile:
struct A {
    dict: Felt252Dict<u128>
}

fn main() {
    A { dict: Default::default() };
}
If you try to run this code, you will get a compile-time error:
error: Variable not dropped. Trait has no implementation in context: core::traits::Drop::<temp7::temp7::A>. Trait has no implementation in context: core::traits::Destruct::<temp7::temp7::A>.
 --> temp7.cairo:7:5
    A {
    ^*^
When A goes out of scope, it can't be dropped as it implements neither the Drop (as it contains a dictionary and can't derive(Drop)) nor the Destruct trait. To fix this, we can derive the Destruct trait implementation for the A type:
#[derive(Destruct)]
struct A {
    dict: Felt252Dict<u128>
}

fn main() {
    A { dict: Default::default() }; // No error here
}
Now, when A goes out of scope, its dictionary will be automatically squashed, and the program will compile.
Copy Array data with Clone
If we do want to deeply copy the data of an Array, we can use a common method called clone. We’ll discuss method syntax in Chapter 6, but because methods are a common feature in many programming languages, you’ve probably seen them before.
Here’s an example of the clone method in action.
use clone::Clone;
use array::ArrayTCloneImpl;
fn main() {
    let arr1 = ArrayTrait::<u128>::new();
    let arr2 = arr1.clone();
}
When you see a call to clone, you know that some arbitrary code is being executed and that code may be expensive. It’s a visual indicator that something different is going on.
In this case, value is being copied, resulting in new memory cells being used, and the a new variable is created, referring to the new, copied value.
Return Values and Scope
Returning values is equivalent to moving them. Listing 4-4 shows an example of a function that returns some value, with similar annotations as those in Listing 4-3.
Filename: src/lib.cairo
#[derive(Drop)]
struct A {}

fn main() {
    let a1 = gives_ownership();           // gives_ownership moves its return
                                          // value into a1

    let a2 = A {};                        // a2 comes into scope

    let a3 = takes_and_gives_back(a2);    // a2 is moved into
                                          // takes_and_gives_back, which also
                                          // moves its return value into a3

} // Here, a3 goes out of scope and is dropped. a2 was moved, so nothing
  // happens. a1 goes out of scope and is dropped.

fn gives_ownership() -> A {               // gives_ownership will move its
                                          // return value into the function
                                          // that calls it

    let some_a = A {};                    // some_a comes into scope

    some_a                                // some_a is returned and
                                          // moves ownership to the calling
                                          // function
}

// This function takes an instance some_a of A and returns it
fn takes_and_gives_back(some_a: A) -> A { // some_a comes into
                                          // scope

    some_a                               // some_a is returned and moves
                                         // ownership to the calling
                                         // function
}
Listing 4-4: Moving return values
While this works, moving into and out of every function is a bit tedious. What if we want to let a function use a value but not move the value? It’s quite annoying that anything we pass in also needs to be passed back if we want to use it again, in addition to any data resulting from the body of the function that we might want to return as well.
Cairo does let us return multiple values using a tuple, as shown in Listing 4-5.
Filename: src/lib.cairo
fn main() {
    let arr1 = ArrayTrait::<u128>::new();

    let (arr2, len) = calculate_length(arr1);
}

fn calculate_length(arr: Array<u128>) -> (Array<u128>, usize) {
    let length = arr.len(); // len() returns the length of an array

    (arr, length)
}
Listing 4-5: Returning many values
But this is too much ceremony and a lot of work for a concept that should be common. Luckily for us, Cairo has two features for passing a value without destroying or moving it, called references and snapshots.
References and Snapshots
The issue with the tuple code in Listing 4-5 is that we have to return the
Array to the calling function so we can still use the Array after the
call to calculate_length, because the Array was moved into
calculate_length.
Snapshots
In the previous chapter, we talked about how Cairo's ownership system prevents us from using a variable after we've moved it, protecting us from potentially writing twice to the same memory cell. However, it's not very convenient. Let's see how we can retain ownership of the variable in the calling function using snapshots.
In Cairo, a snapshot is an immutable view of a value at a certain point in time. Recall that memory is immutable, so modifying a value actually creates a new memory cell. The old memory cell still exists, and snapshots are variables that refer to that "old" value. In this sense, snapshots are a view "into the past".
Here is how you would define and use a calculate_length function that takes a
snapshot to an array as a parameter instead of taking ownership of the underlying value. In this example,
the calculate_length function returns the length of the array passed as parameter.
As we're passing it as a snapshot, which is an immutable view of the array, we can be sure that
the calculate_length function will not mutate the array, and ownership of the array is kept in the main function.
Filename: src/lib.cairo
use debug::PrintTrait;

fn main() {
    let mut arr1 = ArrayTrait::<u128>::new();
    let first_snapshot = @arr1; // Take a snapshot of `arr1` at this point in time
    arr1.append(1); // Mutate `arr1` by appending a value
    let first_length = calculate_length(
        first_snapshot
    ); // Calculate the length of the array when the snapshot was taken
    //ANCHOR: function_call
    let second_length = calculate_length(@arr1); // Calculate the current length of the array
    //ANCHOR_END: function_call
    first_length.print();
    second_length.print();
}

fn calculate_length(arr: @Array<u128>) -> usize {
    arr.len()
}
Note: It is only possible to call the
len()method on an array snapshot because it is defined as such in theArrayTraittrait. If you try to call a method that is not defined for snapshots on a snapshot, you will get a compilation error. However, you can call methods expecting a snapshot on non-snapshot types.
The output of this program is:
[DEBUG]	                               	(raw: 0)

[DEBUG]	                              	(raw: 1)

Run completed successfully, returning []
First, notice that all the tuple code in the variable declaration and the function return value is gone. Second, note
that we pass @arr1 into calculate_length and, in its definition, we take @Array<u128> rather than Array<u128>.
Let’s take a closer look at the function call here:
use debug::PrintTrait;

fn main() {
    let mut arr1 = ArrayTrait::<u128>::new();
    let first_snapshot = @arr1; // Take a snapshot of `arr1` at this point in time
    arr1.append(1); // Mutate `arr1` by appending a value
    let first_length = calculate_length(
        first_snapshot
    ); // Calculate the length of the array when the snapshot was taken
    let second_length = calculate_length(@arr1); // Calculate the current length of the array
    first_length.print();
    second_length.print();
}

fn calculate_length(arr: @Array<u128>) -> usize {
    arr.len()
}
The @arr1 syntax lets us create a snapshot of the value in arr1. Because a snapshot is an immutable view of a value at a specific point in time, the usual rules of the linear type system are not enforced. In particular, snapshot variables are always Drop, never Destruct, even dictionary snapshots.
Similarly, the signature of the function uses @ to indicate that the type of the parameter arr is a snapshot. Let’s add some explanatory annotations:
fn calculate_length(
    array_snapshot: @Array<u128>
) -> usize { // array_snapshot is a snapshot of an Array
    array_snapshot.len()
} // Here, array_snapshot goes out of scope and is dropped.
// However, because it is only a view of what the original array `arr` contains, the original `arr` can still be used.
The scope in which the variable array_snapshot is valid is the same as any function parameter’s scope, but the underlying value of the snapshot is not dropped when array_snapshot stops being used. When functions have snapshots as parameters instead of the actual values, we won’t need to return the values in order to give back ownership of the original value, because we never had it.
Desnap Operator
To convert a snapshot back into a regular variable, you can use the desnap operator *, which serves as the opposite of the @ operator.
Only Copy types can be desnapped. However, in the general case, because the value is not modified, the new variable created by the desnap operator reuses the old value, and so desnapping is a completely free operation, just like Copy.
In the following example, we want to calculate the area of a rectangle, but we don't want to take ownership of the rectangle in the calculate_area function, because we might want to use the rectangle again after the function call. Since our function doesn't mutate the rectangle instance, we can pass the snapshot of the rectangle to the function, and then transform the snapshots back into values using the desnap operator *.
use debug::PrintTrait;

#[derive(Copy, Drop)]
struct Rectangle {
    height: u64,
    width: u64,
}

fn main() {
    let rec = Rectangle { height: 3, width: 10 };
    let area = calculate_area(@rec);
    area.print();
}

fn calculate_area(rec: @Rectangle) -> u64 {
    // As rec is a snapshot to a Rectangle, its fields are also snapshots of the fields types.
    // We need to transform the snapshots back into values using the desnap operator `*`.
    // This is only possible if the type is copyable, which is the case for u64.
    // Here, `*` is used for both multiplying the height and width and for desnapping the snapshots.
    *rec.height * *rec.width
}
But, what happens if we try to modify something we’re passing as snapshot? Try the code in Listing 4-6. Spoiler alert: it doesn’t work!
Filename: src/lib.cairo
#[derive(Copy, Drop)]
struct Rectangle {
    height: u64,
    width: u64,
}

fn main() {
    let rec = Rectangle { height: 3, width: 10 };
    flip(@rec);
}

fn flip(rec: @Rectangle) {
    let temp = rec.height;
    rec.height = rec.width;
    rec.width = temp;
}
Listing 4-6: Attempting to modify a snapshot value
Here’s the error:
error: Invalid left-hand side of assignment.
 --> ownership.cairo:15:5
    rec.height = rec.width;
    ^********^
The compiler prevents us from modifying values associated to snapshots.
Mutable References
We can achieve the behavior we want in Listing 4-6 by using a mutable reference instead of a snapshot. Mutable references are actually mutable values passed to a function that are implicitly returned at the end of the function, returning ownership to the calling context. By doing so, they allow you to mutate the value passed while keeping ownership of it by returning it automatically at the end of the execution.
In Cairo, a parameter can be passed as mutable reference using the ref modifier.
Note: In Cairo, a parameter can only be passed as mutable reference using the
refmodifier if the variable is declared as mutable withmut.
In Listing 4-7, we use a mutable reference to modify the value of the height and width fields of the Rectangle instance in the flip function.
use debug::PrintTrait;
#[derive(Copy, Drop)]
struct Rectangle {
    height: u64,
    width: u64,
}

fn main() {
    let mut rec = Rectangle { height: 3, width: 10 };
    flip(ref rec);
    rec.height.print();
    rec.width.print();
}

fn flip(ref rec: Rectangle) {
    let temp = rec.height;
    rec.height = rec.width;
    rec.width = temp;
}
Listing 4-7: Use of a mutable reference to modify a value
First, we change rec to be mut. Then we pass a mutable reference of rec into flip with ref rec, and update the function signature to accept a mutable reference with ref rec: Rectangle. This makes it very clear that the flip function will mutate the value of the Rectangle instance passed as parameter.
The output of the program is:
[DEBUG]
                                (raw: 10)

[DEBUG]	                        (raw: 3)
As expected, the height and width fields of the rec variable have been swapped.
Small recap
Let’s recap what we’ve discussed about the linear type system, ownership, snapshots, and references:
- At any given time, a variable can only have one owner.
- You can pass a variable by-value, by-snapshot, or by-reference to a function.
- If you pass-by-value, ownership of the variable is transferred to the function.
- If you want to keep ownership of the variable and know that your function won’t mutate it, you can pass it as a snapshot with
@. - If you want to keep ownership of the variable and know that your function will mutate it, you can pass it as a mutable reference with
ref.
Using Structs to Structure Related Data
A struct, or structure, is a custom data type that lets you package together and name multiple related values that make up a meaningful group. If you’re familiar with an object-oriented language, a struct is like an object’s data attributes. In this chapter, we’ll compare and contrast tuples with structs to build on what you already know and demonstrate when structs are a better way to group data.
We’ll demonstrate how to define and instantiate structs. We’ll discuss how to define associated functions, especially the kind of associated functions called methods, to specify behavior associated with a struct type. Structs and enums (discussed in the next chapter) are the building blocks for creating new types in your program’s domain to take full advantage of Cairo's compile-time type checking.
Defining and Instantiating Structs
Structs are similar to tuples, discussed in the Data Types section, in that both hold multiple related values. Like tuples, the pieces of a struct can be different types. Unlike with tuples, in a struct you’ll name each piece of data so it’s clear what the values mean. Adding these names means that structs are more flexible than tuples: you don’t have to rely on the order of the data to specify or access the values of an instance.
To define a struct, we enter the keyword struct and name the entire struct. A struct’s name should describe the significance of the pieces of data being grouped together. Then, inside curly brackets, we define the names and types of the pieces of data, which we call fields. For example, Listing 5-1 shows a struct that stores information about a user account.
Filename: src/lib.cairo
#[derive(Copy, Drop)]
struct User {
    active: bool,
    username: felt252,
    email: felt252,
    sign_in_count: u64,
}
Listing 5-1: A User struct definition
To use a struct after we’ve defined it, we create an instance of that struct by specifying concrete values for each of the fields. We create an instance by stating the name of the struct and then add curly brackets containing key: value pairs, where the keys are the names of the fields and the values are the data we want to store in those fields. We don’t have to specify the fields in the same order in which we declared them in the struct. In other words, the struct definition is like a general template for the type, and instances fill in that template with particular data to create values of the type.
For example, we can declare a particular user as shown in Listing 5-2.
Filename: src/lib.cairo
#[derive(Copy, Drop)]
struct User {
    active: bool,
    username: felt252,
    email: felt252,
    sign_in_count: u64,
}
fn main() {
    let user1 = User {
        active: true, username: 'someusername123', email: 'someone@example.com', sign_in_count: 1
    };
}
Listing 5-2: Creating an instance of the User struct
To get a specific value from a struct, we use dot notation. For example, to access this user’s email address, we use user1.email. If the instance is mutable, we can change a value by using the dot notation and assigning into a particular field. Listing 5-3 shows how to change the value in the email field of a mutable User instance.
Filename: src/lib.cairo
#[derive(Copy, Drop)]
struct User {
    active: bool,
    username: felt252,
    email: felt252,
    sign_in_count: u64,
}
fn main() {
    let mut user1 = User {
        active: true, username: 'someusername123', email: 'someone@example.com', sign_in_count: 1
    };
    user1.email = 'anotheremail@example.com';
}

fn build_user(email: felt252, username: felt252) -> User {
    User { active: true, username: username, email: email, sign_in_count: 1, }
}

fn build_user_short(email: felt252, username: felt252) -> User {
    User { active: true, username, email, sign_in_count: 1, }
}
Listing 5-3: Changing the value in the email field of a User instance
Note that the entire instance must be mutable; Cairo doesn’t allow us to mark only certain fields as mutable.
As with any expression, we can construct a new instance of the struct as the last expression in the function body to implicitly return that new instance.
Listing 5-4 shows a build_user function that returns a User instance with the given email and username. The active field gets the value of true, and the sign_in_count gets a value of 1.
Filename: src/lib.cairo
#[derive(Copy, Drop)]
struct User {
    active: bool,
    username: felt252,
    email: felt252,
    sign_in_count: u64,
}
fn main() {
    let mut user1 = User {
        active: true, username: 'someusername123', email: 'someone@example.com', sign_in_count: 1
    };
    user1.email = 'anotheremail@example.com';
}

fn build_user(email: felt252, username: felt252) -> User {
    User { active: true, username: username, email: email, sign_in_count: 1, }
}

fn build_user_short(email: felt252, username: felt252) -> User {
    User { active: true, username, email, sign_in_count: 1, }
}
Listing 5-4: A build_user function that takes an email and username and returns a User instance
It makes sense to name the function parameters with the same name as the struct fields, but having to repeat the email and username field names and variables is a bit tedious. If the struct had more fields, repeating each name would get even more annoying. Luckily, there’s a convenient shorthand!
Using the Field Init Shorthand
Because the parameter names and the struct field names are exactly the same in Listing 5-4, we can use the field init shorthand syntax to rewrite build_user so it behaves exactly the same but doesn’t have the repetition of username and email, as shown in Listing 5-5.
Filename: src/lib.cairo
#[derive(Copy, Drop)]
struct User {
    active: bool,
    username: felt252,
    email: felt252,
    sign_in_count: u64,
}
fn main() {
    let mut user1 = User {
        active: true, username: 'someusername123', email: 'someone@example.com', sign_in_count: 1
    };
    user1.email = 'anotheremail@example.com';
}

fn build_user(email: felt252, username: felt252) -> User {
    User { active: true, username: username, email: email, sign_in_count: 1, }
}

fn build_user_short(email: felt252, username: felt252) -> User {
    User { active: true, username, email, sign_in_count: 1, }
}
Listing 5-5: A build_user function that uses field init shorthand because the username and email parameters have the same name as struct fields
Here, we’re creating a new instance of the User struct, which has a field named email. We want to set the email field’s value to the value in the email parameter of the build_user function. Because the email field and the email parameter have the same name, we only need to write email rather than email: email.
An Example Program Using Structs
To understand when we might want to use structs, let’s write a program that calculates the area of a rectangle. We’ll start by using single variables, and then refactor the program until we’re using structs instead.
Let’s make a new project with Scarb called rectangles that will take the width and height of a rectangle specified in pixels and calculate the area of the rectangle. Listing 5-6 shows a short program with one way of doing exactly that in our project’s src/lib.cairo.
Filename: src/lib.cairo
use debug::PrintTrait;
fn main() {
    let width1 = 30;
    let height1 = 10;
    let area = area(width1, height1);
    area.print();
}

fn area(width: u64, height: u64) -> u64 {
    width * height
}
Listing 5-6: Calculating the area of a rectangle specified by separate width and height variables
Now run the program with scarb cairo-run:
$ scarb cairo-run
[DEBUG] ,                               (raw: 300)

Run completed successfully, returning []
This code succeeds in figuring out the area of the rectangle by calling the area function with each dimension, but we can do more to make this code clear and readable.
The issue with this code is evident in the signature of area:
fn area(width: u64, height: u64) -> u64 {The area function is supposed to calculate the area of one rectangle, but the function we wrote has two parameters, and it’s not clear anywhere in our program that the parameters are related. It would be more readable and more manageable to group width and height together. We’ve already discussed one way we might do that in Chapter 2: using tuples.
Refactoring with Tuples
Listing 5-7 shows another version of our program that uses tuples.
Filename: src/lib.cairo
use debug::PrintTrait;
fn main() {
    let rectangle = (30, 10);
    let area = area(rectangle);
    area.print(); // print out the area
}

fn area(dimension: (u64, u64)) -> u64 {
    let (x, y) = dimension;
    x * y
}
Listing 5-7: Specifying the width and height of the rectangle with a tuple
In one way, this program is better. Tuples let us add a bit of structure, and we’re now passing just one argument. But in another way, this version is less clear: tuples don’t name their elements, so we have to index into the parts of the tuple, making our calculation less obvious.
Mixing up the width and height wouldn’t matter for the area calculation, but if we want to calculate the difference, it would matter! We would have to keep in mind that width is the tuple index 0 and height is the tuple index 1. This would be even harder for someone else to figure out and keep in mind if they were to use our code. Because we haven’t conveyed the meaning of our data in our code, it’s now easier to introduce errors.
Refactoring with Structs: Adding More Meaning
We use structs to add meaning by labeling the data. We can transform the tuple we’re using into a struct with a name for the whole as well as names for the parts.
Filename: src/lib.cairo
use debug::PrintTrait;

struct Rectangle {
    width: u64,
    height: u64,
}

fn main() {
    let rectangle = Rectangle { width: 30, height: 10, };
    let area = area(rectangle);
    area.print(); // print out the area
}

fn area(rectangle: Rectangle) -> u64 {
    rectangle.width * rectangle.height
}
Listing 5-8: Defining a Rectangle struct
Here we’ve defined a struct and named it Rectangle. Inside the curly brackets, we defined the fields as width and height, both of which have type u64. Then, in main, we created a particular instance of Rectangle that has a width of 30 and a height of 10. Our area function is now defined with one parameter, which we’ve named rectangle which is of type Rectangle struct. We can then access the fields of the instance with dot notation, and it gives descriptive names to the values rather than using the tuple index values of 0 and 1.
Adding Useful Functionality with Trait
It’d be useful to be able to print an instance of Rectangle while we’re debugging our program and see the values for all its fields. Listing 5-9 tries using the print as we have used in previous chapters. This won’t work.
Filename: src/lib.cairo
use debug::PrintTrait;

struct Rectangle {
    width: u64,
    height: u64,
}

fn main() {
    let rectangle = Rectangle { width: 30, height: 10, };
    rectangle.print();
}
Listing 5-9: Attempting to print a Rectangle instance
When we compile this code, we get an error with this message:
$ cairo-compile src/lib.cairo
error: Method `print` not found on type "../src::Rectangle". Did you import the correct trait and impl?
 --> lib.cairo:16:15
    rectangle.print();
              ^***^

Error: Compilation failed.
The print trait is implemented for many data types, but not for the Rectangle struct. We can fix this by implementing the PrintTrait trait on Rectangle as shown in Listing 5-10.
To learn more about traits, see Traits in Cairo.
Filename: src/lib.cairo
use debug::PrintTrait;

struct Rectangle {
    width: u64,
    height: u64,
}

fn main() {
    let rectangle = Rectangle { width: 30, height: 10, };
    rectangle.print();
}

impl RectanglePrintImpl of PrintTrait<Rectangle> {
    fn print(self: Rectangle) {
        self.width.print();
        self.height.print();
    }
}
Listing 5-10: Implementing the PrintTrait trait on Rectangle
Nice! It’s not the prettiest output, but it shows the values of all the fields for this instance, which would definitely help during debugging.
Method Syntax
Methods are similar to functions: we declare them with the fn keyword and a
name, they can have parameters and a return value, and they contain some code
that’s run when the method is called from somewhere else. Unlike functions,
methods are defined within the context of a type and their first parameter is
always self, which represents the instance of the type the method is being
called on. For those familiar with Rust, Cairo's approach might be confusing, as
methods cannot be defined directly on types. Instead, you must define a trait
and an implementation associated with the type for which the method is intended.
Defining Methods
Let’s change the area function that has a Rectangle instance as a parameter
and instead make an area method defined on the RectangleTrait trait, as
shown in Listing 5-13.
Filename: src/lib.cairo
use debug::PrintTrait;
#[derive(Copy, Drop)]
struct Rectangle {
    width: u64,
    height: u64,
}

trait RectangleTrait {
    fn area(self: @Rectangle) -> u64;
}

impl RectangleImpl of RectangleTrait {
    fn area(self: @Rectangle) -> u64 {
        (*self.width) * (*self.height)
    }
}

fn main() {
    let rect1 = Rectangle { width: 30, height: 50, };

    rect1.area().print();
}
Listing 5-13: Defining an area method to use on the
Rectangle
To define the function within the context of Rectangle, we start by defining a
trait block with the signature of the method that we want to implement. Traits
are not linked to a specific type; only the self parameter of the method
defines which type it can be used with. Then, we define an impl
(implementation) block for RectangleTrait, that defines the behavior of the
methods implemented. Everything within this impl block will be associated with
the type of the self parameter of the method called. While it is technically
possible to define methods for multiple types within the same impl block, it
is not a recommended practice, as it can lead to confusion. We recommend that
the type of the self parameter stays consistent within the same impl block.
Then we move the area function within the impl curly brackets and change the
first (and in this case, only) parameter to be self in the signature and
everywhere within the body. In main, where we called the area function and
passed rect1 as an argument, we can instead use the method syntax to call
the area method on our Rectangle instance. The method syntax goes after an
instance: we add a dot followed by the method name, parentheses, and any
arguments.
Methods must have a parameter named self of the type they will be applied to
for their first parameter. Note that we used the @ snapshot operator in front
of the Rectangle type in the function signature. By doing so, we indicate that
this method takes an immutable snapshot of the Rectangle instance, which is
automatically created by the compiler when passing the instance to the method.
Methods can take ownership of self, use self with snapshots as we’ve done
here, or use a mutable reference to self using the ref self: T syntax.
We chose self: @Rectangle here for the same reason we used @Rectangle in the
function version: we don’t want to take ownership, and we just want to read the
data in the struct, not write to it. If we wanted to change the instance that
we’ve called the method on as part of what the method does, we’d use ref self: Rectangle as the first parameter. Having a method that takes ownership of the
instance by using just self as the first parameter is rare; this technique is
usually used when the method transforms self into something else and you want
to prevent the caller from using the original instance after the transformation.
Observe the use of the desnap operator * within the area method when accessing
the struct's members. This is necessary because the struct is passed as a
snapshot, and all of its field values are of type @T, requiring them to be
desnapped in order to manipulate them.
The main reason for using methods instead of functions is for organization and
code clarity. We’ve put all the things we can do with an instance of a type in
one combination of trait & impl blocks, rather than making future users of
our code search for capabilities of Rectangle in various places in the library
we provide. However, we can define multiple combinations of trait & impl
blocks for the same type at different places, which can be useful for a more
granular code organization. For example, you could implement the Add trait for
your type in one impl block, and the Sub trait in another block.
Note that we can choose to give a method the same name as one of the struct’s
fields. For example, we can define a method on Rectangle that is also named
width:
Filename: src/lib.cairo
use debug::PrintTrait;
#[derive(Copy, Drop)]
struct Rectangle {
    width: u64,
    height: u64,
}

trait RectangleTrait {
    fn width(self: @Rectangle) -> bool;
}

impl RectangleImpl of RectangleTrait {
    fn width(self: @Rectangle) -> bool {
        (*self.width) > 0
    }
}

fn main() {
    let rect1 = Rectangle { width: 30, height: 50, };
    rect1.width().print();
}
Here, we’re choosing to make the width method return true if the value in
the instance’s width field is greater than 0 and false if the value is
0: we can use a field within a method of the same name for any purpose. In
main, when we follow rect1.width with parentheses, Cairo knows we mean the
method width. When we don’t use parentheses, Cairo knows we mean the field
width.
Methods with More Parameters
Let’s practice using methods by implementing a second method on the Rectangle
struct. This time we want an instance of Rectangle to take another instance of
Rectangle and return true if the second Rectangle can fit completely
within self (the first Rectangle); otherwise, it should return false. That
is, once we’ve defined the can_hold method, we want to be able to write the
program shown in Listing 5-14.
Filename: src/lib.cairo
use debug::PrintTrait;
#[derive(Copy, Drop)]
struct Rectangle {
    width: u64,
    height: u64,
}

fn main() {
    let rect1 = Rectangle { width: 30, height: 50, };
    let rect2 = Rectangle { width: 10, height: 40, };
    let rect3 = Rectangle { width: 60, height: 45, };

    'Can rect1 hold rect2?'.print();
    rect1.can_hold(@rect2).print();

    'Can rect1 hold rect3?'.print();
    rect1.can_hold(@rect3).print();
}
Listing 5-14: Using the as-yet-unwritten can_hold
method
The expected output would look like the following because both dimensions of
rect2 are smaller than the dimensions of rect1, but rect3 is wider than
rect1:
$ scarb cairo-run
[DEBUG]	Can rec1 hold rect2?           	(raw: 384675147322001379018464490539350216396261044799)

[DEBUG]	true                           	(raw: 1953658213)

[DEBUG]	Can rect1 hold rect3?          	(raw: 384675147322001384331925548502381811111693612095)

[DEBUG]	false                          	(raw: 439721161573)
We know we want to define a method, so it will be within the trait RectangleTrait and impl RectangleImpl of RectangleTrait blocks. The method
name will be can_hold, and it will take a snapshot of another Rectangle as a
parameter. We can tell what the type of the parameter will be by looking at the
code that calls the method: rect1.can_hold(@rect2) passes in @rect2, which
is a snapshot to rect2, an instance of Rectangle. This makes sense because
we only need to read rect2 (rather than write, which would mean we’d need a
mutable borrow), and we want main to retain ownership of rect2 so we can use
it again after calling the can_hold method. The return value of can_hold
will be a Boolean, and the implementation will check whether the width and
height of self are greater than the width and height of the other Rectangle,
respectively. Let’s add the new can_hold method to the trait and impl
blocks from Listing 5-13, shown in Listing 5-15.
Filename: src/lib.cairo
#![allow(unused)]
fn main() {
trait RectangleTrait {
    fn area(self: @Rectangle) -> u64;
    fn can_hold(self: @Rectangle, other: @Rectangle) -> bool;
}

impl RectangleImpl of RectangleTrait {
    fn area(self: @Rectangle) -> u64 {
        *self.width * *self.height
    }

    fn can_hold(self: @Rectangle, other: @Rectangle) -> bool {
        *self.width > *other.width && *self.height > *other.height
    }
}
}
Listing 5-15: Implementing the can_hold method on
Rectangle that takes another Rectangle instance as a parameter
When we run this code with the main function in Listing 5-14, we’ll get our
desired output. Methods can take multiple parameters that we add to the
signature after the self parameter, and those parameters work just like
parameters in functions.
Accessing implementation functions
All functions defined within a trait and impl block can be directly
addressed using the :: operator on the implementation name. Functions in
traits that aren’t methods are often used for constructors that will return a
new instance of the struct. These are often called new, but new isn’t a
special name and isn’t built into the language. For example, we could choose to
provide an associated function named square that would have one dimension
parameter and use that as both width and height, thus making it easier to create
a square Rectangle rather than having to specify the same value twice:
Filename: src/lib.cairo
trait RectangleTrait {
    fn square(size: u64) -> Rectangle;
}

impl RectangleImpl of RectangleTrait {
    fn square(size: u64) -> Rectangle {
        Rectangle { width: size, height: size }
    }
}
To call this function, we use the :: syntax with the implementation name; let square = RectangleImpl::square(10); is an example. This function is namespaced
by the implementation; the :: syntax is used for both trait functions and
namespaces created by modules. We’ll discuss modules in [Chapter 8][modules].
Note: It is also possible to call this function using the trait name, with
RectangleTrait::square(10).
Multiple impl Blocks
Each struct is allowed to have multiple trait and impl blocks. For example,
Listing 5-15 is equivalent to the code shown in Listing 5-16, which has each
method in its own trait and impl blocks.
trait RectangleCalc {
    fn area(self: @Rectangle) -> u64;
}
impl RectangleCalcImpl of RectangleCalc {
    fn area(self: @Rectangle) -> u64 {
        (*self.width) * (*self.height)
    }
}

trait RectangleCmp {
    fn can_hold(self: @Rectangle, other: @Rectangle) -> bool;
}

impl RectangleCmpImpl of RectangleCmp {
    fn can_hold(self: @Rectangle, other: @Rectangle) -> bool {
        *self.width > *other.width && *self.height > *other.height
    }
}
Listing 5-16: Rewriting Listing 5-15 using multiple impl
blocks
There’s no reason to separate these methods into multiple trait and impl
blocks here, but this is valid syntax. We’ll see a case in which multiple blocks
are useful in Chapter 8, where we discuss
generic types and traits.
Summary
Structs let you create custom types that are meaningful for your domain. By
using structs, you can keep associated pieces of data connected to each other
and name each piece to make your code clear. In trait and impl blocks, you
can define methods, which are functions associated to a type and let you specify
the behavior that instances of your type have.
But structs aren’t the only way you can create custom types: let’s turn to Cairo’s enum feature to add another tool to your toolbox.
Enums and Pattern Matching
In this chapter, we’ll look at enumerations, also referred to as enums.
Enums allow you to define a type by enumerating its possible variants. First,
we’ll define and use an enum to show how an enum can encode meaning along with
data. Next, we’ll explore a particularly useful enum, called Option, which
expresses that a value can be either something or nothing. Finally, we’ll look at
how pattern matching in the match expression makes it easy to run different
code for different values of an enum.
Enums
Enums, short for "enumerations," are a way to define a custom data type that consists of a fixed set of named values, called variants. Enums are useful for representing a collection of related values where each value is distinct and has a specific meaning.
Enum Variants and Values
Here's a simple example of an enum:
#[derive(Drop)]
enum Direction {
    North,
    East,
    South,
    West,
}
In this example, we've defined an enum called Direction with four variants: North, East, South, and West. The naming convention is to use PascalCase for enum variants. Each variant represents a distinct value of the Direction type. In this particular example, variants don't have any associated value. One variant can be instantiated using this syntax:
#[derive(Drop)]
enum Direction {
    North,
    East,
    South,
    West,
}

fn main() {
    let direction = Direction::North;
}
It's easy to write code that acts differently depending on the variant of an enum instance, in this example to run specific code according to a Direction. You can learn more about it on The Match Control Flow Construct page.
Enums Combined with Custom Types
Enums can also be used to store more interesting data associated with each variant. For example:
#[derive(Drop)]
enum Message {
    Quit,
    Echo: felt252,
    Move: (u128, u128),
}
In this example, the Message enum has three variants: Quit, Echo and Move, all with different types:
Quitdoesn't have any associated value.Echois a single felt.Moveis a tuple of two u128 values.
You could even use a Struct or another Enum you defined inside one of your Enum variants.
Trait Implementations for Enums
In Cairo, you can define traits and implement them for your custom enums. This allows you to define methods and behaviors associated with the enum. Here's an example of defining a trait and implementing it for the previous Message enum:
trait Processing {
    fn process(self: Message);
}

impl ProcessingImpl of Processing {
    fn process(self: Message) {
        match self {
            Message::Quit => { 'quitting'.print(); },
            Message::Echo(value) => { value.print(); },
            Message::Move((x, y)) => { 'moving'.print(); },
        }
    }
}
In this example, we implemented the Processing trait for Message. Here is how it could be used to process a Quit message:
use debug::PrintTrait;
#[derive(Drop)]
enum Message {
    Quit,
    Echo: felt252,
    Move: (u128, u128),
}

trait Processing {
    fn process(self: Message);
}

impl ProcessingImpl of Processing {
    fn process(self: Message) {
        match self {
            Message::Quit => { 'quitting'.print(); },
            Message::Echo(value) => { value.print(); },
            Message::Move((x, y)) => { 'moving'.print(); },
        }
    }
}
fn main() {
    let msg: Message = Message::Quit;
    msg.process();
}
Running this code would print quitting.
The Option Enum and Its Advantages
The Option enum is a standard Cairo enum that represents the concept of an optional value. It has two variants: Some: T and None: (). Some: T indicates that there's a value of type T, while None represents the absence of a value.
enum Option<T> {
    Some: T,
    None: (),
}
The Option enum is helpful because it allows you to explicitly represent the possibility of a value being absent, making your code more expressive and easier to reason about. Using Option can also help prevent bugs caused by using uninitialized or unexpected null values.
To give you an example, here is a function which returns the index of the first element of an array with a given value, or None if the element is not present.
We are demonstrating two approaches for the above function:
- Recursive Approach
find_value_recursive - Iterative Approach
find_value_iterative
Note: in the future it would be nice to replace this example by something simpler using a loop and without gas related code.
fn find_value_recursive(arr: @Array<felt252>, value: felt252, index: usize) -> Option<usize> {
    if index >= arr.len() {
        return Option::None;
    }

    if *arr.at(index) == value {
        return Option::Some(index);
    }

    find_value_recursive(arr, value, index + 1)
}

fn find_value_iterative(arr: @Array<felt252>, value: felt252) -> Option<usize> {
    let length = arr.len();
    let mut index = 0;
    let mut found: Option<usize> = Option::None;
    loop {
        if index < length {
            if *arr.at(index) == value {
                found = Option::Some(index);
                break;
            }
        } else {
            break;
        }
        index += 1;
    };
    return found;
}

#[cfg(test)]
mod tests {
    use debug::PrintTrait;
    use super::{find_value_recursive, find_value_iterative};

    #[test]
    #[available_gas(999999)]
    fn test_increase_amount() {
        let mut my_array = ArrayTrait::new();
        my_array.append(3);
        my_array.append(7);
        my_array.append(2);
        my_array.append(5);

        let value_to_find = 7;
        let result = find_value_recursive(@my_array, value_to_find, 0);
        let result_i = find_value_iterative(@my_array, value_to_find);

        match result {
            Option::Some(index) => { if index == 1 {
                'it worked'.print();
            } },
            Option::None => { 'not found'.print(); },
        }
        match result_i {
            Option::Some(index) => { if index == 1 {
                'it worked'.print();
            } },
            Option::None => { 'not found'.print(); },
        }
    }
}
Running this code would print it worked.
The Match Control Flow Construct
Cairo has an extremely powerful control flow construct called match that allows you to compare a value against a series of patterns and then execute code based on which pattern matches. Patterns can be made up of literal values, variable names, wildcards, and many other things. The power of match comes from the expressiveness of the patterns and the fact that the compiler confirms that all possible cases are handled.
Think of a match expression as being like a coin-sorting machine: coins slide down a track with variously sized holes along it, and each coin falls through the first hole it encounters that it fits into. In the same way, values go through each pattern in a match, and at the first pattern the value “fits”, the value falls into the associated code block to be used during execution.
Speaking of coins, let’s use them as an example using match! We can write a function that takes an unknown US coin and, in a similar way as the counting machine, determines which coin it is and returns its value in cents, as shown in Listing 6-3.
enum Coin {
    Penny,
    Nickel,
    Dime,
    Quarter,
}

fn value_in_cents(coin: Coin) -> felt252 {
    match coin {
        Coin::Penny => 1,
        Coin::Nickel => 5,
        Coin::Dime => 10,
        Coin::Quarter => 25,
    }
}
Listing 6-3: An enum and a match expression that has the variants of the enum as its patterns
Let’s break down the match in the value_in_cents function. First we list the match keyword followed by an expression, which in this case is the value coin. This seems very similar to a conditional expression used with if, but there’s a big difference: with if, the condition needs to evaluate to a Boolean value, but here it can be any type. The type of coin in this example is the Coin enum that we defined on the first line.
Next are the match arms. An arm has two parts: a pattern and some code. The first arm here has a pattern that is the value Coin::Penny(_) and then the => operator that separates the pattern and the code to run. The code in this case is just the value 1. Each arm is separated from the next with a comma.
When the match expression executes, it compares the resultant value against the pattern of each arm, in order. If a pattern matches the value, the code associated with that pattern is executed. If that pattern doesn’t match the value, execution continues to the next arm, much as in a coin-sorting machine. We can have as many arms as we need: in the above example, our match has four arms.
In Cairo, the order of the arms must follow the same order as the enum.
The code associated with each arm is an expression, and the resultant value of the expression in the matching arm is the value that gets returned for the entire match expression.
We don’t typically use curly brackets if the match arm code is short, as it is in our example where each arm just returns a value. If you want to run multiple lines of code in a match arm, you must use curly brackets, with a comma following the arm. For example, the following code prints “Lucky penny!” every time the method is called with a Coin::Penny, but still returns the last value of the block, 1:
fn value_in_cents(coin: Coin) -> felt252 {
    match coin {
        Coin::Penny => {
            ('Lucky penny!').print();
            1
        },
        Coin::Nickel => 5,
        Coin::Dime => 10,
        Coin::Quarter => 25,
    }
}
Patterns That Bind to Values
Another useful feature of match arms is that they can bind to the parts of the values that match the pattern. This is how we can extract values out of enum variants.
As an example, let’s change one of our enum variants to hold data inside it. From 1999 through 2008, the United States minted quarters with different designs for each of the 50 states on one side. No other coins got state designs, so only quarters have this extra value. We can add this information to our enum by changing the Quarter variant to include a UsState value stored inside it, which we’ve done in Listing 6-4.
#[derive(Drop)]
enum UsState {
    Alabama,
    Alaska,
}

#[derive(Drop)]
enum Coin {
    Penny,
    Nickel,
    Dime,
    Quarter: UsState,
}
Listing 6-4: A Coin enum in which the Quarter variant also holds a UsState value
Let’s imagine that a friend is trying to collect all 50 state quarters. While we sort our loose change by coin type, we’ll also call out the name of the state associated with each quarter so that if it’s one our friend doesn’t have, they can add it to their collection.
In the match expression for this code, we add a variable called state to the pattern that matches values of the variant Coin::Quarter. When a Coin::Quarter matches, the state variable will bind to the value of that quarter’s state. Then we can use state in the code for that arm, like so:
fn value_in_cents(coin: Coin) -> felt252 {
    match coin {
        Coin::Penny => 1,
        Coin::Nickel => 5,
        Coin::Dime => 10,
        Coin::Quarter(state) => {
            state.print();
            25
        },
    }
}
To print the value of a variant of an enum in Cairo, we need to add an implementation for the print function for the debug::PrintTrait:
impl UsStatePrintImpl of PrintTrait<UsState> {
    fn print(self: UsState) {
        match self {
            UsState::Alabama => ('Alabama').print(),
            UsState::Alaska => ('Alaska').print(),
        }
    }
}
If we were to call value_in_cents(Coin::Quarter(UsState::Alaska)), coin would be Coin::Quarter(UsState::Alaska). When we compare that value with each of the match arms, none of them match until we reach Coin::Quarter(state). At that point, the binding for state will be the value UsState::Alaska. We can then use that binding in the PrintTrait, thus getting the inner state value out of the Coin enum variant for Quarter.
Matching with Options
In the previous section, we wanted to get the inner T value out of the Some case when using Option<T>; we can also handle Option<T> using match, as we did with the Coin enum! Instead of comparing coins, we’ll compare the variants of Option<T>, but the way the match expression works remains the same. You can use Options by importing the option::OptionTrait trait.
Let’s say we want to write a function that takes an Option<u8> and, if there’s a value inside, adds 1 to that value. If there isn’t a value inside, the function should return the None value and not attempt to perform any operations.
This function is very easy to write, thanks to match, and will look like Listing 6-5.
use debug::PrintTrait;

fn plus_one(x: Option<u8>) -> Option<u8> {
    match x {
        Option::Some(val) => Option::Some(val + 1),
        Option::None => Option::None,
    }
}

fn main() {
    let five: Option<u8> = Option::Some(5);
    let six: Option<u8> = plus_one(five);
    six.unwrap().print();
    let none = plus_one(Option::None);
    none.unwrap().print();
}
Listing 6-5: A function that uses a match
expression on an Option<u8>
Note that your arms must respect the same order as the enum defined in the OptionTrait of the core Cairo lib.
enum Option<T> {
    Some: T,
    None,
}
Let’s examine the first execution of plus_one in more detail. When we call plus_one(five), the variable x in the body of plus_one will have the value Some(5). We then compare that against each match arm:
Option::Some(val) => Option::Some(val + 1),Does Option::Some(5) value match the pattern Option::Some(val)? It does! We have the same variant. The val binds to the value contained in Option::Some, so val takes the value 5. The code in the match arm is then executed, so we add 1 to the value of val and create a new Option::Some value with our total 6 inside. Because the first arm matched, no other arms are compared.
Now let’s consider the second call of plus_one in our main function, where x is Option::None. We enter the match and compare to the first arm:
Option::Some(val) => Option::Some(val + 1),The Option::Some(val) value doesn’t match the pattern Option::None, so we continue to the next arm:
#![allow(unused)]
fn main() {
        Option::None => Option::None,
}
It matches! There’s no value to add to, so the program stops and returns the Option::None value on the right side of =>.
Combining match and enums is useful in many situations. You’ll see this pattern a lot in Cairo code: match against an enum, bind a variable to the data inside, and then execute code based on it. It’s a bit tricky at first, but once you get used to it, you’ll wish you had it in all languages. It’s consistently a user favorite.
Matches Are Exhaustive
There’s one other aspect of match we need to discuss: the arms’ patterns must cover all possibilities. Consider this version of our plus_one function, which has a bug and won’t compile:
fn plus_one(x: Option<u8>) -> Option<u8> {
    match x {
        Option::Some(val) => Option::Some(val + 1),
    }
}
$ scarb cairo-run
error: Unsupported match. Currently, matches require one arm per variant,
in the order of variant definition.
--> test.cairo:34:5
match x {
^*******^
Error: failed to compile: ./src/test.cairo
Cairo knows that we didn’t cover every possible case, and even knows which pattern we forgot! Matches in Cairo are exhaustive: we must exhaust every last possibility in order for the code to be valid. Especially in the case of Option<T>, when Cairo prevents us from forgetting to explicitly handle the None case, it protects us from assuming that we have a value when we might have null, thus making the billion-dollar mistake discussed earlier impossible.
Match 0 and the _ Placeholder
Using enums, we can also take special actions for a few particular values, but for all other values take one default action. Currently only 0 and the _operator are supported.
Imagine we’re implementing a game where, you get a random number between 0 and 7. If you have 0, you win. For all other values you lose. Here's a match that implements that logic, with the number hardcoded rather than a random value.
fn did_i_win(nb: felt252) {
    match nb {
        0 => ('You won!').print(),
        _ => ('You lost...').print(),
    }
}
The first arm, the pattern is the literal values 0. For the last arm that covers every other possible value, the pattern is the character _. This code compiles, even though we haven’t listed all the possible values a felt252 can have, because the last pattern will match all values not specifically listed. This catch-all pattern meets the requirement that match must be exhaustive. Note that we have to put the catch-all arm last because the patterns are evaluated in order. If we put the catch-all arm earlier, the other arms would never run, so Cairo will warn us if we add arms after a catch-all!
Managing Cairo Projects with Packages, Crates and Modules
As you write large programs, organizing your code will become increasingly important. By grouping related functionality and separating code with distinct features, you’ll clarify where to find code that implements a particular feature and where to go to change how a feature works.
The programs we’ve written so far have been in one module in one file. As a project grows, you should organize code by splitting it into multiple modules and then multiple files. As a package grows, you can extract parts into separate crates that become external dependencies. This chapter covers all these techniques.
We’ll also discuss encapsulating implementation details, which lets you reuse code at a higher level: once you’ve implemented an operation, other code can call your code without having to know how the implementation works.
A related concept is scope: the nested context in which code is written has a set of names that are defined as “in scope.” When reading, writing, and compiling code, programmers and compilers need to know whether a particular name at a particular spot refers to a variable, function, struct, enum, module, constant, or other item and what that item means. You can create scopes and change which names are in or out of scope. You can’t have two items with the same name in the same scope.
Cairo has a number of features that allow you to manage your code’s organization. These features, sometimes collectively referred to as the module system, include:
- Packages: A Scarb feature that lets you build, test, and share crates
- Crates: A tree of modules that corresponds to a single compilation unit.
It has a root directory, and a root module defined at the file
lib.cairounder this directory. - Modules and use: Let you control the organization and scope of items.
- Paths: A way of naming an item, such as a struct, function, or module
In this chapter, we’ll cover all these features, discuss how they interact, and explain how to use them to manage scope. By the end, you should have a solid understanding of the module system and be able to work with scopes like a pro!
Packages and Crates
What is a crate?
A crate is the smallest amount of code that the Cairo compiler considers at a time. Even if you run cairo-compile rather than scarb build and pass a single source code file, the compiler considers that file to be a crate. Crates can contain modules, and the modules may be defined in other files that get compiled with the crate, as will be discussed in the subsequent sections.
What is the crate root?
The crate root is the lib.cairo source file that the Cairo compiler starts from and makes up the root module of your crate (we’ll explain modules in depth in the “Defining Modules to Control Scope” section).
What is a package?
A cairo package is a bundle of one or more crates with a Scarb.toml file that describes how to build those crates. This enables the splitting of code into smaller, reusable parts and facilitates more structured dependency management.
Creating a Package with Scarb
You can create a new Cairo package using the scarb command-line tool. To create a new package, run the following command:
scarb new my_package
This command will generate a new package directory named my_package with the following structure:
my_package/
├── Scarb.toml
└── src
    └── lib.cairo
src/is the main directory where all the Cairo source files for the package will be stored.lib.cairois the default root module of the crate, which is also the main entry point of the package.Scarb.tomlis the package manifest file, which contains metadata and configuration options for the package, such as dependencies, package name, version, and authors. You can find documentation about it on the scarb reference.
[package]
name = "my_package"
version = "0.1.0"

[dependencies]
# foo = { path = "vendor/foo" }
As you develop your package, you may want to organize your code into multiple Cairo source files. You can do this by creating additional .cairo files within the src directory or its subdirectories.
Defining Modules to Control Scope
In this section, we’ll talk about modules and other parts of the module system,
namely paths that allow you to name items and the use keyword that brings a
path into scope.
First, we’re going to start with a list of rules for easy reference when you’re organizing your code in the future. Then we’ll explain each of the rules in detail.
Modules Cheat Sheet
Here we provide a quick reference on how modules, paths and the use keyword
work in the compiler, and how most developers organize their
code. We’ll be going through examples of each of these rules throughout this
chapter, but this is a great place to refer to as a reminder of how modules
work. You can create a new Scarb project with scarb new backyard to follow along.
-
Start from the crate root: When compiling a crate, the compiler first looks in the crate root file (src/lib.cairo) for code to compile.
-
Declaring modules: In the crate root file, you can declare new modules; say, you declare a “garden” module with
mod garden;. The compiler will look for the module’s code in these places:-
Inline, within curly brackets that replace the semicolon following
mod garden;.// crate root file (src/lib.cairo) mod garden { // code defining the garden module goes here } -
In the file src/garden.cairo
-
-
Declaring submodules: In any file other than the crate root, you can declare submodules. For example, you might declare
mod vegetables;in src/garden.cairo. The compiler will look for the submodule’s code within the directory named for the parent module in these places:-
Inline, directly following
mod vegetables, within curly brackets instead of the semicolon.// src/garden.cairo file mod vegetables { // code defining the vegetables submodule goes here } -
In the file src/garden/vegetables.cairo
-
-
Paths to code in modules: Once a module is part of your crate, you can refer to code in that module from anywhere else in that same crate, using the path to the code. For example, an
Asparagustype in the garden vegetables module would be found atbackyard::garden::vegetables::Asparagus. -
The
usekeyword: Within a scope, theusekeyword creates shortcuts to items to reduce repetition of long paths. In any scope that can refer tobackyard::garden::vegetables::Asparagus, you can create a shortcut withuse backyard::garden::vegetables::Asparagus;and from then on you only need to writeAsparagusto make use of that type in the scope.
Here we create a crate named backyard that illustrates these rules. The
crate’s directory, also named backyard, contains these files and directories:
backyard/
├── Scarb.toml
└── src
    ├── garden
    │   └── vegetables.cairo
    ├── garden.cairo
    └── lib.cairo
The crate root file in this case is src/lib.cairo, and it contains:
Filename: src/lib.cairo
use garden::vegetables::Asparagus;

mod garden;

fn main() {
    let Asparagus = Asparagus {};
}
The mod garden; line tells the compiler to include the code it finds in src/garden.cairo, which is:
Filename: src/garden.cairo
mod vegetables;Here, mod vegetables; means the code in src/garden/vegetables.cairo is
included too. That code is:
#[derive(Copy, Drop)]
struct Asparagus {}
The line use garden::vegetables::Asparagus; lets us use bring the Asparagus type into scope,
so we can use it in the main function.
Now let’s get into the details of these rules and demonstrate them in action!
Grouping Related Code in Modules
Modules let us organize code within a crate for readability and easy reuse. As an example, let’s write a library crate that provides the functionality of a restaurant. We’ll define the signatures of functions but leave their bodies empty to concentrate on the organization of the code, rather than the implementation of a restaurant.
In the restaurant industry, some parts of a restaurant are referred to as front of house and others as back of house. Front of house is where customers are; this encompasses where the hosts seat customers, servers take orders and payment, and bartenders make drinks. Back of house is where the chefs and cooks work in the kitchen, dishwashers clean up, and managers do administrative work.
To structure our crate in this way, we can organize its functions into nested
modules. Create a new package named restaurant by running scarb new restaurant; then enter the code in Listing 7-1 into src/lib.cairo to
define some modules and function signatures. Here’s the front of house section:
Filename: src/lib.cairo
mod front_of_house {
    mod hosting {
        fn add_to_waitlist() {}

        fn seat_at_table() {}
    }

    mod serving {
        fn take_order() {}

        fn serve_order() {}

        fn take_payment() {}
    }
}
Listing 7-1: A front_of_house module containing other
modules that then contain functions
We define a module with the mod keyword followed by the name of the module
(in this case, front_of_house). The body of the module then goes inside curly
brackets. Inside modules, we can place other modules, as in this case with the
modules hosting and serving. Modules can also hold definitions for other
items, such as structs, enums, constants, traits, and—as in Listing
6-1—functions.
By using modules, we can group related definitions together and name why they’re related. Programmers using this code can navigate the code based on the groups rather than having to read through all the definitions, making it easier to find the definitions relevant to them. Programmers adding new functionality to this code would know where to place the code to keep the program organized.
Earlier, we mentioned that src/lib.cairo is called the crate root. The reason for this name is that the content of this file form a module named after the crate name at the root of the crate’s module structure, known as the module tree.
Listing 7-2 shows the module tree for the structure in Listing 7-1.
restaurant
 └── front_of_house
     ├── hosting
     │   ├── add_to_waitlist
     │   └── seat_at_table
     └── serving
         ├── take_order
         ├── serve_order
         └── take_payment
Listing 7-2: The module tree for the code in Listing 6-1
This tree shows how some of the modules nest inside one another; for example,
hosting nests inside front_of_house. The tree also shows that some modules
are siblings to each other, meaning they’re defined in the same module;
hosting and serving are siblings defined within front_of_house. If module
A is contained inside module B, we say that module A is the child of module B
and that module B is the parent of module A. Notice that the entire module
tree is rooted under the explicit name of the crate restaurant.
The module tree might remind you of the filesystem’s directory tree on your computer; this is a very apt comparison! Just like directories in a filesystem, you use modules to organize your code. And just like files in a directory, we need a way to find our modules.
Paths for Referring to an Item in the Module Tree
To show Cairo where to find an item in a module tree, we use a path in the same way we use a path when navigating a filesystem. To call a function, we need to know its path.
A path can take two forms:
-
An absolute path is the full path starting from a crate root. The absolute path begins with the crate name.
-
A relative path starts from the current module.
Both absolute and relative paths are followed by one or more identifiers separated by double colons (
::).
To illustrate this notion let's take back our example Listing 7-1 for the restaurant we used in the last chapter. We have a crate named restaurant in which we have a module named front_of_house that contains a module named hosting. The hosting module contains a function named add_to_waitlist. We want to call the add_to_waitlist function from the eat_at_restaurant function. We need to tell Cairo the path to the add_to_waitlist function so it can find it.
Filename: src/lib.cairo
mod front_of_house {
    mod hosting {
        fn add_to_waitlist() {}

        fn seat_at_table() {}
    }

    mod serving {
        fn take_order() {}

        fn serve_order() {}

        fn take_payment() {}
    }
}


fn eat_at_restaurant() {
    // Absolute path
    restaurant::front_of_house::hosting::add_to_waitlist(); // ✅ Compiles

    // Relative path
    front_of_house::hosting::add_to_waitlist(); // ✅ Compiles
}
Listing 7-3: Calling the add_to_waitlist function using absolute and relative paths
The first time we call the add_to_waitlist function in eat_at_restaurant,
we use an absolute path. The add_to_waitlist function is defined in the same
crate as eat_at_restaurant. In Cairo, absolute paths start from the crate root, which you need to refer to by using the crate name.
The second time we call add_to_waitlist, we use a relative path. The path starts with front_of_house, the name of the module
defined at the same level of the module tree as eat_at_restaurant. Here the
filesystem equivalent would be using the path
./front_of_house/hosting/add_to_waitlist. Starting with a module name means
that the path is relative to the current module.
Starting Relative Paths with super
Choosing whether to use a super or not is a decision you’ll make
based on your project, and depends on whether you’re more likely to move item
definition code separately from or together with the code that uses the item.
Filename: src/lib.cairo
fn deliver_order() {}

mod back_of_house {
    fn fix_incorrect_order() {
        cook_order();
        super::deliver_order();
    }

    fn cook_order() {}
}
Listing 7-4: Calling a function using a relative path starting with super
Here you can see directly that you access a parent's module easily using super, which wasn't the case previously.
Bringing Paths into Scope with the use Keyword
Having to write out the paths to call functions can feel inconvenient and repetitive. Fortunately, there’s a way to simplify this process: we can create a shortcut to a path with the use keyword once, and then use the shorter name everywhere else in the scope.
In Listing 7-5, we bring the restaurant::front_of_house::hosting module into the
scope of the eat_at_restaurant function so we only have to specify
hosting::add_to_waitlist to call the add_to_waitlist function in
eat_at_restaurant.
Filename: src/lib.cairo
#![allow(unused)]
fn main() {
// Assuming "front_of_house" module is contained in a crate called "restaurant", as mentioned in the section "Defining Modules to Control Scope"
// If the path is created in the same crate, "restaurant" is optional in the use statement

mod front_of_house {
    mod hosting {
        fn add_to_waitlist() {}
    }
}

use restaurant::front_of_house::hosting;

fn eat_at_restaurant() {
    hosting::add_to_waitlist(); // ✅ Shorter path
}
}
Listing 7-5: Bringing a module into scope with
use
Adding use and a path in a scope is similar to creating a symbolic link in the filesystem. By adding use restaurant::front_of_house::hosting in the crate root, hosting is now a valid name in that scope, just as though the hosting module had been defined in the crate root.
Note that use only creates the shortcut for the particular scope in which the use occurs. Listing 7-6 moves the eat_at_restaurant function into a new
child module named customer, which is then a different scope than the use
statement, so the function body won’t compile:
Filename: src/lib.cairo
#![allow(unused)]
fn main() {
mod front_of_house {
    mod hosting {
        fn add_to_waitlist() {}
    }
}

use restaurant::front_of_house::hosting;

mod customer {
    fn eat_at_restaurant() {
        hosting::add_to_waitlist();
    }
}
}
Listing 7-6: A use statement only applies in the scope
it’s in
The compiler error shows that the shortcut no longer applies within the
customer module:
❯ scarb build
error: Identifier not found.
 --> lib.cairo:11:9
        hosting::add_to_waitlist();
        ^*****^
Creating Idiomatic use Paths
In Listing 7-5, you might have wondered why we specified use restaurant::front_of_house::hosting and then called hosting::add_to_waitlist in
eat_at_restaurant rather than specifying the use path all the way out to
the add_to_waitlist function to achieve the same result, as in Listing 7-7.
Filename: src/lib.cairo
#![allow(unused)]
fn main() {
mod front_of_house {
    mod hosting {
        fn add_to_waitlist() {}
    }
}

use restaurant::front_of_house::hosting::add_to_waitlist;

fn eat_at_restaurant() {
    add_to_waitlist();
}
}
Listing 7-7: Bringing the add_to_waitlist function
into scope with use, which is unidiomatic
Although both Listing 7-5 and 6-7 accomplish the same task, Listing 7-5 is
the idiomatic way to bring a function into scope with use. Bringing the
function’s parent module into scope with use means we have to specify the
parent module when calling the function. Specifying the parent module when
calling the function makes it clear that the function isn’t locally defined
while still minimizing repetition of the full path. The code in Listing 7-7 is
unclear as to where add_to_waitlist is defined.
On the other hand, when bringing in structs, enums, traits, and other items with use,
it’s idiomatic to specify the full path. Listing 7-8 shows the idiomatic way
to bring the core library’s ArrayTrait trait into the scope.
fn main() {
    let mut arr = ArrayTrait::new();
    arr.append(1);
}
Listing 7-8: Bringing ArrayTrait into scope in an
idiomatic way
There’s no strong reason behind this idiom: it’s just the convention that has emerged in the Rust community, and folks have gotten used to reading and writing Rust code this way. As Cairo shares many idioms with Rust, we follow this convention as well.
The exception to this idiom is if we’re bringing two items with the same name
into scope with use statements, because Cairo doesn’t allow that.
Providing New Names with the as Keyword
There’s another solution to the problem of bringing two types of the same name
into the same scope with use: after the path, we can specify as and a new
local name, or alias, for the type. Listing 7-9 shows how you can rename an import with as:
Filename: src/lib.cairo
use array::ArrayTrait as Arr;

fn main() {
    let mut arr = Arr::new(); // ArrayTrait was renamed to Arr
    arr.append(1);
}
Listing 7-9: Renaming a trait when it’s brought into
scope with the as keyword
Here, we brought ArrayTrait into scope with the alias Arr. We can now access the trait's methods with the Arr identifier.
Importing multiple items from the same module
When you want to import multiple items (like functions, structs or enums)
from the same module in Cairo, you can use curly braces {} to list all of
the items that you want to import. This helps to keep your code clean and easy
to read by avoiding a long list of individual use statements.
The general syntax for importing multiple items from the same module is:
#![allow(unused)]
fn main() {
use module::{item1, item2, item3};
}
Here is an example where we import three structures from the same module:
// Assuming we have a module called `shapes` with the structures `Square`, `Circle`, and `Triangle`.
mod shapes {
    #[derive(Drop)]
    struct Square {
        side: u32
    }

    #[derive(Drop)]
    struct Circle {
        radius: u32
    }

    #[derive(Drop)]
    struct Triangle {
        base: u32,
        height: u32,
    }
}

// We can import the structures `Square`, `Circle`, and `Triangle` from the `shapes` module like this:
use shapes::{Square, Circle, Triangle};

// Now we can directly use `Square`, `Circle`, and `Triangle` in our code.
fn main() {
    let sq = Square { side: 5 };
    let cr = Circle { radius: 3 };
    let tr = Triangle { base: 5, height: 2 };
// ...
}
Listing 7-10: Importing multiple items from the same module
Re-exporting Names in Module Files
When we bring a name into scope with the use keyword, the name available in
the new scope can be imported as if it had been defined in that code’s scope.
This technique is called re-exporting because we’re bringing an item into scope,
but also making that item available for others to bring into their scope.
For example, let's re-export the add_to_waitlist function in the restaurant example:
Filename: src/lib.cairo
#![allow(unused)]
fn main() {
mod front_of_house {
    mod hosting {
        fn add_to_waitlist() {}
    }
}

use restaurant::front_of_house::hosting;

fn eat_at_restaurant() {
    hosting::add_to_waitlist();
}
}
Listing 7-11: Making a name available for any code to use
from a new scope with pub use
Before this change, external code would have to call the add_to_waitlist
function by using the path
restaurant::front_of_house::hosting::add_to_waitlist(). Now that this use
has re-exported the hosting module from the root module, external code
can now use the path restaurant::hosting::add_to_waitlist() instead.
Re-exporting is useful when the internal structure of your code is different
from how programmers calling your code would think about the domain. For
example, in this restaurant metaphor, the people running the restaurant think
about “front of house” and “back of house.” But customers visiting a restaurant
probably won’t think about the parts of the restaurant in those terms. With
use, we can write our code with one structure but expose a different
structure. Doing so makes our library well organized for programmers working on
the library and programmers calling the library.
Using External Packages in Cairo with Scarb
You might need to use external packages to leverage the functionality provided by the community. To use an external package in your project with Scarb, follow these steps:
The dependencies system is still a work in progress. You can check the official documentation.
Separating Modules into Different Files
So far, all the examples in this chapter defined multiple modules in one file. When modules get large, you might want to move their definitions to a separate file to make the code easier to navigate.
For example, let’s start from the code in Listing 7-11 that had multiple restaurant modules. We’ll extract modules into files instead of having all the modules defined in the crate root file. In this case, the crate root file is src/lib.cairo.
First, we’ll extract the front_of_house module to its own file. Remove the
code inside the curly brackets for the front_of_house module, leaving only
the mod front_of_house; declaration, so that src/lib.cairo contains the code
shown in Listing 7-12. Note that this won’t compile until we create the
src/front_of_house.cairo file in Listing 7-13.
Filename: src/lib.cairo
mod front_of_house;

use restaurant::front_of_house::hosting;

fn eat_at_restaurant() {
    hosting::add_to_waitlist();
}
Listing 7-12: Declaring the front_of_house module whose
body will be in src/front_of_house.cairo
Next, place the code that was in the curly brackets into a new file named
src/front_of_house.cairo, as shown in Listing 7-13. The compiler knows to look
in this file because it came across the module declaration in the crate root
with the name front_of_house.
Filename: src/front_of_house.cairo
mod hosting {
    fn add_to_waitlist() {}
}
Listing 7-13: Definitions inside the front_of_house
module in src/front_of_house.cairo
Note that you only need to load a file using a mod declaration once in your
module tree. Once the compiler knows the file is part of the project (and knows
where in the module tree the code resides because of where you’ve put the mod
statement), other files in your project should refer to the loaded file’s code
using a path to where it was declared, as covered in the “Paths for Referring
to an Item in the Module Tree” section. In other words,
mod is not an “include” operation that you may have seen in other
programming languages.
Next, we’ll extract the hosting module to its own file. The process is a bit
different because hosting is a child module of front_of_house, not of the
root module. We’ll place the file for hosting in a new directory that will be
named for its ancestors in the module tree, in this case src/front_of_house/.
To start moving hosting, we change src/front_of_house.cairo to contain only the
declaration of the hosting module:
Filename: src/front_of_house.cairo
mod hosting;Then we create a src/front_of_house directory and a file hosting.cairo to
contain the definitions made in the hosting module:
Filename: src/front_of_house/hosting.cairo
fn add_to_waitlist() {}If we instead put hosting.cairo in the src directory, the compiler would
expect the hosting.cairo code to be in a hosting module declared in the crate
root, and not declared as a child of the front_of_house module. The
compiler’s rules for which files to check for which modules’ code means the
directories and files more closely match the module tree.
We’ve moved each module’s code to a separate file, and the module tree remains
the same. The function calls in eat_at_restaurant will work without any
modification, even though the definitions live in different files. This
technique lets you move modules to new files as they grow in size.
Note that the use restaurant::front_of_house::hosting statement in
src/lib.cairo also hasn’t changed, nor does use have any impact on what files
are compiled as part of the crate. The mod keyword declares modules, and Cairo
looks in a file with the same name as the module for the code that goes into
that module.
Summary
Cairo lets you split a package into multiple crates and a crate into modules
so you can refer to items defined in one module from another module. You can do
this by specifying absolute or relative paths. These paths can be brought into
scope with a use statement so you can use a shorter path for multiple uses of
the item in that scope. Module code is public by default.
Generic Types and Traits
Every programming language has tools for effectively handling the duplication of concepts. In Cairo, one such tool is generics: abstract stand-ins for concrete types or other properties. We can express the behavior of generics or how they relate to other generics without knowing what will be in their place when compiling and running the code.
Functions, structs, enums and traits can incorporate generic types as part of their definition instead of a concrete type like u32 or ContractAddress.
Generics allow us to replace specific types with a placeholder that represents multiple types to remove code duplication.
For each concrete type that replaces a generic type the compiler creates a new definition, reducing development time for the programmer, but code duplication at compile level still exists. This may be of importance if you are writing Starknet contracts and using a generic for multiple types which will cause contract size to increment.
Then you’ll learn how to use traits to define behavior in a generic way. You can combine traits with generic types to constrain a generic type to accept only those types that have a particular behavior, as opposed to just any type.
Generic Data Types
We use generics to create definitions for item declarations, such as structs and functions, which we can then use with many different concrete data types. In Cairo we can use generics when defining functions, structs, enums, traits, implementations and methods! In this chapter we are going to take a look at how to effectively use generic types with all of them.
Generic Functions
When defining a function that uses generics, we place the generics in the function signature, where we would usually specify the data types of the parameter and return value. For example, imagine we want to create a function which given two Array of items, will return the largest one. If we need to perform this operation for lists of different types, then we would have to redefine the function each time. Luckily we can implement the function once using generics and move on to other tasks.
// Specify generic type T between the angulars
fn largest_list<T>(l1: Array<T>, l2: Array<T>) -> Array<T> {
    if l1.len() > l2.len() {
        l1
    } else {
        l2
    }
}

fn main() {
    let mut l1 = ArrayTrait::new();
    let mut l2 = ArrayTrait::new();

    l1.append(1);
    l1.append(2);

    l2.append(3);
    l2.append(4);
    l2.append(5);

    // There is no need to specify the concrete type of T because
    // it is inferred by the compiler
    let l3 = largest_list(l1, l2);
}
The largest_list function compares two lists of the same type and returns the one with more elements and drops the other. If you compile the previous code, you will notice that it will fail with an error saying that there are no traits defined for dropping an array of a generic type. This happens because the compiler has no way to guarantee that an Array<T> is droppable when executing the main function. In order to drop an array of T, the compiler must first know how to drop T. This can be fixed by specifying in the function signature of largest_list that T must implement the drop trait. The correct function definition of largest_list is as follows:
#![allow(unused)]
fn main() {
fn largest_list<T, +Drop<T>>(l1: Array<T>, l2: Array<T>) -> Array<T> {
    if l1.len() > l2.len() {
        l1
    } else {
        l2
    }
}
}
The new largest_list function includes in its definition the requirement that whatever generic type is placed there, it must be droppable. The main function remains unchanged, the compiler is smart enough to deduce which concrete type is being used and if it implements the Drop trait.
Constraints for Generic Types
When defining generic types, it is useful to have information about them. Knowing which traits a generic type implements allow us to use them more effectively in a functions logic at the cost of constraining the generic types that can be used with the function. We saw an example of this previously by adding the TDrop implementation as part of the generic arguments of largest_list. While TDrop was added to satisfy the compiler's requirements, we can also add constraints to benefit our function logic.
Imagine that we want, given a list of elements of some generic type T, to find the smallest element among them. Initially, we know that for an element of type T to be comparable, it must implement the PartialOrd trait. The resulting function would be:
// Given a list of T get the smallest one.
// The PartialOrd trait implements comparison operations for T
fn smallest_element<T, +PartialOrd<T>>(list: @Array<T>) -> T {
    // This represents the smallest element through the iteration
    // Notice that we use the desnap (*) operator
    let mut smallest = *list[0];

    // The index we will use to move through the list
    let mut index = 1;

    // Iterate through the whole list storing the smallest
    loop {
        if index >= list.len() {
            break smallest;
        }
        if *list[index] < smallest {
            smallest = *list[index];
        }
        index = index + 1;
    }
}

fn main() {
    let mut list: Array<u8> = ArrayTrait::new();
    list.append(5);
    list.append(3);
    list.append(10);

    // We need to specify that we are passing a snapshot of `list` as an argument
    let s = smallest_element(@list);
    assert(s == 3, 0);
}
The smallest_element function uses a generic type T that implements the PartialOrd trait, takes a snapshot of an Array<T> as a parameter and returns a copy of the smallest element. Because the parameter is of type @Array<T>, we no longer need to drop it at the end of the execution and so we don't require to implement the Drop trait for T as well. Why it does not compile then?
When indexing on list, the value results in a snap of the indexed element, unless PartialOrd is implemented for @T we need to desnap the element using *. The * operation requires a copy from @T toT, which means that T needs to implement the Copy trait. After copying an element of type @T to T, there are now variables with type T that need to be dropped, requiring for T to implement the Drop trait as well. We must then add both Drop and Copy traits implementation for the function to be correct. After updating thesmallest_element function the resulting code would be:
#![allow(unused)]
fn main() {
fn smallest_element<T, impl TPartialOrd: PartialOrd<T>, impl TCopy: Copy<T>, impl TDrop: Drop<T>>(
    list: @Array<T>
) -> T {
    let mut smallest = *list[0];
    let mut index = 1;
    loop {
        if index >= list.len() {
            break smallest;
        }
        if *list[index] < smallest {
            smallest = *list[index];
        }
        index = index + 1;
    }
}
}
Anonymous Generic Implementation Parameter (+ operator)
Until now, we have always specified a name for each implementation of the required generic trait: TPartialOrd for PartialOrd<T>, TDrop for Drop<T>, and TCopy for Copy<T>.
However, most of the time, we don't use the implementation in the function body; we only use it as a constraint. In these cases, we can use the + operator to specify that the generic type must implement a trait without naming the implementation. This is referred to as an anonymous generic implementation parameter.
For example, +PartialOrd<T> is equivalent to impl TPartialOrd: PartialOrd<T>.
We can rewrite the smallest_element function signature as follows:
#![allow(unused)]
fn main() {
fn smallest_element<T, +PartialOrd<T>, +Copy<T>, +Drop<T>>(list: @Array<T>) -> T {
    let mut smallest = *list[0];
    let mut index = 1;
    loop {
        if index >= list.len() {
            break smallest;
        }
        if *list[index] < smallest {
            smallest = *list[index];
        }
        index = index + 1;
    }
}
}
Structs
We can also define structs to use a generic type parameter for one or more fields using the <> syntax, similar to function definitions. First we declare the name of the type parameter inside the angle brackets just after the name of the struct. Then we use the generic type in the struct definition where we would otherwise specify concrete data types. The next code example shows the definition Wallet<T> which has a balance field of type T.
#[derive(Drop)]
struct Wallet<T> {
    balance: T
}


fn main() {
    let w = Wallet { balance: 3 };
}
The above code derives the Drop trait for the Wallet type automatically. It is equivalent to writing the following code:
struct Wallet<T> {
    balance: T
}

impl WalletDrop<T, +Drop<T>> of Drop<Wallet<T>>;

fn main() {
    let w = Wallet { balance: 3 };
}
We avoid using the derive macro for Drop implementation of Wallet and instead define our own WalletDrop implementation. Notice that we must define, just like functions, an additional generic type for WalletDrop saying that T implements the Drop trait as well. We are basically saying that the struct Wallet<T> is droppable as long as T is also droppable.
Finally, if we want to add a field to Wallet representing its address and we want that field to be different than T but generic as well, we can simply add another generic type between the <>:
#[derive(Drop)]
struct Wallet<T, U> {
    balance: T,
    address: U,
}

fn main() {
    let w = Wallet { balance: 3, address: 14 };
}
We add to Wallet struct definition a new generic type U and then assign this type to the new field member address. Notice that the derive attribute for the Drop trait works for U as well.
Enums
As we did with structs, we can define enums to hold generic data types in their variants. For example the Option<T> enum provided by the Cairo core library:
enum Option<T> {
    Some: T,
    None,
}
The Option<T> enum is generic over a type T and has two variants: Some, which holds one value of type T and None that doesn't hold any value. By using the Option<T> enum, it is possible for us to express the abstract concept of an optional value and because the value has a generic type T we can use this abstraction with any type.
Enums can use multiple generic types as well, like definition of the Result<T, E> enum that the core library provides:
enum Result<T, E> {
    Ok: T,
    Err: E,
}
The Result<T, E> enum has two generic types, T and E, and two variants: Ok which holds the value of type T and Err which holds the value of type E. This definition makes it convenient to use the Result enum anywhere we have an operation that might succeed (by returning a value of type T) or fail (by returning a value of type E).
Generic Methods
We can implement methods on structs and enums, and use the generic types in their definition, too. Using our previous definition of Wallet<T> struct, we define a balance method for it:
#[derive(Copy, Drop)]
struct Wallet<T> {
    balance: T
}

trait WalletTrait<T> {
    fn balance(self: @Wallet<T>) -> T;
}

impl WalletImpl<T, +Copy<T>> of WalletTrait<T> {
    fn balance(self: @Wallet<T>) -> T {
        return *self.balance;
    }
}

fn main() {
    let w = Wallet { balance: 50 };
    assert(w.balance() == 50, 0);
}
We first define WalletTrait<T> trait using a generic type T which defines a method that returns a snapshot of the field address from Wallet. Then we give an implementation for the trait in WalletImpl<T>. Note that you need to include a generic type in both definitions of the trait and the implementation.
We can also specify constraints on generic types when defining methods on the type. We could, for example, implement methods only for Wallet<u128> instances rather than Wallet<T>. In the code example we define an implementation for wallets which have a concrete type of u128 for the balance field.
#[derive(Copy, Drop)]
struct Wallet<T> {
    balance: T
}

/// Generic trait for wallets
trait WalletTrait<T> {
    fn balance(self: @Wallet<T>) -> T;
}

impl WalletImpl<T, +Copy<T>> of WalletTrait<T> {
    fn balance(self: @Wallet<T>) -> T {
        return *self.balance;
    }
}

/// Trait for wallets of type u128
trait WalletReceiveTrait {
    fn receive(ref self: Wallet<u128>, value: u128);
}

impl WalletReceiveImpl of WalletReceiveTrait {
    fn receive(ref self: Wallet<u128>, value: u128) {
        self.balance += value;
    }
}

fn main() {
    let mut w = Wallet { balance: 50 };
    assert(w.balance() == 50, 0);

    w.receive(100);
    assert(w.balance() == 150, 0);
}
The new method receive increments the size of the balance of any instance of a Wallet<u128>. Notice that we changed the main function making w a mutable variable in order for it to be able to update its balance. If we were to change the initialization of w by changing the type of balance the previous code wouldn't compile.
Cairo allows us to define generic methods inside generic traits as well. Using the past implementation from Wallet<U, V> we are going to define a trait that picks two wallets of different generic types and create a new one with a generic type of each. First, let's rewrite the struct definition:
struct Wallet<T, U> {
    balance: T,
    address: U,
}
Next we are going to naively define the mixup trait and implementation:
// This does not compile!
trait WalletMixTrait<T1, U1> {
    fn mixup<T2, U2>(self: Wallet<T1, U1>, other: Wallet<T2, U2>) -> Wallet<T1, U2>;
}

impl WalletMixImpl<T1, U1> of WalletMixTrait<T1, U1> {
    fn mixup<T2, U2>(self: Wallet<T1, U1>, other: Wallet<T2, U2>) -> Wallet<T1, U2> {
        Wallet { balance: self.balance, address: other.address }
    }
}
We are creating a trait WalletMixTrait<T1, U1> with the mixup<T2, U2> methods which given an instance of Wallet<T1, U1> and Wallet<T2, U2> creates a new Wallet<T1, U2>. As mixup signature specify, both self and other are getting dropped at the end of the function, which is the reason for this code not to compile. If you have been following from the start until now you would know that we must add a requirement for all the generic types specifying that they will implement the Drop trait in order for the compiler to know how to drop instances of Wallet<T, U>. The updated implementation is as follow:
#![allow(unused)]
fn main() {
trait WalletMixTrait<T1, U1> {
    fn mixup<T2, +Drop<T2>, U2, +Drop<U2>>(
        self: Wallet<T1, U1>, other: Wallet<T2, U2>
    ) -> Wallet<T1, U2>;
}

impl WalletMixImpl<T1, +Drop<T1>, U1, +Drop<U1>> of WalletMixTrait<T1, U1> {
    fn mixup<T2, +Drop<T2>, U2, +Drop<U2>>(
        self: Wallet<T1, U1>, other: Wallet<T2, U2>
    ) -> Wallet<T1, U2> {
        Wallet { balance: self.balance, address: other.address }
    }
}
}
We add the requirements for T1 and U1 to be droppable on WalletMixImpl declaration. Then we do the same for T2 and U2, this time as part of mixup signature. We can now try the mixup function:
fn main() {
    let w1 = Wallet { balance: true, address: 10 };
    let w2 = Wallet { balance: 32, address: 100 };

    let w3 = w1.mixup(w2);

    assert(w3.balance == true, 0);
    assert(w3.address == 100, 0);
}
We first create two instances: one of Wallet<bool, u128> and the other of Wallet<felt252, u8>. Then, we call mixup and create a new Wallet<bool, u8> instance.
Traits in Cairo
A trait defines a set of methods that can be implemented by a type. These methods can be called on instances of the type when this trait is implemented. A trait combined with a generic type defines functionality a particular type has and can share with other types. We can use traits to define shared behavior in an abstract way. We can use trait bounds to specify that a generic type can be any type that has certain behavior.
Note: Note: Traits are similar to a feature often called interfaces in other languages, although with some differences.
While traits can be written to not accept generic types, they are most useful when used with generic types. We already covered generics in the previous chapter, and we will use them in this chapter to demonstrate how traits can be used to define shared behavior for generic types.
Defining a Trait
A type’s behavior consists of the methods we can call on that type. Different types share the same behavior if we can call the same methods on all of those types. Trait definitions are a way to group method signatures together to define a set of behaviors necessary to accomplish some purpose.
For example, let’s say we have a struct NewsArticle that holds a news story in a particular location. We can define a trait Summary that describes the behavior of something that can summarize the NewsArticle type.
#[derive(Drop, Clone)]
struct NewsArticle {
    headline: ByteArray,
    location: ByteArray,
    author: ByteArray,
    content: ByteArray,
}

trait Summary {
    fn summarize(self: @NewsArticle) -> ByteArray;
}

impl NewsArticleSummary of Summary {
    fn summarize(self: @NewsArticle) -> ByteArray {
        format!("{:?} by {:?} ({:?})", self.headline, self.author, self.location)
    }
}
Here, we declare a trait using the trait keyword and then the trait’s name, which is Summary in this case.
Inside the curly brackets, we declare the method signatures that describe the behaviors of the types that implement this trait, which in this case is fn summarize(self: @NewsArticle) -> ByteArray. After the method signature, instead of providing an implementation within curly brackets, we use a semicolon.
Note: the
ByteArraytype is the type used to represent Strings in Cairo.
As the trait is not generic, the self parameter is not generic either and is of type @NewsArticle. This means that the summarize method can only be called on instances of NewsArticle.
Now, consider that we want to make a media aggregator library crate named aggregator that can display summaries of data that might be stored in a NewsArticle or Tweet instance. To do this, we need a summary from each type, and we’ll request that summary by calling a summarize method on an instance. By defining the Summary trait on generic type T, we can implement the summarize method on any type we want to be able to summarize.
use debug::PrintTrait;

mod aggregator {
    trait Summary<T> {
        fn summarize(self: @T) -> ByteArray;
    }

    #[derive(Drop, Clone)]
    struct NewsArticle {
        headline: ByteArray,
        location: ByteArray,
        author: ByteArray,
        content: ByteArray,
    }

    impl NewsArticleSummary of Summary<NewsArticle> {
        fn summarize(self: @NewsArticle) -> ByteArray {
            format!(
                "{} by {} ({})", self.headline.clone(), self.author.clone(), self.location.clone()
            )
        }
    }

    #[derive(Drop, Clone)]
    struct Tweet {
        username: ByteArray,
        content: ByteArray,
        reply: bool,
        retweet: bool,
    }

    impl TweetSummary of Summary<Tweet> {
        fn summarize(self: @Tweet) -> ByteArray {
            format!("{}: {}", self.username.clone(), self.content.clone())
        }
    }
}

use aggregator::{Summary, NewsArticle, Tweet};
fn main() {
    let news = NewsArticle {
        headline: "Cairo has become the most popular language for developers",
        location: "Worldwide",
        author: "Cairo Digger",
        content: "Cairo is a new programming language for zero-knowledge proofs",
    };

    let tweet = Tweet {
        username: "EliBenSasson",
        content: "Crypto is full of short-term maximizing projects. \n @Starknet and @StarkWareLtd are about long-term vision maximization.",
        reply: false,
        retweet: false
    }; // Tweet instantiation

    println!("New article available! {}", news.summarize());
    println!("1 new tweet: {}", tweet.summarize());
}
A Summary trait that consists of the behavior provided by a summarize method
Each generic type implementing this trait must provide its own custom behavior for the body of the method. The compiler will enforce that any type that has the Summary trait will have the method summarize defined with this signature exactly.
A trait can have multiple methods in its body: the method signatures are listed one per line and each line ends in a semicolon.
Implementing a Trait on a type
Now that we’ve defined the desired signatures of the Summary trait’s methods,
we can implement it on the types in our media aggregator. The next code snippet shows
an implementation of the Summary trait on the NewsArticle struct that uses
the headline, the author, and the location to create the return value of
summarize. For the Tweet struct, we define summarize as the username
followed by the entire text of the tweet, assuming that tweet content is
already limited to 280 characters.
use debug::PrintTrait;

mod aggregator {
    trait Summary<T> {
        fn summarize(self: @T) -> ByteArray;
    }

    #[derive(Drop, Clone)]
    struct NewsArticle {
        headline: ByteArray,
        location: ByteArray,
        author: ByteArray,
        content: ByteArray,
    }

    impl NewsArticleSummary of Summary<NewsArticle> {
        fn summarize(self: @NewsArticle) -> ByteArray {
            format!(
                "{} by {} ({})", self.headline.clone(), self.author.clone(), self.location.clone()
            )
        }
    }

    #[derive(Drop, Clone)]
    struct Tweet {
        username: ByteArray,
        content: ByteArray,
        reply: bool,
        retweet: bool,
    }

    impl TweetSummary of Summary<Tweet> {
        fn summarize(self: @Tweet) -> ByteArray {
            format!("{}: {}", self.username.clone(), self.content.clone())
        }
    }
}

use aggregator::{Summary, NewsArticle, Tweet};
fn main() {
    let news = NewsArticle {
        headline: "Cairo has become the most popular language for developers",
        location: "Worldwide",
        author: "Cairo Digger",
        content: "Cairo is a new programming language for zero-knowledge proofs",
    };

    let tweet = Tweet {
        username: "EliBenSasson",
        content: "Crypto is full of short-term maximizing projects. \n @Starknet and @StarkWareLtd are about long-term vision maximization.",
        reply: false,
        retweet: false
    }; // Tweet instantiation

    println!("New article available! {}", news.summarize());
    println!("1 new tweet: {}", tweet.summarize());
}
Implementing a trait on a type is similar to implementing regular methods. The
difference is that after impl, we put a name for the implementation,
then use the of keyword, and then specify the name of the trait we are writing the implementation for.
If the implementation is for a generic type, we place the generic type name in the angle brackets after the trait name.
Within the impl block, we put the method signatures
that the trait definition has defined. Instead of adding a semicolon after each
signature, we use curly brackets and fill in the method body with the specific
behavior that we want the methods of the trait to have for the particular type.
Now that the library has implemented the Summary trait on NewsArticle and
Tweet, users of the crate can call the trait methods on instances of
NewsArticle and Tweet in the same way we call regular methods. The only
difference is that the user must bring the trait into scope as well as the
types. Here’s an example of how a crate could use our aggregator crate:
use debug::PrintTrait;

mod aggregator {
    trait Summary<T> {
        fn summarize(self: @T) -> ByteArray;
    }

    #[derive(Drop, Clone)]
    struct NewsArticle {
        headline: ByteArray,
        location: ByteArray,
        author: ByteArray,
        content: ByteArray,
    }

    impl NewsArticleSummary of Summary<NewsArticle> {
        fn summarize(self: @NewsArticle) -> ByteArray {
            format!(
                "{} by {} ({})", self.headline.clone(), self.author.clone(), self.location.clone()
            )
        }
    }

    #[derive(Drop, Clone)]
    struct Tweet {
        username: ByteArray,
        content: ByteArray,
        reply: bool,
        retweet: bool,
    }

    impl TweetSummary of Summary<Tweet> {
        fn summarize(self: @Tweet) -> ByteArray {
            format!("{}: {}", self.username.clone(), self.content.clone())
        }
    }
}

use aggregator::{Summary, NewsArticle, Tweet};
fn main() {
    let news = NewsArticle {
        headline: "Cairo has become the most popular language for developers",
        location: "Worldwide",
        author: "Cairo Digger",
        content: "Cairo is a new programming language for zero-knowledge proofs",
    };

    let tweet = Tweet {
        username: "EliBenSasson",
        content: "Crypto is full of short-term maximizing projects. \n @Starknet and @StarkWareLtd are about long-term vision maximization.",
        reply: false,
        retweet: false
    }; // Tweet instantiation

    println!("New article available! {}", news.summarize());
    println!("1 new tweet: {}", tweet.summarize());
}
This code prints the following:
New article available! Cairo has become the most popular language for developers by Cairo Digger (Worldwide)

1 new tweet: EliBenSasson: Crypto is full of short-term maximizing projects.
 @Starknet and @StarkWareLtd are about long-term vision maximization.
Other crates that depend on the aggregator crate can also bring the Summary
trait into scope to implement Summary on their own types.
Implementing a trait, without writing its declaration.
You can write implementations directly without defining the corresponding trait. This is made possible by using the #[generate_trait] attribute within the implementation, which will make the compiler generate the trait corresponding to the implementation automatically. Remember to add Trait as a suffix to your trait name, as the compiler will create the trait by adding a Trait suffix to the implementation name.
struct Rectangle {
    height: u64,
    width: u64,
}

#[generate_trait]
impl RectangleGeometry of RectangleGeometryTrait {
    fn boundary(self: Rectangle) -> u64 {
        2 * (self.height + self.width)
    }
    fn area(self: Rectangle) -> u64 {
        self.height * self.width
    }
}
In the aforementioned code, there is no need to manually define the trait. The compiler will automatically handle its definition, dynamically generating and updating it as new functions are introduced.
Managing and using external trait implementations
To use traits methods, you need to make sure the correct traits/implementation(s) are imported. In the code above we imported PrintTrait from debug with use debug::PrintTrait; to use the print() methods on supported types.
In some cases you might need to import not only the trait but also the implementation if they are declared in separate modules.
If CircleGeometry was in a separate module/file circle then to use boundary on circ: Circle, we'd need to import CircleGeometry in addition to ShapeGeometry.
If the code was organized into modules like this, where the implementation of a trait was defined in a different module than the trait itself, explicitly importing the relevant implementation is required.
use debug::PrintTrait;

// struct Circle { ... } and struct Rectangle { ... }

mod geometry {
    use super::Rectangle;
    trait ShapeGeometry<T> {
        // ...
    }

    impl RectangleGeometry of ShapeGeometry<Rectangle> {
        // ...
    }
}

// Could be in a different file
mod circle {
    use super::geometry::ShapeGeometry;
    use super::Circle;
    impl CircleGeometry of ShapeGeometry<Circle> {
        // ...
    }
}

fn main() {
    let rect = Rectangle { height: 5, width: 7 };
    let circ = Circle { radius: 5 };
    // Fails with this error
    // Method `area` not found on... Did you import the correct trait and impl?
    rect.area().print();
    circ.area().print();
}
To make it work, in addition to,
#![allow(unused)]
fn main() {
use geometry::ShapeGeometry;
}
you will need to import CircleGeometry explicitly. Note that you do not need to import RectangleGeometry, as it is defined in the same module as the imported trait, and thus is automatically resolved.
#![allow(unused)]
fn main() {
use circle::CircleGeometry
}
Testing Cairo Programs
How To Write Tests
The Anatomy of a Test Function
Tests are Cairo functions that verify that the non-test code is functioning in the expected manner. The bodies of test functions typically perform these three actions:
- Set up any needed data or state.
- Run the code you want to test.
- Assert the results are what you expect.
Let’s look at the features Cairo provides specifically for writing tests that take these actions, which include the test attribute, the assert function, and the should_panic attribute.
The Anatomy of a Test Function
At its simplest, a test in Cairo is a function that’s annotated with the test attribute. Attributes are metadata about pieces of Cairo code; one example is the derive attribute we used with structs in Chapter 5. To change a function into a test function, add #[test] on the line before fn. When you run your tests with the scarb cairo-test command, Scarb runs Cairo's test runner binary that runs the annotated functions and reports on whether each test function passes or fails.
Let's create a new project called adder that will add two numbers using Scarb with the command scarb new adder:
adder
├── Scarb.toml
└── src
    └── lib.cairo
In lib.cairo, let's remove the existing content and add a first test, as shown in Listing 9-1.
Filename: src/lib.cairo
#![allow(unused)]
fn main() {
    #[test]
    fn it_works() {
        let result = 2 + 2;
        assert(result == 4, 'result is not 4');
    }
}
Listing 9-1: A test module and function
For now, let’s ignore the top two lines and focus on the function. Note the #[test] annotation: this attribute indicates this is a test function, so the test runner knows to treat this function as a test. We might also have non-test functions in the tests module to help set up common scenarios or perform common operations, so we always need to indicate which functions are tests.
The example function body uses the assert function, which contains the result of adding 2 and 2, equals 4. This assertion serves as an example of the format for a typical test. Let’s run it to see that this test passes.
The scarb cairo-test command runs all tests founds in our project, as shown in Listing 9-2.
$ scarb cairo-test
testing adder...
running 1 tests
test adder::lib::tests::it_works ... ok
test result: ok. 1 passed; 0 failed; 0 ignored; 0 filtered out;
Listing 9-2: The output from running a test
scarb cairo-test compiled and ran the test. We see the line running 1 tests. The next line shows the name of the test function, called it_works, and that the result of running that test is ok. The overall summary test result: ok. means that all the tests passed, and the portion that reads 1 passed; 0 failed totals the number of tests that passed or failed.
It’s possible to mark a test as ignored so it doesn’t run in a particular instance; we’ll cover that in the Ignoring Some Tests Unless Specifically Requested section later in this chapter. Because we haven’t done that here, the summary shows 0 ignored. We can also pass an argument to the scarb cairo-test command to run only a test whose name matches a string; this is called filtering and we’ll cover that in the Running Single Tests section. We also haven’t filtered the tests being run, so the end of the summary shows 0 filtered out.
Let’s start to customize the test to our own needs. First change the name of the it_works function to a different name, such as exploration, like so:
Filename: src/lib.cairo
#![allow(unused)]
fn main() {
    #[test]
    fn exploration() {
        let result = 2 + 2;
        assert(result == 4, 'result is not 4');
    }
}
Then run scarb cairo-test again. The output now shows exploration instead of it_works:
$ scarb cairo-test
running 1 tests
test adder::lib::tests::exploration ... ok
test result: ok. 1 passed; 0 failed; 0 ignored; 0 filtered out;
Now we’ll add another test, but this time we’ll make a test that fails! Tests fail when something in the test function panics. Each test is run in a new thread, and when the main thread sees that a test thread has died, the test is marked as failed. Enter the new test as a function named another, so your src/lib.cairo file looks like Listing 9-3.
#![allow(unused)]
fn main() {
    #[test]
    fn another() {
        let result = 2 + 2;
        assert(result == 6, 'Make this test fail');
    }

}
Listing 9-3: Adding a second test that will fail
$ scarb cairo-test
running 2 tests
test adder::lib::tests::exploration ... ok
test adder::lib::tests::another ... fail
failures:
    adder::lib::tests::another - panicked with [1725643816656041371866211894343434536761780588 ('Make this test fail'), ].
Error: test result: FAILED. 1 passed; 1 failed; 0 ignored
Listing 9-4: Test results when one test passes and one test fails
Instead of ok, the line adder::lib::tests::another shows fail. A new section appears between the individual results and the summary. It displays the detailed reason for each test failure. In this case, we get the details that another failed because it panicked with [1725643816656041371866211894343434536761780588 ('Make this test fail'), ] in the src/lib.cairo file.
The summary line displays at the end: overall, our test result is FAILED. We had one test pass and one test fail.
Now that you’ve seen what the test results look like in different scenarios, let’s look at some functions that are useful in tests.
Checking Results with the assert function
The assert function, provided by Cairo, is useful when you want to ensure that some condition in a test evaluates to true. We give the assert function a first argument that evaluates to a Boolean. If the value is true, nothing happens and the test passes. If the value is false, the assert function calls panic() to cause the test to fail with a message we defined as the second argument of the assert function. Using the assert function helps us check that our code is functioning in the way we intend.
In Chapter 5, Listing 5-15, we used a Rectangle struct and a can_hold method, which are repeated here in Listing 9-5. Let’s put this code in the src/lib.cairo file, then write some tests for it using the assert function.
Filename: src/lib.cairo
#![allow(unused)]
fn main() {
trait RectangleTrait {
    fn area(self: @Rectangle) -> u64;
    fn can_hold(self: @Rectangle, other: @Rectangle) -> bool;
}

impl RectangleImpl of RectangleTrait {
    fn area(self: @Rectangle) -> u64 {
        *self.width * *self.height
    }

    fn can_hold(self: @Rectangle, other: @Rectangle) -> bool {
        *self.width > *other.width && *self.height > *other.height
    }
}
}
Listing 9-5: Using the Rectangle struct and its can_hold method from Chapter 5
The can_hold method returns a bool, which means it’s a perfect use case for the assert function. In Listing 9-6, we write a test that exercises the can_hold method by creating a Rectangle instance that has a width of 8 and a height of 7 and asserting that it can hold another Rectangle instance that has a width of 5 and a height of 1.
Filename: src/lib.cairo
#![allow(unused)]
fn main() {
use debug::PrintTrait;
#[derive(Copy, Drop)]
struct Rectangle {
    width: u64,
    height: u64,
}

trait RectangleTrait {
    fn area(self: @Rectangle) -> u64;
    fn can_hold(self: @Rectangle, other: @Rectangle) -> bool;
}

impl RectangleImpl of RectangleTrait {
    fn area(self: @Rectangle) -> u64 {
        *self.width * *self.height
    }

    fn can_hold(self: @Rectangle, other: @Rectangle) -> bool {
        *self.width > *other.width && *self.height > *other.height
    }
}

#[cfg(test)]
mod tests {
    use super::Rectangle;
    use super::RectangleTrait;


    #[test]
    fn larger_can_hold_smaller() {
        let larger = Rectangle { height: 7, width: 8, };
        let smaller = Rectangle { height: 1, width: 5, };

        assert(larger.can_hold(@smaller), 'rectangle cannot hold');
    }

    #[test]
    fn smaller_cannot_hold_larger() {
        let larger = Rectangle { height: 7, width: 8, };
        let smaller = Rectangle { height: 1, width: 5, };

        assert(!smaller.can_hold(@larger), 'rectangle cannot hold');
    }
}


}
Listing 9-6: A test for can_hold that checks whether a larger rectangle can indeed hold a smaller rectangle
Note that we’ve added two new lines inside the tests module: use super::Rectangle; and use super::RectangleTrait;. The tests module is a regular module that follows the usual visibility rules. Because the tests module is an inner module, we need to bring the code under test in the outer module into the scope of the inner module.
We’ve named our test larger_can_hold_smaller, and we’ve created the two Rectangle instances that we need. Then we called the assert function and passed it the result of calling larger.can_hold(@smaller). This expression is supposed to return true, so our test should pass. Let’s find out!
$ scarb cairo-test
running 1 tests
test adder::lib::tests::larger_can_hold_smaller ... ok
test result: ok. 1 passed; 0 failed; 0 ignored; 0 filtered out;
It does pass! Let’s add another test, this time asserting that a smaller rectangle cannot hold a larger rectangle:
Filename: src/lib.cairo
#![allow(unused)] fn main() { use debug::PrintTrait; #[derive(Copy, Drop)] struct Rectangle { width: u64, height: u64, } trait RectangleTrait { fn area(self: @Rectangle) -> u64; fn can_hold(self: @Rectangle, other: @Rectangle) -> bool; } impl RectangleImpl of RectangleTrait { fn area(self: @Rectangle) -> u64 { *self.width * *self.height } fn can_hold(self: @Rectangle, other: @Rectangle) -> bool { *self.width > *other.width && *self.height > *other.height } } #[cfg(test)] mod tests { use super::Rectangle; use super::RectangleTrait; #[test] fn larger_can_hold_smaller() { let larger = Rectangle { height: 7, width: 8, }; let smaller = Rectangle { height: 1, width: 5, }; assert(larger.can_hold(@smaller), 'rectangle cannot hold'); } #[test] fn smaller_cannot_hold_larger() { let larger = Rectangle { height: 7, width: 8, }; let smaller = Rectangle { height: 1, width: 5, }; assert(!smaller.can_hold(@larger), 'rectangle cannot hold'); } } }
Because the correct result of the can_hold function in this case is false, we need to negate that result before we pass it to the assert function. As a result, our test will pass if can_hold returns false:
$ scarb cairo-test
running 2 tests
test adder::lib::tests::smaller_cannot_hold_larger ... ok
test adder::lib::tests::larger_can_hold_smaller ... ok
test result: ok. 2 passed; 0 failed; 0 ignored; 0 filtered out;
Two tests that pass! Now let’s see what happens to our test results when we introduce a bug in our code. We’ll change the implementation of the can_hold method by replacing the greater-than sign with a less-than sign when it compares the widths:
#![allow(unused)] fn main() { impl RectangleImpl of RectangleTrait { fn area(self: @Rectangle) -> u64 { *self.width * *self.height } fn can_hold(self: @Rectangle, other: @Rectangle) -> bool { *self.width < *other.width && *self.height > *other.height } } }
Running the tests now produces the following:
$ scarb cairo-test
running 2 tests
test adder::lib::tests::smaller_cannot_hold_larger ... ok
test adder::lib::tests::larger_can_hold_smaller ... fail
failures:
adder::lib::tests::larger_can_hold_smaller - panicked with [167190012635530104759003347567405866263038433127524 ('rectangle cannot hold'), ].
Error: test result: FAILED. 1 passed; 1 failed; 0 ignored
Our tests caught the bug! Because larger.width is 8 and smaller.width is 5, the comparison of the widths in can_hold now returns false: 8 is not less than 5.
Checking for panics with should_panic
In addition to checking return values, it’s important to check that our code handles error conditions as we expect. For example, consider the Guess type in Listing 9-8. Other code that uses Guess depends on the guarantee that Guess instances will contain only values between 1 and 100. We can write a test that ensures that attempting to create a Guess instance with a value outside that range panics.
We do this by adding the attribute should_panic to our test function. The test passes if the code inside the function panics; the test fails if the code inside the function doesn’t panic.
Listing 9-8 shows a test that checks that the error conditions of GuessTrait::new happen when we expect them to.
Filename: src/lib.cairo
#![allow(unused)] fn main() { #[derive(Copy, Drop)] struct Guess { value: u64, } trait GuessTrait { fn new(value: u64) -> Guess; } impl GuessImpl of GuessTrait { fn new(value: u64) -> Guess { if value < 1 || value > 100 { let mut data = ArrayTrait::new(); data.append('Guess must be >= 1 and <= 100'); panic(data); } Guess { value } } } #[cfg(test)] mod tests { use super::Guess; use super::GuessTrait; #[test] #[should_panic] fn greater_than_100() { GuessTrait::new(200); } } }
Listing 9-8: Testing that a condition will cause a panic
We place the #[should_panic] attribute after the #[test] attribute and before the test function it applies to. Let’s look at the result when this test passes:
$ scarb cairo-test
running 1 tests
test adder::lib::tests::greater_than_100 ... ok
test result: ok. 1 passed; 0 failed; 0 ignored; 0 filtered out;
Looks good! Now let’s introduce a bug in our code by removing the condition that the new function will panic if the value is greater than 100:
#![allow(unused)] fn main() { #[derive(Copy, Drop)] struct Guess { value: u64, } trait GuessTrait { fn new(value: u64) -> Guess; } impl GuessImpl of GuessTrait { fn new(value: u64) -> Guess { if value < 1 { let mut data = ArrayTrait::new(); data.append('Guess must be >= 1 and <= 100'); panic(data); } Guess { value, } } } }
When we run the test in Listing 9-8, it will fail:
$ scarb cairo-test
running 1 tests
test adder::lib::tests::greater_than_100 ... fail
failures:
adder::lib::tests::greater_than_100 - expected panic but finished successfully.
Error: test result: FAILED. 0 passed; 1 failed; 0 ignored
We don’t get a very helpful message in this case, but when we look at the test function, we see that it’s annotated with #[should_panic]. The failure we got means that the code in the test function did not cause a panic.
Tests that use should_panic can be imprecise. A should_panic test would pass even if the test panics for a different reason from the one we were expecting. To make should_panic tests more precise, we can add an optional expected parameter to the should_panic attribute. The test harness will make sure that the failure message contains the provided text. For example, consider the modified code for Guess in Listing 9-9 where the new function panics with different messages depending on whether the value is too small or too large.
Filename: src/lib.cairo
#![allow(unused)] fn main() { #[derive(Copy, Drop)] struct Guess { value: u64, } trait GuessTrait { fn new(value: u64) -> Guess; } impl GuessImpl of GuessTrait { fn new(value: u64) -> Guess { if value < 1 { panic_with_felt252('Guess must be >= 1'); } else if value > 100 { panic_with_felt252('Guess must be <= 100'); } Guess { value, } } } #[cfg(test)] mod tests { use super::Guess; use super::GuessTrait; #[test] #[should_panic(expected: ('Guess must be <= 100',))] fn greater_than_100() { GuessTrait::new(200); } } }
Listing 9-9: Testing for a panic with a panic message containing the error message string
This test will pass because the value we put in the should_panic attribute’s expected parameter is the array of string of the message that the Guess::new function panics with. We need to specify the entire panic message that we expect.
To see what happens when a should_panic test with an expected message fails, let’s again introduce a bug into our code by swapping the bodies of the if value < 1 and the else if value > 100 blocks:
#![allow(unused)] fn main() { impl GuessImpl of GuessTrait { fn new(value: u64) -> Guess { if value < 1 { let mut data = ArrayTrait::new(); data.append('Guess must be >= 1'); panic(data); } else if value > 100 { let mut data = ArrayTrait::new(); data.append('Guess must be <= 100'); panic(data); } Guess { value, } } } #[cfg(test)] mod tests { use super::Guess; use super::GuessTrait; #[test] #[should_panic(expected: ('Guess must be <= 100',))] fn greater_than_100() { GuessTrait::new(200); } } }
This time when we run the should_panic test, it will fail:
$ scarb cairo-test
running 1 tests
test adder::lib::tests::greater_than_100 ... fail
failures:
adder::lib::tests::greater_than_100 - panicked with [6224920189561486601619856539731839409791025 ('Guess must be >= 1'), ].
Error: test result: FAILED. 0 passed; 1 failed; 0 ignored
The failure message indicates that this test did indeed panic as we expected, but the panic message did not include the expected string. The panic message that we did get in this case was Guess must be >= 1. Now we can start figuring out where our bug is!
Running Single Tests
Sometimes, running a full test suite can take a long time. If you’re working on code in a particular area, you might want to run only the tests pertaining to that code. You can choose which tests to run by passing scarb cairo-test an option -f (for "filter"), followed by the name of the test you want to run as an argument.
To demonstrate how to run a single test, we’ll first create two tests functions, as shown in Listing 9-10, and choose which ones to run.
Filename: src/lib.cairo
#![allow(unused)] fn main() { #[cfg(test)] mod tests { #[test] fn add_two_and_two() { let result = 2 + 2; assert(result == 4, 'result is not 4'); } #[test] fn add_three_and_two() { let result = 3 + 2; assert(result == 5, 'result is not 5'); } } }
Listing 9-10: Two tests with two different names
We can pass the name of any test function to cairo-test to run only that test using the -f flag:
$ scarb cairo-test -f add_two_and_two
running 1 tests
test adder::lib::tests::add_two_and_two ... ok
test result: ok. 1 passed; 0 failed; 0 ignored; 1 filtered out;
Only the test with the name add_two_and_two ran; the other test didn’t match that name. The test output lets us know we had one more test that didn’t run by displaying 1 filtered out at the end.
We can also specify part of a test name, and any test whose name contains that value will be run.
Ignoring Some Tests Unless Specifically Requested
Sometimes a few specific tests can be very time-consuming to execute, so you might want to exclude them during most runs of scarb cairo-test. Rather than listing as arguments all tests you do want to run, you can instead annotate the time-consuming tests using the ignore attribute to exclude them, as shown here:
Filename: src/lib.cairo
#![allow(unused)] fn main() { #[cfg(test)] mod tests { #[test] fn it_works() { let result = 2 + 2; assert(result == 4, 'result is not 4'); } #[test] #[ignore] fn expensive_test() { // code that takes an hour to run } } }
After #[test] we add the #[ignore] line to the test we want to exclude. Now when we run our tests, it_works runs, but expensive_test doesn’t:
$ scarb cairo-test
running 2 tests
test adder::lib::tests::expensive_test ... ignored
test adder::lib::tests::it_works ... ok
test result: ok. 1 passed; 0 failed; 1 ignored; 0 filtered out;
The expensive_test function is listed as ignored.
When you’re at a point where it makes sense to check the results of the ignored tests and you have time to wait for the results, you can run scarb cairo-test --include-ignored to run all tests whether they’re ignored or not.
Testing recursive functions or loops
When testing recursive functions or loops, you must provide the test with a maximum amount of gas that it can consume. This prevents running infinite loops or consuming too much gas, and can help you benchmark the efficiency of your implementations. To do so, you must add the #[available_gas(<Number>)] attribute on the test function. The following example shows how to use it:
Filename: src/lib.cairo
#![allow(unused)] fn main() { fn sum_n(n: usize) -> usize { let mut i = 0; let mut sum = 0; loop { if i == n { sum += i; break; }; sum += i; i += 1; }; sum } #[cfg(test)] mod test { use super::sum_n; #[test] #[available_gas(2000000)] fn test_sum_n() { let result = sum_n(10); assert(result == 55, 'result is not 55'); } } }
Benchmarking the gas usage of a specific operation
When you want to benchmark the gas usage of a specific operation, you can use the following pattern in your test function.
#![allow(unused)] fn main() { let initial = testing::get_available_gas(); gas::withdraw_gas().unwrap(); /// code we want to bench. (testing::get_available_gas() - x).print(); }
The following example shows how to use it to test the gas function of the sum_n function above.
#![allow(unused)] fn main() { fn sum_n(n: usize) -> usize { let mut i = 0; let mut sum = 0; loop { if i == n { sum += i; break; }; sum += i; i += 1; }; sum } #[cfg(test)] mod test { use super::sum_n; use debug::PrintTrait; #[test] #[available_gas(2000000)] fn benchmark_sum_n_gas() { let initial = testing::get_available_gas(); gas::withdraw_gas().unwrap(); /// code we want to bench. let result = sum_n(10); (initial - testing::get_available_gas()).print(); } } }
The value printed when running scarb cairo-test is the amount of gas that was consumed by the operation benchmarked.
$ scarb cairo-test
testing no_listing_09_benchmark_gas ...
running 1 tests
[DEBUG] (raw: 0x179f8
test no_listing_09_benchmark_gas::benchmark_sum_n_gas ... ok (gas usage est.: 98030)
test result: ok. 1 passed; 0 failed; 0 ignored; 0 filtered out;
Here, the gas usage of the sum_n function is 96760 (decimal representation of the hex number). The total amount consumed by the test is slightly higher at 98030, due to some extra steps required to run the entire test function.
Testing Organization
We'll think about tests in terms of two main categories: unit tests and integration tests. Unit tests are small and more focused, testing one module in isolation at a time, and can test private functions. Although Cairo doesn't implement the concept of public/private functions/fields yet, it's good practice to start organizing your code as if it were. Integration tests use your code in the same way any other external code would, using only the public interface and potentially exercising multiple modules per test.
Writing both kinds of tests is important to ensure that the pieces of your library are doing what you expect them to, separately and together.
Unit Tests
The purpose of unit tests is to test each unit of code in isolation from the rest of the code to quickly pinpoint where code is and isn’t working as expected. You’ll put unit tests in the src directory in each file with the code that they’re testing.
The convention is to create a module named tests in each file to contain the test functions and to annotate the module with cfg(test).
The Tests Module and #[cfg(test)]
The #[cfg(test)] annotation on the tests module tells Cairo to compile and run the test code only when you run scarb cairo-test, not when you run cairo-run. This saves compile time when you only want to build the library and saves space in the resulting compiled artifact because the tests are not included. You’ll see that because integration tests go in a different directory, they don’t need the #[cfg(test)] annotation. However, because unit tests go in the same files as the code, you’ll use #[cfg(test)] to specify that they shouldn’t be included in the compiled result.
Recall that when we created the new adder project in the first section of this chapter, we wrote this first test:
#![allow(unused)] fn main() { #[cfg(test)] mod tests { #[test] fn it_works() { let result = 2 + 2; assert(result == 4, 'result is not 4'); } } }
Filename: src/lib.cairo
The attribute cfg stands for configuration and tells Cairo that the following item should only be included given a certain configuration option. In this case, the configuration option is test, which is provided by Cairo for compiling and running tests. By using the cfg attribute, Cairo compiles our test code only if we actively run the tests with scarb cairo-test. This includes any helper functions that might be within this module, in addition to the functions annotated with #[test].
Integration Tests
Integration tests use your library in the same way any other code would. Their purpose is to test whether many parts of your library work together correctly. Units of code that work correctly on their own could have problems when integrated, so test coverage of the integrated code is important as well. To create integration tests, you first need a tests directory.
The tests Directory
adder
├── Scarb.toml
├── src
│ ├── lib.cairo
│ ├── tests
│ │ └── integration_test.cairo
│ └── tests.cairo
#![allow(unused)] fn main() { #[cfg(test)] mod tests; fn it_adds_two(a: u8, b: u8) -> u8 { a + b } }
Filename: src/lib.cairo
#![allow(unused)] fn main() { #[cfg(tests)] mod integration_tests; }
Filename: src/tests.cairo
Enter the code in Listing 9-11 into the src/tests/integration_test.cairo file:
#![allow(unused)] fn main() { use adder::it_adds_two; #[test] #[available_gas(2000000)] fn internal() { assert(it_adds_two(2, 2) == 4, 'internal_adder failed'); } }
Filename: src/tests/integration_test.cairo
We need to bring our tested functions into each test file scope. For that reason we add use adder::it_adds_two at the top of the code, which we didn’t need in the unit tests.
Then, to run all of our integration tests, we can just add a filter to only run tests whose path contains "integration_tests".
$ scarb test -f integration_tests
Running cairo-test adder
testing adder ...
running 1 tests
test adder::tests::integration_tests::internal ... ok (gas usage est.: 3770)
test result: ok. 1 passed; 0 failed; 0 ignored; 0 filtered out;
The result of the tests is the same as what we've been seeing: one line for each test.
Error handling
In this chapter, we will explore various error handling techniques provided by Cairo, which not only allow you to address potential issues in your code, but also make it easier to create programs that are adaptable and maintainable. By examining different approaches to managing errors, such as pattern matching with the Result enum, using the ? operator for more ergonomic error propagation, and employing the unwrap or expect methods for handling recoverable errors, you'll gain a deeper understanding of Cairo's error handling features. These concepts are crucial for building robust applications that can effectively handle unexpected situations, ensuring your code is ready for production.
Unrecoverable Errors with panic
In Cairo, unexpected issues may arise during program execution, resulting in runtime errors. While the panic function from the core library doesn't provide a resolution for these errors, it does acknowledge their occurrence and terminates the program. There are two primary ways that a panic can be triggered in Cairo: inadvertently, through actions causing the code to panic (e.g., accessing an array beyond its bounds), or deliberately, by invoking the panic function.
When a panic occurs, it leads to an abrupt termination of the program. The panic function takes an array as an argument, which can be used to provide an error message and performs an unwind process where all variables are dropped and dictionaries squashed to ensure the soundness of the program to safely terminate the execution.
Here is how we can panic from inside a program and return the error code 2:
Filename: src/lib.cairo
use debug::PrintTrait; fn main() { let mut data = ArrayTrait::new(); data.append(2); if true == true { panic(data); } 'This line isn\'t reached'.print(); }
Running the program will produce the following output:
$ scarb cairo-run
Run panicked with [2 (''), ].
As you can notice in the output, the print statement is never reached, as the program terminates after encountering the panic statement.
An alternative and more idiomatic approach to panic in Cairo would be to use the panic_with_felt252 function. This function serves as an abstraction of the array-defining process and is often preferred due to its clearer and more concise expression of intent. By using panic_with_felt252, developers can panic in a one-liner by providing a felt252 error message as an argument, making the code more readable and maintainable.
Let's consider an example:
fn main() { panic_with_felt252(2); }
Executing this program will yield the same error message as before. In that case, if there is no need for an array and multiple values to be returned within the error, so panic_with_felt252 is a more succinct alternative.
nopanic notation
You can use the nopanic notation to indicate that a function will never panic. Only nopanic functions can be called in a function annotated as nopanic.
Example:
fn function_never_panic() -> felt252 nopanic {
42
}Wrong example:
fn function_never_panic() nopanic {
assert(1 == 1, 'what');
}If you write the following function that includes a function that may panic you will get the following error:
error: Function is declared as nopanic but calls a function that may panic.
--> test.cairo:2:12
assert(1 == 1, 'what');
^****^
Function is declared as nopanic but calls a function that may panic.
--> test.cairo:2:5
assert(1 == 1, 'what');
^********************^
Note that there are two functions that may panic here, assert and equality.
panic_with attribute
You can use the panic_with attribute to mark a function that returns an Option or Result. This attribute takes two arguments, which are the data that is passed as the panic reason as well as the name for a wrapping function. It will create a wrapper for your annotated function which will panic if the function returns None or Err, the panic function will be called with the given data.
Example:
#[panic_with('value is 0', wrap_not_zero)] fn wrap_if_not_zero(value: u128) -> Option<u128> { if value == 0 { Option::None } else { Option::Some(value) } } fn main() { wrap_if_not_zero(0); // this returns None wrap_not_zero(0); // this panic with 'value is 0' }
Using assert
The assert function from the Cairo core library is actually a utility function based on panics. It asserts that a boolean expression is true at runtime, and if it is not, it calls the panic function with an error value. The assert function takes two arguments: the boolean expression to verify, and the error value. The error value is specified as a felt252, so any string passed must be able to fit inside a felt252.
Here is an example of its usage:
fn main() { let my_number: u8 = 0; assert(my_number != 0, 'number is zero'); 100 / my_number; }
We are asserting in main that my_number is not zero to ensure that we're not performing a division by 0.
In this example, my_number is zero so the assertion will fail, and the program will panic
with the string 'number is zero' (as a felt252) and the division will not be reached.
Recoverable Errors with Result
Most errors aren’t serious enough to require the program to stop entirely. Sometimes, when a function fails, it’s for a reason that you can easily interpret and respond to. For example, if you try to add two large integers and the operation overflows because the sum exceeds the maximum representable value, you might want to return an error or a wrapped result instead of causing undefined behavior or terminating the process.
The Result enum
Recall from “Generic data types” in Chapter 8 that the Result enum is defined as having two variants, Ok and Err, as follows:
enum Result<T, E> {
Ok: T,
Err: E,
}The Result<T, E> enum has two generic types, T and E, and two variants: Ok which holds the value of type T and Err which holds the value of type E. This definition makes it convenient to use the Result enum anywhere we have an operation that might succeed (by returning a value of type T) or fail (by returning a value of type E).
The ResultTrait
The ResultTrait trait provides methods for working with the Result<T, E> enum, such as unwrapping values, checking whether the Result is Ok or Err, and panicking with a custom message. The ResultTraitImpl implementation defines the logic of these methods.
trait ResultTrait<T, E> {
fn expect<+Drop<E>>(self: Result<T, E>, err: felt252) -> T;
fn unwrap<+Drop<E>>(self: Result<T, E>) -> T;
fn expect_err<+Drop<T>>(self: Result<T, E>, err: felt252) -> E;
fn unwrap_err<+Drop<T>>(self: Result<T, E>) -> E;
fn is_ok(self: @Result<T, E>) -> bool;
fn is_err(self: @Result<T, E>) -> bool;
}The expect and unwrap methods are similar in that they both attempt to extract the value of type T from a Result<T, E> when it is in the Ok variant. If the Result is Ok(x), both methods return the value x. However, the key difference between the two methods lies in their behavior when the Result is in the Err variant. The expect method allows you to provide a custom error message (as a felt252 value) that will be used when panicking, giving you more control and context over the panic. On the other hand, the unwrap method panics with a default error message, providing less information about the cause of the panic.
The expect_err and unwrap_err have the exact opposite behavior. If the Result is Err(x), both methods return the value x. However, the key difference between the two methods is in case of Result::Ok(). The expect_err method allows you to provide a custom error message (as a felt252 value) that will be used when panicking, giving you more control and context over the panic. On the other hand, the unwrap_err method panics with a default error message, providing less information about the cause of the panic.
A careful reader may have noticed the <+Drop<T>> and <+Drop<E>> in the first four methods signatures. This syntax represents generic type constraints in the Cairo language. These constraints indicate that the associated functions require an implementation of the Drop trait for the generic types T and E, respectively.
Finally, the is_ok and is_err methods are utility functions provided by the ResultTrait trait to check the variant of a Result enum value.
is_ok takes a snapshot of a Result<T, E> value and returns true if the Result is the Ok variant, meaning the operation was successful. If the Result is the Err variant, it returns false.
is_err takes a reference to a Result<T, E> value and returns true if the Result is the Err variant, meaning the operation encountered an error. If the Result is the Ok variant, it returns false.
These methods are helpful when you want to check the success or failure of an operation without consuming the Result value, allowing you to perform additional operations or make decisions based on the variant without unwrapping it.
You can find the implementation of the ResultTrait here.
It is always easier to understand with examples.
Have a look at this function signature:
fn u128_overflowing_add(a: u128, b: u128) -> Result<u128, u128>;It takes two u128 integers, a and b, and returns a Result<u128, u128> where the Ok variant holds the sum if the addition does not overflow, and the Err variant holds the overflowed value if the addition does overflow.
Now, we can use this function elsewhere. For instance:
fn u128_checked_add(a: u128, b: u128) -> Option<u128> {
match u128_overflowing_add(a, b) {
Result::Ok(r) => Option::Some(r),
Result::Err(r) => Option::None,
}
}Here, it accepts two u128 integers, a and b, and returns an Option<u128>. It uses the Result returned by u128_overflowing_add to determine the success or failure of the addition operation. The match expression checks the Result from u128_overflowing_add. If the result is Ok(r), it returns Option::Some(r) containing the sum. If the result is Err(r), it returns Option::None to indicate that the operation has failed due to overflow. The function does not panic in case of an overflow.
Let's take another example demonstrating the use of unwrap.
First we import the necessary modules:
use core::traits::Into;
use traits::TryInto;
use option::OptionTrait;
use result::ResultTrait;
use result::ResultTraitImpl;In this example, the parse_u8 function takes a felt252 integer and tries to convert it into a u8 integer using the try_into method. If successful, it returns Result::Ok(value), otherwise it returns Result::Err('Invalid integer').
fn parse_u8(s: felt252) -> Result<u8, felt252> {
match s.try_into() {
Option::Some(value) => Result::Ok(value),
Option::None => Result::Err('Invalid integer'),
}
}Listing 10-1: Using the Result type
Our two test cases are:
fn parse_u8(s: felt252) -> Result<u8, felt252> {
match s.try_into() {
Option::Some(value) => Result::Ok(value),
Option::None => Result::Err('Invalid integer'),
}
}
#[cfg(test)]
mod tests {
use super::parse_u8;
#[test]
fn test_felt252_to_u8() {
let number: felt252 = 5_felt252;
// should not panic
let res = parse_u8(number).unwrap();
}
#[test]
#[should_panic]
fn test_felt252_to_u8_panic() {
let number: felt252 = 256_felt252;
// should panic
let res = parse_u8(number).unwrap();
}
}
The first one tests a valid conversion from felt252 to u8, expecting the unwrap method not to panic. The second test function attempts to convert a value that is out of the u8 range, expecting the unwrap method to panic with the error message 'Invalid integer'.
We could have also used the #[should_panic] attribute here.
The ? operator ?
The last operator we will talk about is the ? operator. The ? operator is used for more idiomatic and concise error handling. When you use the ? operator on a Result or Option type, it will do the following:
- If the value is
Result::Ok(x)orOption::Some(x), it will return the inner valuexdirectly. - If the value is
Result::Err(e)orOption::None, it will propagate the error orNoneby immediately returning from the function.
The ? operator is useful when you want to handle errors implicitly and let the calling function deal with them.
Here is an example.
fn do_something_with_parse_u8(input: felt252) -> Result<u8, felt252> {
let input_to_u8: u8 = parse_u8(input)?;
// DO SOMETHING
let res = input_to_u8 - 1;
Result::Ok(res)
}Listing 10-1: Using the ? operator
do_something_with_parse_u8 function takes a felt252 value as input and calls parse_u8. The ? operator is used to propagate the error, if any, or unwrap the successful value.
And with a little test case:
fn parse_u8(s: felt252) -> Result<u8, felt252> {
match s.try_into() {
Option::Some(value) => Result::Ok(value),
Option::None => Result::Err('Invalid integer'),
}
}
fn do_something_with_parse_u8(input: felt252) -> Result<u8, felt252> {
let input_to_u8: u8 = parse_u8(input)?;
// DO SOMETHING
let res = input_to_u8 - 1;
Result::Ok(res)
}
#[cfg(test)]
mod tests {
use super::do_something_with_parse_u8;
use debug::PrintTrait;
#[test]
fn test_function_2() {
let number: felt252 = 258_felt252;
match do_something_with_parse_u8(number) {
Result::Ok(value) => value.print(),
Result::Err(e) => e.print()
}
}
}
The console will print the error "Invalid Integer".
Summary
We saw that recoverable errors can be handled in Cairo using the Result enum, which has two variants: Ok and Err. The Result<T, E> enum is generic, with types T and E representing the successful and error values, respectively. The ResultTrait provides methods for working with Result<T, E>, such as unwrapping values, checking if the result is Ok or Err, and panicking with custom messages.
To handle recoverable errors, a function can return a Result type and use pattern matching to handle the success or failure of an operation. The ? operator can be used to implicitly handle errors by propagating the error or unwrapping the successful value. This allows for more concise and clear error handling, where the caller is responsible for managing errors raised by the called function.
Advanced Features
Now, let's learn about more advanced features offered by Cairo.
Operator Overloading
Operator overloading is a feature in some programming languages that allows the redefinition of standard operators, such as addition (+), subtraction (-), multiplication (*), and division (/), to work with user-defined types. This can make the syntax of the code more intuitive, by enabling operations on user-defined types to be expressed in the same way as operations on primitive types.
In Cairo, operator overloading is achieved through the implementation of specific traits. Each operator has an associated trait, and overloading that operator involves providing an implementation of that trait for a custom type. However, it's essential to use operator overloading judiciously. Misuse can lead to confusion, making the code more difficult to maintain, for example when there is no semantic meaning to the operator being overloaded.
Consider an example where two Potions need to be combined. Potions have two data fields, mana and health. Combining two Potions should add their respective fields.
struct Potion { health: felt252, mana: felt252 } impl PotionAdd of Add<Potion> { fn add(lhs: Potion, rhs: Potion) -> Potion { Potion { health: lhs.health + rhs.health, mana: lhs.mana + rhs.mana, } } } fn main() { let health_potion: Potion = Potion { health: 100, mana: 0 }; let mana_potion: Potion = Potion { health: 0, mana: 100 }; let super_potion: Potion = health_potion + mana_potion; // Both potions were combined with the `+` operator. assert(super_potion.health == 100, ''); assert(super_potion.mana == 100, ''); }
In the code above, we're implementing the Add trait for the Potion type. The add function takes two arguments: lhs and rhs (left and right-hand side). The function body returns a new Potion instance, its field values being a combination of lhs and rhs.
As illustrated in the example, overloading an operator requires specification of the concrete type being overloaded. The overloaded generic trait is Add<T>, and we define a concrete implementation for the type Potion with Add<Potion>.
Macros
The Cairo language has some plugins that allows developers to simplify their code. They are called inline_macros and are a way of writing code that generates other code. In Cairo, there are only two macros: array![] and consteval_int!().
Let's start by array!
Sometimes, we need to create arrays with values that are already known at compile time. The basic way of doing that is redundant. You would first declare the array and then append each value one by one. array! is a simpler way of doing this task by combining the two steps.
At compile-time, the compiler will create an array and append all values passed to the array! macro sequentially.
Without array!:
#![allow(unused)] fn main() { let mut arr = ArrayTrait::new(); arr.append(1); arr.append(2); arr.append(3); arr.append(4); arr.append(5); }
With array!:
#![allow(unused)] fn main() { let arr = array![1, 2, 3, 4, 5]; }
consteval_int!
In some situations, a developer might need to declare a constant that is the result of a computation of integers. To compute a constant expression and use its result at compile time, it is required to use the consteval_int! macro.
Here is an example of consteval_int!:
#![allow(unused)] fn main() { const a: felt252 = consteval_int!(2 * 2 * 2); }
This will be interpreted as const a: felt252 = 8; by the compiler.
Hashes
At its essence, hashing is a process of converting input data (often called a message) of any length into a fixed-size value, typically referred to as a "hash." This transformation is deterministic, meaning that the same input will always produce the same hash value. Hash functions are a fundamental component in various fields, including data storage, cryptography, and data integrity verification - and are very often when developing smart contracts, especially when working with Merkle trees.
In this chapter, we will present the two hash functions implemented in natively in the Cairo library : Poseidon and Pedersen. We will discuss about when and how to use them, and see examples with cairo programs.
Hash functions in Cairo
The Cairo core library provides two hash functions: Pedersen and Poseidon.
Pedersen hash functions are cryptographic algorithms that rely on elliptic curve cryptography. These functions perform operations on points along an elliptic curve — essentially, doing math with the locations of these points — which are easy to do in one direction and hard to undo. This one-way difficulty is based on the Elliptic Curve Discrete Logarithm Problem (ECDLP), which is a problem so hard to solve that it ensures the security of the hash function. The difficulty of reversing these operations is what makes the Pedersen hash function secure and reliable for cryptographic purposes.
Poseidon is a family of hash functions designed for being very efficient as algebraic circuits. Its design is particularly efficient for Zero-Knowledge proof systems, including STARKs (so, Cairo). Poseidon uses a method called a 'sponge construction,' which soaks up data and transforms it securely using a process known as the Hades permutation. Cairo's version of Poseidon is based on a three element state permutation with specific parameters
When to use them ?
Pedersen was the first hash function used on Starknet, and is still used to compute the addresses of variables in storage (for example, LegacyMap uses Pedersen to hash the keys of a storage mapping on Starknet). However, as Poseidon is cheaper and faster than Pedersen when working with STARK proofs system, it's now the recommended hash function to use in Cairo programs.
Working with Hashes
The core library makes it easy to work with hashes. The Hash trait is implemented for all types that can be converted to felt252, including felt252 itself. For more complex types like structs, deriving Hash allows them to be hashed easily using the hash function of your choice - given that all of the struct's fields are themselves hashable. You cannot derive the Hash trait on a struct that contains un-hashable values, such as Array<T> or a Felt252Dict<T>, even if T itself is hashable.
The Hash trait is accompanied by the HashStateTrait that defines the basic methods to work with hashes. They allow you to initialize a hash state that will contain the temporary values of the hash after each application of the hash function; update the hash state, and finalize it when the computation is completed. HashStateTrait is defined as follows:
#![allow(unused)] fn main() { /// A trait for hash state accumulators. trait HashStateTrait<S> { fn update(self: S, value: felt252) -> S; fn finalize(self: S) -> felt252; } /// A trait for values that can be hashed. trait Hash<T, S, +HashStateTrait<S>> { /// Updates the hash state with the given value. fn update_state(state: S, value: T) -> S; } }
To use hashes in your code, you must first import the relevant traits and functions. In the following example, we will demonstrate how to hash a struct using both the Pedersen and Poseidon hash functions.
The first step is to initialize the hash with either PoseidonTrait::new() -> HashState or PedersenTrait::new(base: felt252) -> HashState depending on which hash function we want to work with. Then the hash state can be updated with the update(self: HashState, value: felt252) -> HashState or update_with(self: S, value: T) -> S functions as many times as required. Then the function finalize(self: HashState) -> felt252 is called on the hash state and it returns the value of the hash as a felt252.
#![allow(unused)] fn main() { use pedersen::PedersenTrait; use poseidon::PoseidonTrait; use hash::{HashStateTrait, HashStateExTrait}; }
#![allow(unused)] fn main() { #[derive(Drop, Hash)] struct StructForHash { first: felt252, second: felt252, third: (u32, u32), last: bool, } }
As our struct derives the trait HashTrait, we can call the function as follow for Poseidon hashing :
use pedersen::PedersenTrait; use poseidon::PoseidonTrait; use hash::{HashStateTrait, HashStateExTrait}; #[derive(Drop, Hash)] struct StructForHash { first: felt252, second: felt252, third: (u32, u32), last: bool, } fn main() -> felt252 { let struct_to_hash = StructForHash { first: 0, second: 1, third: (1, 2), last: false }; let hash = PoseidonTrait::new().update_with(struct_to_hash).finalize(); hash }
And as follow for Pedersen hashing :
use pedersen::PedersenTrait; use poseidon::PoseidonTrait; use hash::{HashStateTrait, HashStateExTrait}; #[derive(Drop, Hash)] struct StructForHash { first: felt252, second: felt252, third: (u32, u32), last: bool, } fn main() -> felt252 { let struct_to_hash = StructForHash { first: 0, second: 1, third: (1, 2), last: false }; let hash = PedersenTrait::new(0).update_with(struct_to_hash).finalize(); hash }
Advanced Hashing: Hashing arrays with Poseidon
Let us look at an example of hashing a function that contains an Span<felt252>.
To hash a Span<felt252> or a struct that contains a Span<felt252> you can use the build-in function in poseidon
poseidon_hash_span(mut span: Span<felt252>) -> felt252. Similarly you can hash Array<felt252> by calling poseidon_hash_span on its span.
First let us import the following trait and function :
#![allow(unused)] fn main() { use poseidon::PoseidonTrait; use poseidon::poseidon_hash_span; use hash::{HashStateTrait, HashStateExTrait}; }
Now we define the structure, as you might have notice we didn't derived the Hash trait. If you try to derive the Hash trait on this structure it will rise an error because the structure contains a field not hashable.
#[derive(Drop)]
struct StructForHashArray {
first: felt252,
second: felt252,
third: Array<felt252>,
}
In this example, we initialized a HashState (hash) and updateted it and then called the function finalize() on the
HashState to get the computed hash hash_felt252. We used the poseidon_hash_span on the Span of the Array<felt252> to compute its hash.
use poseidon::PoseidonTrait; use poseidon::poseidon_hash_span; use hash::{HashStateTrait, HashStateExTrait}; #[derive(Drop)] struct StructForHashArray { first: felt252, second: felt252, third: Array<felt252>, } fn main() { let struct_to_hash = StructForHashArray { first: 0, second: 1, third: array![1, 2, 3, 4, 5] }; let mut hash = PoseidonTrait::new().update(struct_to_hash.first).update(struct_to_hash.second); let hash_felt252 = hash.update(poseidon_hash_span(struct_to_hash.third.span())).finalize(); }
Starknet Smart Contracts
All through the previous sections, you've mostly written programs with a main entrypoint. In the coming sections, you will learn to write and deploy Starknet contracts.
One of the applications of the Cairo language is to write smart contracts for the Starknet network. Starknet is a permissionless network that leverages zk-STARKs technology for scalability. As a Layer-2 scalability solution for Ethereum, Starknet's goal is to offer fast, secure, and low-cost transactions. It functions as a Validity Rollup (commonly known as a zero-knowledge Rollup) and is built on top of the Cairo language and the Starknet VM.
Starknet contracts, in simple words, are programs that can run on the Starknet VM. Since they run on the VM, they have access to Starknet’s persistent state, can alter or modify variables in Starknet’s states, communicate with other contracts, and interact seamlessly with the underlying L1.
Starknet contracts are denoted by the #[contract] attribute. We'll dive deeper into this in the next sections.
If you want to learn more about the Starknet network itself, its architecture and the tooling available, you should read the Starknet Book. This section will focus on writing smart contracts in Cairo.
Scarb
Scarb supports smart contract development for Starknet. To enable this functionality, you'll need to make some configurations in your Scarb.toml file (see Installation for how to install Scarb).
You have to add the starknet dependency and add a [[target.starknet-contract]] section to enable contract compilation.
Below is the minimal Scarb.toml file required to compile a crate containing Starknet contracts:
[package]
name = "package_name"
version = "0.1.0"
[dependencies]
starknet = ">=2.4.0"
[[target.starknet-contract]]
For additional configuration, such as external contract dependencies, please refer to the Scarb documentation.
Each example in this chapter can be used with Scarb.
Introduction to smart-contracts
This chapter will give you a high level introduction to what smart-contracts are, what are they used for and why would blockchain developers use Cairo and Starknet. If you are already familiar with blockchain programming, feel free to skip this chapter. The last part might still be interesting though.
Smart-contracts
Smart contracts gained popularity and became more widespread with the birth of Ethereum. Smart contracts are essentially programs deployed on a blockchain. The term "smart contract" is somewhat misleading, as they are neither "smart" nor "contracts" but rather code and instructions that are executed based on specific inputs. They primarily consist of two components: storage and functions. Once deployed, users can interact with smart contracts by initiating blockchain transactions containing execution data (which function to call and with what input). Smart contracts can modify and read the storage of the underlying blockchain. A smart contract has its own address and is considered a blockchain account, meaning it can hold tokens.
The programming language used to write smart contracts varies depending on the blockchain. For example, on Ethereum and the EVM-compatible ecosystem, the most commonly used language is Solidity, while on Starknet, it is Cairo. The way the code is compiled also differs based on the blockchain. On Ethereum, Solidity is compiled into bytecode. On Starknet, Cairo is compiled into Sierra and then into Cairo Assembly (casm).
Smart contracts possess several unique characteristics. They are permissionless, meaning anyone can deploy a smart contract on the network (within the context of a decentralized blockchain, of course). Smart contracts are also transparent; the data stored by the smart contract is accessible to anyone. The code that composes the contract can also be transparent, enabling composability. This allows developers to write smart contracts that use other smart contracts. Smart contracts can only access and interact with data from the blockchain they are deployed on. They require third-party software (called oracles) to access external data (the price of a token for instance).
For developers to build smart contracts that can interact with each other, it is required to know what the other contracts look like. Hence, Ethereum developers started to build standards for smart contract development, the ERCxx. The two most used and famous standards are the ERC20, used to build tokens like USDC, DAI or STARK, and the ERC721, for NFTs (Non-fungible tokens) like CryptoPunks or Everai.
Use cases
There are many possible use cases for smart-contracts. The only limits are the technical constraints of the blockchain and the creativity of developers.
DeFi
Right now, the principal use case for smart contracts is similar to that of Ethereum or Bitcoin, which is essentially handling money. In the context of the alternative payment system promised by Bitcoin, smart contracts on Ethereum enable the creation of decentralized financial applications that no longer rely on traditional financial intermediaries. This is what we call DeFi (decentralized finance). DeFi consists of various projects such as lending/borrowing apps, decentralized exchanges (DEX), on-chain derivatives, stablecoins, decentralized hedge funds, insurance, and many more.
Tokenization
Smart contracts can facilitate the tokenization of real-world assets, such as real estate, art, or precious metals. Tokenization divides an asset into digital tokens, which can be easily traded and managed on blockchain platforms. This can increase liquidity, enable fractional ownership, and simplify the buying and selling process.
Voting
Smart contracts can be used to create secure and transparent voting systems. Votes can be recorded on the blockchain, ensuring immutability and transparency. The smart contract can then automatically tally the votes and declare the results, minimizing the potential for fraud or manipulation.
Royalties
Smart contracts can automate royalty payments for artists, musicians, and other content creators. When a piece of content is consumed or sold, the smart contract can automatically calculate and distribute the royalties to the rightful owners, ensuring fair compensation and reducing the need for intermediaries.
Decentralized identities DIDs
Smart contracts can be used to create and manage digital identities, allowing individuals to control their personal information and share it with third parties securely. The smart contract could verify the authenticity of a user's identity and automatically grant or revoke access to specific services based on the user's credentials.
As Ethereum continues to mature, we can expect the use cases and applications of smart contracts to expand further, bringing about exciting new opportunities and reshaping traditional systems for the better.
The rise of Starknet and Cairo
Ethereum, being the most widely used and resilient smart-contract platform, became a victim of its own success. With the rapid adoption of some previously mentioned use cases, mainly DeFi, the cost of performing transactions became extremely high, rendering the network almost unusable. Engineers and researchers in the ecosystem began working on solutions to address this scalability issue.
A famous trilemma (The Blockchain Trilemma) in the blockchain space states that it is impossible to achieve a high level of scalability, decentralization, and security simultaneously; trade-offs must be made. Ethereum is at the intersection of decentralization and security. Eventually, it was decided that Ethereum's purpose would be to serve as a secure settlement layer, while complex computations would be offloaded to other networks built on top of Ethereum. These are called Layer 2s (L2s).
The two primary types of L2s are optimistic rollups and validity rollups. Both approaches involve compressing and batching numerous transactions together, computing the new state, and settling the result on Ethereum (L1). The difference lies in the way the result is settled on L1. For optimistic rollups, the new state is considered valid by default, but there is a 7-day window for nodes to identify malicious transactions.
In contrast, validity rollups, such as Starknet, use cryptography to prove that the new state has been correctly computed. This is the purpose of STARKs, this cryptographic technology could permit validity rollups to scale significantly more than optimistic rollups. You can learn more about STARKs from Starkware's Medium article, which serves as a good primer.
Starknet's architecture is thoroughly described in the Starknet Book, which is a great resource to learn more about the Starknet network.
Remember Cairo? It is, in fact, a language developed specifically to work with STARKs and make them general-purpose. With Cairo, we can write provable code. In the context of Starknet, this allows proving the correctness of computations from one state to another.
Unlike most (if not all) of Starknet's competitors that chose to use the EVM (either as-is or adapted) as a base layer, Starknet employs its own VM. This frees developers from the constraints of the EVM, opening up a broader range of possibilities. Coupled with decreased transaction costs, the combination of Starknet and Cairo creates an exciting playground for developers. Native account abstraction enables more complex logic for accounts, that we call "Smart Accounts", and transaction flows. Emerging use cases include transparent AI and machine learning applications. Finally, blockchain games can be developed entirely on-chain. Starknet has been specifically designed to maximize the capabilities of STARK proofs for optimal scalability.
Learn more about Account Abstraction in the Starknet Book.
Cairo programs and Starknet contracts: what is the difference?
Starknet contracts are a special superset of Cairo programs, so the concepts previously learned in this book are still applicable to write Starknet contracts.
As you may have already noticed, a Cairo program must always have a function main that serves as the entry point for this program:
fn main() {}
Starknet contracts are essentially programs that can run on the Starknet OS, and as such, have access to Starknet's state. For a module to be handled as a contract by the compiler, it must be annotated with the #[starknet::contract] attribute.
A simple contract
This chapter will introduce you to the basics of Starknet contracts with an example of a basic contract. You will learn how to write a simple contract that stores a single number on the blockchain.
Anatomy of a simple Starknet Contract
Let's consider the following contract to present the basics of a Starknet contract. It might not be easy to understand it all at once, but we will go through it step by step:
#![allow(unused)] fn main() { #[starknet::interface] trait ISimpleStorage<TContractState> { fn set(ref self: TContractState, x: u128); fn get(self: @TContractState) -> u128; } #[starknet::contract] mod SimpleStorage { use starknet::get_caller_address; use starknet::ContractAddress; #[storage] struct Storage { stored_data: u128 } #[external(v0)] impl SimpleStorage of super::ISimpleStorage<ContractState> { fn set(ref self: ContractState, x: u128) { self.stored_data.write(x); } fn get(self: @ContractState) -> u128 { self.stored_data.read() } } } }
Listing 99-1: A simple storage contract
Note: Starknet contracts are defined within modules.
What is this contract?
In this example, the Storage struct declares a storage variable called stored_data of type u128 (unsigned integer of 128 bits).
You can think of it as a single slot in a database that you can query and alter by calling functions of the code that manages the database.
The contract defines and exposes publicly the functions set and get that can be used to modify or retrieve the value of that variable.
The Interface: the contract's blueprint
#[starknet::interface]
trait ISimpleStorage<TContractState> {
fn set(ref self: TContractState, x: u128);
fn get(self: @TContractState) -> u128;
}The interface of a contract represents the functions this contract exposes to the outside world. Here, the interface exposes two functions: set and get. By leveraging the traits & impls mechanism from Cairo, we can make sure that the actual implementation of the contract matches its interface. In fact, you will get a compilation error if your contract doesn’t conform with the declared interface.
#[external(v0)]
impl SimpleStorage of super::ISimpleStorage<ContractState> {
fn set(ref self: ContractState) {}
fn get(self: @ContractState) -> u128 {
self.stored_data.read()
}
}Listing 99-1-bis: A wrong implementation of the interface of the contract. This does not compile.
In the interface, note the generic type TContractState of the self argument which is passed by reference to the set function. The self parameter represents the contract state. Seeing the self argument passed to set tells us that this function might access the state of the contract, as it is what gives us access to the contract’s storage. The ref modifier implies that self may be modified, meaning that the storage variables of the contract may be modified inside the set function.
On the other hand, get takes a snapshot of TContractState, which immediately tells us that it does not modify the state (and indeed, the compiler will complain if we try to modify storage inside the get function).
Public functions are defined in an implementation block
Before we explore things further down, let's define some terminology.
-
In the context of Starknet, a public function is a function that is exposed to the outside world. In the example above,
setandgetare public functions. A public function can be called by anyone, and can be called from outside the contract, or from within the contract. In the example above,setandgetare public functions. -
What we call an external function is a public function that is invoked through a transaction and that can mutate the state of the contract.
setis an external function. -
A view function is a public function that can be called from outside the contract, but that cannot mutate the state of the contract.
getis a view function.
#[external(v0)]
impl SimpleStorage of super::ISimpleStorage<ContractState> {
fn set(ref self: ContractState, x: u128) {
self.stored_data.write(x);
}
fn get(self: @ContractState) -> u128 {
self.stored_data.read()
}
}Since the contract interface is defined as the ISimpleStorage trait, in order to match the interface, the external functions of the contract
must be defined in an implementation of this trait — which allows us to make sure that the implementation of the contract matches its interface.
However, simply defining the functions in the implementation is not enough. The implementation block must be annotated with the #[external(v0)] attribute. This attribute exposes the functions defined in this implementation to the outside world — forget to add it and your functions will not be callable from the outside. All functions defined in a block marked as #[external(v0)] are consequently public functions.
When writing the implementation of the interface, the generic parameter corresponding to the self argument in the trait must be ContractState. The ContractState type is generated by the compiler, and gives access to the storage variables defined in the Storage struct.
Additionally, ContractState gives us the ability to emit events. The name ContractState is not surprising, as it’s a representation of the contract’s state, which is what we think of self in the contract interface trait.
Modifying the contract's state
As you can notice, all functions that need to access the state of the contract are defined under the implementation of a trait that has a TContractState generic parameter, and take a self: ContractState parameter.
This allows us to explicitly pass the self: ContractState parameter to the function, allowing access the storage variables of the contract.
To access a storage variable of the current contract, you add the self prefix to the storage variable name, which allows you to use the read and write methods to either read or write the value of the storage variable.
fn set(ref self: ContractState, x: u128) {
self.stored_data.write(x);
}Using self and the write method to modify the value of a storage variable
Note: if the contract state is passed as a snapshot instead of
ref, attempting to modify will result in a compilation error.
This contract does not do much yet apart from allowing anyone to store a single number that is accessible by anyone in the world. Anyone could call set again with a different value and overwrite your number, but the number is still stored in the history of the blockchain. Later, you will see how you can impose access restrictions so that only you can alter the number.
A deeper dive into contracts
In the previous section, we gave an introductory example of a smart contract written in Cairo. In this section, we'll be taking a deeper look at all the components of a smart contract, step by step.
When we discussed interfaces, we specified the difference between public functions, external functions and view functions, and we mentioned how to interact with storage.
At this point, you should have multiple questions that come to mind:
- How do I define internal/private functions?
- How can I emit events? How can I index them?
- Where should I define functions that do not need to access the contract's state?
- Is there a way to reduce the boilerplate?
- How can I store more complex data types?
Luckily, we'll be answering all these questions in this chapter. Let's consider the following example contract that we'll be using throughout this chapter:
use starknet::ContractAddress;
#[starknet::interface]
trait INameRegistry<TContractState> {
fn store_name(
ref self: TContractState, name: felt252, registration_type: NameRegistry::RegistrationType
);
fn get_name(self: @TContractState, address: ContractAddress) -> felt252;
fn get_owner(self: @TContractState) -> NameRegistry::Person;
}
#[starknet::contract]
mod NameRegistry {
use starknet::{ContractAddress, get_caller_address};
#[storage]
struct Storage {
names: LegacyMap::<ContractAddress, felt252>,
registration_type: LegacyMap::<ContractAddress, RegistrationType>,
total_names: u128,
owner: Person
}
#[event]
#[derive(Drop, starknet::Event)]
enum Event {
StoredName: StoredName,
}
#[derive(Drop, starknet::Event)]
struct StoredName {
#[key]
user: ContractAddress,
name: felt252
}
#[derive(Copy, Drop, Serde, starknet::Store)]
struct Person {
name: felt252,
address: ContractAddress
}
#[derive(Drop, Serde, starknet::Store)]
enum RegistrationType {
finite: u64,
infinite
}
#[constructor]
fn constructor(ref self: ContractState, owner: Person) {
self.names.write(owner.address, owner.name);
self.total_names.write(1);
self.owner.write(owner);
}
#[external(v0)]
impl NameRegistry of super::INameRegistry<ContractState> {
fn store_name(ref self: ContractState, name: felt252, registration_type: RegistrationType) {
let caller = get_caller_address();
self._store_name(caller, name, registration_type);
}
fn get_name(self: @ContractState, address: ContractAddress) -> felt252 {
let name = self.names.read(address);
name
}
fn get_owner(self: @ContractState) -> Person {
let owner = self.owner.read();
owner
}
}
#[generate_trait]
impl InternalFunctions of InternalFunctionsTrait {
fn _store_name(
ref self: ContractState,
user: ContractAddress,
name: felt252,
registration_type: RegistrationType
) {
let mut total_names = self.total_names.read();
self.names.write(user, name);
self.registration_type.write(user, registration_type);
self.total_names.write(total_names + 1);
self.emit(StoredName { user: user, name: name });
}
}
fn get_contract_name() -> felt252 {
'Name Registry'
}
fn get_owner_storage_address(self: @ContractState) -> starknet::StorageBaseAddress {
self.owner.address()
}
}Listing 99-1bis: Our reference contract for this chapter
Contract Storage
The most common way for interacting with a contract’s storage is through storage variables. As stated previously, storage variables allow you to store data that will be stored in the contract's storage that is itself stored on the blockchain. These data are persistent and can be accessed and modified anytime once the contract is deployed.
Storage variables in Starknet contracts are stored in a special struct called Storage:
use starknet::ContractAddress;
#[starknet::interface]
trait INameRegistry<TContractState> {
fn store_name(
ref self: TContractState, name: felt252, registration_type: NameRegistry::RegistrationType
);
fn get_name(self: @TContractState, address: ContractAddress) -> felt252;
fn get_owner(self: @TContractState) -> NameRegistry::Person;
}
#[starknet::contract]
mod NameRegistry {
use starknet::{ContractAddress, get_caller_address};
#[storage]
struct Storage {
names: LegacyMap::<ContractAddress, felt252>,
registration_type: LegacyMap::<ContractAddress, RegistrationType>,
total_names: u128,
owner: Person
}
#[event]
#[derive(Drop, starknet::Event)]
enum Event {
StoredName: StoredName,
}
#[derive(Drop, starknet::Event)]
struct StoredName {
#[key]
user: ContractAddress,
name: felt252
}
#[derive(Copy, Drop, Serde, starknet::Store)]
struct Person {
name: felt252,
address: ContractAddress
}
#[derive(Drop, Serde, starknet::Store)]
enum RegistrationType {
finite: u64,
infinite
}
#[constructor]
fn constructor(ref self: ContractState, owner: Person) {
self.names.write(owner.address, owner.name);
self.total_names.write(1);
self.owner.write(owner);
}
#[external(v0)]
impl NameRegistry of super::INameRegistry<ContractState> {
fn store_name(ref self: ContractState, name: felt252, registration_type: RegistrationType) {
let caller = get_caller_address();
self._store_name(caller, name, registration_type);
}
fn get_name(self: @ContractState, address: ContractAddress) -> felt252 {
let name = self.names.read(address);
name
}
fn get_owner(self: @ContractState) -> Person {
let owner = self.owner.read();
owner
}
}
#[generate_trait]
impl InternalFunctions of InternalFunctionsTrait {
fn _store_name(
ref self: ContractState,
user: ContractAddress,
name: felt252,
registration_type: RegistrationType
) {
let mut total_names = self.total_names.read();
self.names.write(user, name);
self.registration_type.write(user, registration_type);
self.total_names.write(total_names + 1);
self.emit(StoredName { user: user, name: name });
}
}
fn get_contract_name() -> felt252 {
'Name Registry'
}
fn get_owner_storage_address(self: @ContractState) -> starknet::StorageBaseAddress {
self.owner.address()
}
}
A Storage Struct
The storage struct is a struct like any other,
except that it must be annotated with #[storage]. This annotation tells the compiler to generate the required code to interact with the blockchain state, and allows you to read and write data from and to storage. Moreover, this allows you to define storage mappings using the LegacyMap type.
Each variable stored in the storage struct is stored in a different location in the contract's storage. The storage address of a variable is determined by the variable's name, and the eventual keys of the variable if it is a mapping.
Storage Addresses
The address of a storage variable is computed as follows:
- If the variable is a single value (not a mapping), the address is the
sn_keccakhash of the ASCII encoding of the variable's name.sn_keccakis Starknet's version of the Keccak256 hash function, whose output is truncated to 250 bits. - If the variable is a mapping, the address of the value at key
k_1,...,k_nish(...h(h(sn_keccak(variable_name),k_1),k_2),...,k_n)where ℎ is the Pedersen hash and the final value is takenmod (2^251) − 256. - If it is a mapping to complex values (e.g., tuples or structs), then this complex value lies in a continuous segment starting from the address calculated in the previous point. Note that 256 field elements is the current limitation on the maximal size of a complex storage value.
You can access the address of a storage variable by calling the address function on the variable, which returns a StorageBaseAddress value.
use starknet::ContractAddress;
#[starknet::interface]
trait INameRegistry<TContractState> {
fn store_name(
ref self: TContractState, name: felt252, registration_type: NameRegistry::RegistrationType
);
fn get_name(self: @TContractState, address: ContractAddress) -> felt252;
fn get_owner(self: @TContractState) -> NameRegistry::Person;
}
#[starknet::contract]
mod NameRegistry {
use starknet::{ContractAddress, get_caller_address};
#[storage]
struct Storage {
names: LegacyMap::<ContractAddress, felt252>,
registration_type: LegacyMap::<ContractAddress, RegistrationType>,
total_names: u128,
owner: Person
}
#[event]
#[derive(Drop, starknet::Event)]
enum Event {
StoredName: StoredName,
}
#[derive(Drop, starknet::Event)]
struct StoredName {
#[key]
user: ContractAddress,
name: felt252
}
#[derive(Copy, Drop, Serde, starknet::Store)]
struct Person {
name: felt252,
address: ContractAddress
}
#[derive(Drop, Serde, starknet::Store)]
enum RegistrationType {
finite: u64,
infinite
}
#[constructor]
fn constructor(ref self: ContractState, owner: Person) {
self.names.write(owner.address, owner.name);
self.total_names.write(1);
self.owner.write(owner);
}
#[external(v0)]
impl NameRegistry of super::INameRegistry<ContractState> {
fn store_name(ref self: ContractState, name: felt252, registration_type: RegistrationType) {
let caller = get_caller_address();
self._store_name(caller, name, registration_type);
}
fn get_name(self: @ContractState, address: ContractAddress) -> felt252 {
let name = self.names.read(address);
name
}
fn get_owner(self: @ContractState) -> Person {
let owner = self.owner.read();
owner
}
}
#[generate_trait]
impl InternalFunctions of InternalFunctionsTrait {
fn _store_name(
ref self: ContractState,
user: ContractAddress,
name: felt252,
registration_type: RegistrationType
) {
let mut total_names = self.total_names.read();
self.names.write(user, name);
self.registration_type.write(user, registration_type);
self.total_names.write(total_names + 1);
self.emit(StoredName { user: user, name: name });
}
}
fn get_contract_name() -> felt252 {
'Name Registry'
}
fn get_owner_storage_address(self: @ContractState) -> starknet::StorageBaseAddress {
self.owner.address()
}
}
Interacting with Storage Variables
Variables stored in the storage struct can be accessed and modified using the read and write functions, and you can get their address in storage using the addr function. These functions are automatically generated by the compiler for each storage variable.
To read the value of the owner storage variable, which is a single value, we call the read function on the owner variable, passing in no parameters.
use starknet::ContractAddress;
#[starknet::interface]
trait INameRegistry<TContractState> {
fn store_name(
ref self: TContractState, name: felt252, registration_type: NameRegistry::RegistrationType
);
fn get_name(self: @TContractState, address: ContractAddress) -> felt252;
fn get_owner(self: @TContractState) -> NameRegistry::Person;
}
#[starknet::contract]
mod NameRegistry {
use starknet::{ContractAddress, get_caller_address};
#[storage]
struct Storage {
names: LegacyMap::<ContractAddress, felt252>,
registration_type: LegacyMap::<ContractAddress, RegistrationType>,
total_names: u128,
owner: Person
}
#[event]
#[derive(Drop, starknet::Event)]
enum Event {
StoredName: StoredName,
}
#[derive(Drop, starknet::Event)]
struct StoredName {
#[key]
user: ContractAddress,
name: felt252
}
#[derive(Copy, Drop, Serde, starknet::Store)]
struct Person {
name: felt252,
address: ContractAddress
}
#[derive(Drop, Serde, starknet::Store)]
enum RegistrationType {
finite: u64,
infinite
}
#[constructor]
fn constructor(ref self: ContractState, owner: Person) {
self.names.write(owner.address, owner.name);
self.total_names.write(1);
self.owner.write(owner);
}
#[external(v0)]
impl NameRegistry of super::INameRegistry<ContractState> {
fn store_name(ref self: ContractState, name: felt252, registration_type: RegistrationType) {
let caller = get_caller_address();
self._store_name(caller, name, registration_type);
}
fn get_name(self: @ContractState, address: ContractAddress) -> felt252 {
let name = self.names.read(address);
name
}
fn get_owner(self: @ContractState) -> Person {
let owner = self.owner.read();
owner
}
}
#[generate_trait]
impl InternalFunctions of InternalFunctionsTrait {
fn _store_name(
ref self: ContractState,
user: ContractAddress,
name: felt252,
registration_type: RegistrationType
) {
let mut total_names = self.total_names.read();
self.names.write(user, name);
self.registration_type.write(user, registration_type);
self.total_names.write(total_names + 1);
self.emit(StoredName { user: user, name: name });
}
}
fn get_contract_name() -> felt252 {
'Name Registry'
}
fn get_owner_storage_address(self: @ContractState) -> starknet::StorageBaseAddress {
self.owner.address()
}
}
Calling the read function on the owner variable
To read the value of the storage variable names, which is a mapping from ContractAddress to felt252, we call the read function on the names variable, passing in the key address as a parameter. If the mapping had more than one key, we would pass in the other keys as parameters as well.
use starknet::ContractAddress;
#[starknet::interface]
trait INameRegistry<TContractState> {
fn store_name(
ref self: TContractState, name: felt252, registration_type: NameRegistry::RegistrationType
);
fn get_name(self: @TContractState, address: ContractAddress) -> felt252;
fn get_owner(self: @TContractState) -> NameRegistry::Person;
}
#[starknet::contract]
mod NameRegistry {
use starknet::{ContractAddress, get_caller_address};
#[storage]
struct Storage {
names: LegacyMap::<ContractAddress, felt252>,
registration_type: LegacyMap::<ContractAddress, RegistrationType>,
total_names: u128,
owner: Person
}
#[event]
#[derive(Drop, starknet::Event)]
enum Event {
StoredName: StoredName,
}
#[derive(Drop, starknet::Event)]
struct StoredName {
#[key]
user: ContractAddress,
name: felt252
}
#[derive(Copy, Drop, Serde, starknet::Store)]
struct Person {
name: felt252,
address: ContractAddress
}
#[derive(Drop, Serde, starknet::Store)]
enum RegistrationType {
finite: u64,
infinite
}
#[constructor]
fn constructor(ref self: ContractState, owner: Person) {
self.names.write(owner.address, owner.name);
self.total_names.write(1);
self.owner.write(owner);
}
#[external(v0)]
impl NameRegistry of super::INameRegistry<ContractState> {
fn store_name(ref self: ContractState, name: felt252, registration_type: RegistrationType) {
let caller = get_caller_address();
self._store_name(caller, name, registration_type);
}
fn get_name(self: @ContractState, address: ContractAddress) -> felt252 {
let name = self.names.read(address);
name
}
fn get_owner(self: @ContractState) -> Person {
let owner = self.owner.read();
owner
}
}
#[generate_trait]
impl InternalFunctions of InternalFunctionsTrait {
fn _store_name(
ref self: ContractState,
user: ContractAddress,
name: felt252,
registration_type: RegistrationType
) {
let mut total_names = self.total_names.read();
self.names.write(user, name);
self.registration_type.write(user, registration_type);
self.total_names.write(total_names + 1);
self.emit(StoredName { user: user, name: name });
}
}
fn get_contract_name() -> felt252 {
'Name Registry'
}
fn get_owner_storage_address(self: @ContractState) -> starknet::StorageBaseAddress {
self.owner.address()
}
}
Calling the read function on the names variable
To write a value to a storage variable, we call the write function passing in the eventual keys the value as arguments. As with the read function, the number of arguments depends on the number of keys - here, we only pass in the value to write to the owner variable as it is a simple variable.
use starknet::ContractAddress;
#[starknet::interface]
trait INameRegistry<TContractState> {
fn store_name(
ref self: TContractState, name: felt252, registration_type: NameRegistry::RegistrationType
);
fn get_name(self: @TContractState, address: ContractAddress) -> felt252;
fn get_owner(self: @TContractState) -> NameRegistry::Person;
}
#[starknet::contract]
mod NameRegistry {
use starknet::{ContractAddress, get_caller_address};
#[storage]
struct Storage {
names: LegacyMap::<ContractAddress, felt252>,
registration_type: LegacyMap::<ContractAddress, RegistrationType>,
total_names: u128,
owner: Person
}
#[event]
#[derive(Drop, starknet::Event)]
enum Event {
StoredName: StoredName,
}
#[derive(Drop, starknet::Event)]
struct StoredName {
#[key]
user: ContractAddress,
name: felt252
}
#[derive(Copy, Drop, Serde, starknet::Store)]
struct Person {
name: felt252,
address: ContractAddress
}
#[derive(Drop, Serde, starknet::Store)]
enum RegistrationType {
finite: u64,
infinite
}
#[constructor]
fn constructor(ref self: ContractState, owner: Person) {
self.names.write(owner.address, owner.name);
self.total_names.write(1);
self.owner.write(owner);
}
#[external(v0)]
impl NameRegistry of super::INameRegistry<ContractState> {
fn store_name(ref self: ContractState, name: felt252, registration_type: RegistrationType) {
let caller = get_caller_address();
self._store_name(caller, name, registration_type);
}
fn get_name(self: @ContractState, address: ContractAddress) -> felt252 {
let name = self.names.read(address);
name
}
fn get_owner(self: @ContractState) -> Person {
let owner = self.owner.read();
owner
}
}
#[generate_trait]
impl InternalFunctions of InternalFunctionsTrait {
fn _store_name(
ref self: ContractState,
user: ContractAddress,
name: felt252,
registration_type: RegistrationType
) {
let mut total_names = self.total_names.read();
self.names.write(user, name);
self.registration_type.write(user, registration_type);
self.total_names.write(total_names + 1);
self.emit(StoredName { user: user, name: name });
}
}
fn get_contract_name() -> felt252 {
'Name Registry'
}
fn get_owner_storage_address(self: @ContractState) -> starknet::StorageBaseAddress {
self.owner.address()
}
}
Calling the write function on the owner variable
use starknet::ContractAddress;
#[starknet::interface]
trait INameRegistry<TContractState> {
fn store_name(
ref self: TContractState, name: felt252, registration_type: NameRegistry::RegistrationType
);
fn get_name(self: @TContractState, address: ContractAddress) -> felt252;
fn get_owner(self: @TContractState) -> NameRegistry::Person;
}
#[starknet::contract]
mod NameRegistry {
use starknet::{ContractAddress, get_caller_address};
#[storage]
struct Storage {
names: LegacyMap::<ContractAddress, felt252>,
registration_type: LegacyMap::<ContractAddress, RegistrationType>,
total_names: u128,
owner: Person
}
#[event]
#[derive(Drop, starknet::Event)]
enum Event {
StoredName: StoredName,
}
#[derive(Drop, starknet::Event)]
struct StoredName {
#[key]
user: ContractAddress,
name: felt252
}
#[derive(Copy, Drop, Serde, starknet::Store)]
struct Person {
name: felt252,
address: ContractAddress
}
#[derive(Drop, Serde, starknet::Store)]
enum RegistrationType {
finite: u64,
infinite
}
#[constructor]
fn constructor(ref self: ContractState, owner: Person) {
self.names.write(owner.address, owner.name);
self.total_names.write(1);
self.owner.write(owner);
}
#[external(v0)]
impl NameRegistry of super::INameRegistry<ContractState> {
fn store_name(ref self: ContractState, name: felt252, registration_type: RegistrationType) {
let caller = get_caller_address();
self._store_name(caller, name, registration_type);
}
fn get_name(self: @ContractState, address: ContractAddress) -> felt252 {
let name = self.names.read(address);
name
}
fn get_owner(self: @ContractState) -> Person {
let owner = self.owner.read();
owner
}
}
#[generate_trait]
impl InternalFunctions of InternalFunctionsTrait {
fn _store_name(
ref self: ContractState,
user: ContractAddress,
name: felt252,
registration_type: RegistrationType
) {
let mut total_names = self.total_names.read();
self.names.write(user, name);
self.registration_type.write(user, registration_type);
self.total_names.write(total_names + 1);
self.emit(StoredName { user: user, name: name });
}
}
fn get_contract_name() -> felt252 {
'Name Registry'
}
fn get_owner_storage_address(self: @ContractState) -> starknet::StorageBaseAddress {
self.owner.address()
}
}
Calling the write function on the names variable
Storing custom types
The Store trait, defined in the starknet::storage_access module, is used to specify how a type should be stored in storage. In order for a type to be stored in storage, it must implement the Store trait. Most types from the core library, such as unsigned integers (u8, u128, u256...), felt252, bool, ContractAddress, etc. implement the Store trait and can thus be stored without further action.
But what if you wanted to store a type that you defined yourself, such as an enum or a struct? In that case, you have to explicitly tell the compiler how to store this type.
In our example, we want to store a Person struct in storage, which is possible by implementing the Store trait for the Person type. This can be achieved by simply adding a #[derive(starknet::Store)] attribute on top of our struct definition.
use starknet::ContractAddress;
#[starknet::interface]
trait INameRegistry<TContractState> {
fn store_name(
ref self: TContractState, name: felt252, registration_type: NameRegistry::RegistrationType
);
fn get_name(self: @TContractState, address: ContractAddress) -> felt252;
fn get_owner(self: @TContractState) -> NameRegistry::Person;
}
#[starknet::contract]
mod NameRegistry {
use starknet::{ContractAddress, get_caller_address};
#[storage]
struct Storage {
names: LegacyMap::<ContractAddress, felt252>,
registration_type: LegacyMap::<ContractAddress, RegistrationType>,
total_names: u128,
owner: Person
}
#[event]
#[derive(Drop, starknet::Event)]
enum Event {
StoredName: StoredName,
}
#[derive(Drop, starknet::Event)]
struct StoredName {
#[key]
user: ContractAddress,
name: felt252
}
#[derive(Copy, Drop, Serde, starknet::Store)]
struct Person {
name: felt252,
address: ContractAddress
}
#[derive(Drop, Serde, starknet::Store)]
enum RegistrationType {
finite: u64,
infinite
}
#[constructor]
fn constructor(ref self: ContractState, owner: Person) {
self.names.write(owner.address, owner.name);
self.total_names.write(1);
self.owner.write(owner);
}
#[external(v0)]
impl NameRegistry of super::INameRegistry<ContractState> {
fn store_name(ref self: ContractState, name: felt252, registration_type: RegistrationType) {
let caller = get_caller_address();
self._store_name(caller, name, registration_type);
}
fn get_name(self: @ContractState, address: ContractAddress) -> felt252 {
let name = self.names.read(address);
name
}
fn get_owner(self: @ContractState) -> Person {
let owner = self.owner.read();
owner
}
}
#[generate_trait]
impl InternalFunctions of InternalFunctionsTrait {
fn _store_name(
ref self: ContractState,
user: ContractAddress,
name: felt252,
registration_type: RegistrationType
) {
let mut total_names = self.total_names.read();
self.names.write(user, name);
self.registration_type.write(user, registration_type);
self.total_names.write(total_names + 1);
self.emit(StoredName { user: user, name: name });
}
}
fn get_contract_name() -> felt252 {
'Name Registry'
}
fn get_owner_storage_address(self: @ContractState) -> starknet::StorageBaseAddress {
self.owner.address()
}
}
Similarly, Enums can be written to storage if they implement the Store trait, which can be trivially derived as long as all associated types implement the Store trait.
use starknet::ContractAddress;
#[starknet::interface]
trait INameRegistry<TContractState> {
fn store_name(
ref self: TContractState, name: felt252, registration_type: NameRegistry::RegistrationType
);
fn get_name(self: @TContractState, address: ContractAddress) -> felt252;
fn get_owner(self: @TContractState) -> NameRegistry::Person;
}
#[starknet::contract]
mod NameRegistry {
use starknet::{ContractAddress, get_caller_address};
#[storage]
struct Storage {
names: LegacyMap::<ContractAddress, felt252>,
registration_type: LegacyMap::<ContractAddress, RegistrationType>,
total_names: u128,
owner: Person
}
#[event]
#[derive(Drop, starknet::Event)]
enum Event {
StoredName: StoredName,
}
#[derive(Drop, starknet::Event)]
struct StoredName {
#[key]
user: ContractAddress,
name: felt252
}
#[derive(Copy, Drop, Serde, starknet::Store)]
struct Person {
name: felt252,
address: ContractAddress
}
#[derive(Drop, Serde, starknet::Store)]
enum RegistrationType {
finite: u64,
infinite
}
#[constructor]
fn constructor(ref self: ContractState, owner: Person) {
self.names.write(owner.address, owner.name);
self.total_names.write(1);
self.owner.write(owner);
}
#[external(v0)]
impl NameRegistry of super::INameRegistry<ContractState> {
fn store_name(ref self: ContractState, name: felt252, registration_type: RegistrationType) {
let caller = get_caller_address();
self._store_name(caller, name, registration_type);
}
fn get_name(self: @ContractState, address: ContractAddress) -> felt252 {
let name = self.names.read(address);
name
}
fn get_owner(self: @ContractState) -> Person {
let owner = self.owner.read();
owner
}
}
#[generate_trait]
impl InternalFunctions of InternalFunctionsTrait {
fn _store_name(
ref self: ContractState,
user: ContractAddress,
name: felt252,
registration_type: RegistrationType
) {
let mut total_names = self.total_names.read();
self.names.write(user, name);
self.registration_type.write(user, registration_type);
self.total_names.write(total_names + 1);
self.emit(StoredName { user: user, name: name });
}
}
fn get_contract_name() -> felt252 {
'Name Registry'
}
fn get_owner_storage_address(self: @ContractState) -> starknet::StorageBaseAddress {
self.owner.address()
}
}
Structs storage layout
On Starknet, structs are stored in storage as a sequence of primitive types.
The elements of the struct are stored in the same order as they are defined in the struct definition. The first element of the struct is stored at the base address of the struct, which is computed as specified in Storage Addresses and can be obtained by calling var.address(), and subsequent elements are stored at addresses contiguous to the first element.
For example, the storage layout for the owner variable of type Person will result in the following layout:
| Fields | Address |
|---|---|
| name | owner.address() |
| address | owner.address() +1 |
Enums storage layout
When you store an enum variant, what you're essentially storing is the variant's index and an eventual associated values. This index starts at 0 for the first variant of your enum and increments by 1 for each subsequent variant.
If your variant has an associated value, it's stored starting from the address immediately following the base address.
For example, suppose we have the RegistrationType enum with the finite variant, which carries an associated limit date. The storage layout would look like this:
| Element | Address |
|---|---|
| Variant index (e.g. 1 for finite) | registration_type.address() |
| Associated limit date | registration_type.address() + 1 |
Storage mappings
Storage mappings are similar to hash tables in that they allow mapping keys to values. However, unlike a typical hash table, the key data itself is not stored - only its hash is used to look up the associated value in the contract's storage. Mappings do not have a concept of length or whether a key/value pair is set. The only way to remove a mapping is to set its value to the default zero value.
Mappings are only used to compute the location of data in the storage of a contract given certain keys. They are thus only allowed as storage variables. They cannot be used as parameters or return parameters of contract functions, and cannot be used as types inside structs.
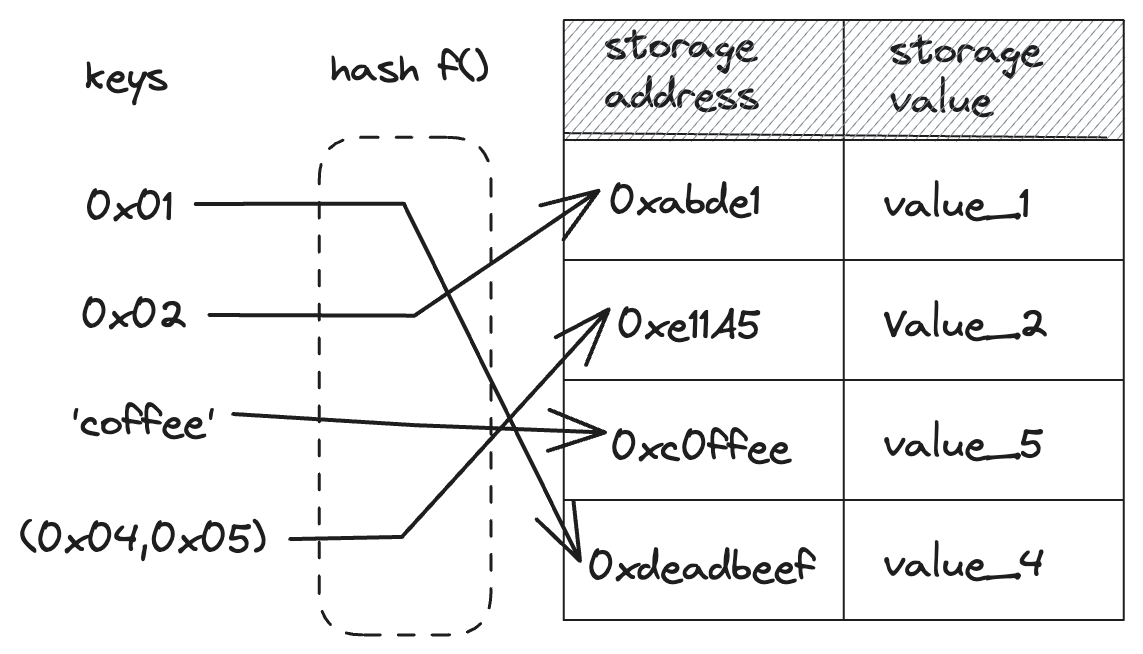
To declare a mapping, use the LegacyMap type enclosed in angle brackets <>,
specifying the key and value types.
You can also create more complex mappings with multiple keys. You can find one in Listing 99-2bis like the popular allowances storage variable in the ERC20 Standard which maps an owner and an allowed spender to its allowance amount using multiple keys passed inside a tuple:
#[storage]
struct Storage {
allowances: LegacyMap::<(ContractAddress, ContractAddress), u256>
}Listing 99-2bis: Storing mappings
The address in storage of a variable stored in a mapping is computed according to the description in the Storage Addresses section.
If the key of a mapping is a struct, each element of the struct constitutes a key. Moreover, the struct should implement the Hash trait, which can be derived with the #[derive(Hash)] attribute. For example, if you have struct with two fields, the address will be h(h(sn_keccak(variable_name),k_1),k_2) - where k_1 and k_2 are the values of the two fields of the struct.
Similarly, in the case of a nested mapping such as LegacyMap((ContractAddress, ContractAddress), u8), the address will be computed in the same way: h(h(sn_keccak(variable_name),k_1),k_2).
For more details about the contract storage layout in the Starknet Documentation
Contract Functions
In this section, we are going to be looking at the different types of functions you could encounter in contracts:
1. Constructors
Constructors are a special type of function that only runs once when deploying a contract, and can be used to initialize the state of a contract.
#[constructor]
fn constructor(ref self: ContractState, owner: Person) {
self.names.write(owner.address, owner.name);
self.total_names.write(1);
self.owner.write(owner);
}Some important rules to note:
- Your contract can't have more than one constructor.
- Your constructor function must be named
constructor. - It must be annotated with the
#[constructor]attribute.
2. Public functions
As stated previously, public functions are accessible from outside of the contract. They must be defined inside an implementation block annotated with the #[external(v0)] attribute. This attribute only affects the visibility (public vs private/internal), but it doesn't inform us on the ability of these functions to modify the state of the contract.
#[external(v0)]
impl NameRegistry of super::INameRegistry<ContractState> {
fn store_name(ref self: ContractState, name: felt252, registration_type: RegistrationType) {
let caller = get_caller_address();
self._store_name(caller, name, registration_type);
}
fn get_name(self: @ContractState, address: ContractAddress) -> felt252 {
let name = self.names.read(address);
name
}
fn get_owner(self: @ContractState) -> Person {
let owner = self.owner.read();
owner
}
}External functions
External functions are functions that can modify the state of a contract. They are public and can be called by any other contract or externally.
External functions are public functions where the self: ContractState is passed as reference with the ref keyword, allowing you to modify the state of the contract.
fn store_name(ref self: ContractState, name: felt252, registration_type: RegistrationType) {
let caller = get_caller_address();
self._store_name(caller, name, registration_type);
}View functions
View functions are read-only functions allowing you to access data from the contract while ensuring that the state of the contract is not modified. They can be called by other contracts or externally.
View functions are public functions where the self: ContractState is passed as snapshot, preventing you from modifying the state of the contract.
fn get_name(self: @ContractState, address: ContractAddress) -> felt252 {
let name = self.names.read(address);
name
}Note: It's important to note that both external and view functions are public. To create an internal function in a contract, you will need to define it outside of the implementation block annotated with the
#[external(v0)]attribute.
3. Private functions
Functions that are not defined in a block annotated with the #[external(v0)] attribute are private functions (also called internal functions). They can only be called from within the contract.
#[generate_trait]
impl InternalFunctions of InternalFunctionsTrait {
fn _store_name(
ref self: ContractState,
user: ContractAddress,
name: felt252,
registration_type: RegistrationType
) {
let mut total_names = self.total_names.read();
self.names.write(user, name);
self.registration_type.write(user, registration_type);
self.total_names.write(total_names + 1);
self.emit(StoredName { user: user, name: name });
}
}Wait, what is this
#[generate_trait]attribute? Where is the trait definition for this implementation? Well, the#[generate_trait]attribute is a special attribute that tells the compiler to generate a trait definition for the implementation block. This allows you to get rid of the boilerplate code of defining a trait and implementing it for the implementation block. We will see more about this in the next section.
At this point, you might still be wondering if all of this is really necessary if you don't need to access the contract's state in your function (for example, a helper/library function). As a matter of fact, you can also define internal functions outside of implementation blocks. The only reason why we need to define functions inside impl blocks is if we want to access the contract's state.
fn get_contract_name() -> felt252 {
'Name Registry'
}
fn get_owner_storage_address(self: @ContractState) -> starknet::StorageBaseAddress {
self.owner.address()
}Events
Events are custom data structures that are emitted by smart contracts during execution. They provide a way for smart contracts to communicate with the external world by logging information about specific occurrences in a contract.
Events play a crucial role in the creation of smart contracts. Take, for instance, the Non-Fungible Tokens (NFTs) minted on Starknet. All of these are indexed and stored in a database, then displayed to users through the use of these events. Neglecting to include an event within your NFT contract could lead to a bad user experience. This is because users may not see their NFTs appear in their wallets (wallets use these indexers to display a user's NFTs).
Defining events
All the different events in the contract are defined under the Event enum, which implements the starknet::Event trait, as enum variants. This trait is defined in the core library as follows:
trait Event<T> {
fn append_keys_and_data(self: T, ref keys: Array<felt252>, ref data: Array<felt252>);
fn deserialize(ref keys: Span<felt252>, ref data: Span<felt252>) -> Option<T>;
}The #[derive(starknet::Event)] attribute causes the compiler to generate an implementation for the above trait,
instantiated with the Event type, which in our example is the following enum:
#[event]
#[derive(Drop, starknet::Event)]
enum Event {
StoredName: StoredName,
}
#[derive(Drop, starknet::Event)]
struct StoredName {
#[key]
user: ContractAddress,
name: felt252
}Each event variant has to be a struct of the same name as the variant, and each variant needs to implement the starknet::Event trait itself.
Moreover, the members of these variants must implement the Serde trait (c.f. Appendix C: Serializing with Serde), as keys/data are added to the event using a serialization process.
The auto implementation of the starknet::Event trait will implement the append_keys_and_data function for each variant of our Event enum. The generated implementation will append a single key based on the variant name (StoredName), and then recursively call append_keys_and_data in the impl of the Event trait for the variant’s type .
In our contract, we define an event named StoredName that emits the contract address of the caller and the name stored within the contract, where the user field is serialized as a key and the name field is serialized as data.
To index the key of an event, simply annotate it with the #[key] as demonstrated in the example for the user key.
When emitting the event with self.emit(StoredName { user: user, name: name }), a key corresponding to the name StoredName, specifically sn_keccak(StoredName), is appended to the keys list. useris serialized as key, thanks to the #[key] attribute, while address is serialized as data. After everything is processed, we end up with the following keys and data: keys = [sn_keccak("StoredName"),user] and data = [address].
Emitting events
After defining events, we can emit them using self.emit, with the following syntax:
self.emit(StoredName { user: user, name: name });Reducing boilerplate
In a previous section, we saw this example of an implementation block in a contract that didn't have any corresponding trait.
#[generate_trait]
impl InternalFunctions of InternalFunctionsTrait {
fn _store_name(
ref self: ContractState,
user: ContractAddress,
name: felt252,
registration_type: RegistrationType
) {
let mut total_names = self.total_names.read();
self.names.write(user, name);
self.registration_type.write(user, registration_type);
self.total_names.write(total_names + 1);
self.emit(StoredName { user: user, name: name });
}
}It's not the first time that we encounter this attribute, we already talked about in it Traits in Cairo. In this section, we'll be taking a deeper look at it and see how it can be used in contracts.
Recall that in order to access the ContractState in a function, this function must be defined in an implementation block whose generic parameter is ContractState. This implies that we first need to define a generic trait that takes a TContractState, and then implement this trait for the ContractState type.
But by using the #[generate_trait] attribute, this whole process can be skipped and we can simply define the implementation block directly, without any generic parameter, and use self: ContractState in our functions.
If we had to manually define the trait for the InternalFunctions implementation, it would look something like this:
trait InternalFunctionsTrait<TContractState> {
fn _store_name(ref self: TContractState, user: ContractAddress, name: felt252);
}
impl InternalFunctions of InternalFunctionsTrait<ContractState> {
fn _store_name(ref self: ContractState, user: ContractAddress, name: felt252) {
let mut total_names = self.total_names.read();
self.names.write(user, name);
self.total_names.write(total_names + 1);
self.emit(Event::StoredName(StoredName { user: user, name: name }));
}
}
}
Storage Optimization with StorePacking
Bit-packing is a simple concept: Use as few bits as possible to store a piece of data. When done well, it can significantly reduce the size of the data you need to store. This is especially important in smart contracts, where storage is expensive.
When writing Cairo smart contracts, it is important to optimize storage usage to reduce gas costs. Indeed, most of the cost associated with a transaction is related to storage updates; and each storage slot costs gas to write to. This means that by packing multiple values into fewer slots, you can decrease the gas cost incurred by the users of your smart contract.
Cairo provides the StorePacking trait to enable packing struct fields into fewer storage slots. For example, consider a Sizes struct with 3 fields of different types. The total size is 8 + 32 + 64 = 104 bits. This is less than the 128 bits of a single u128. This means we can pack all 3 fields into a single u128 variable. Since a storage slot can hold up to 251 bits, our packed value will take only one storage slot instead of 3.
#![allow(unused)] fn main() { use starknet::{StorePacking}; use integer::{u128_safe_divmod, u128_as_non_zero}; #[derive(Drop, Serde)] struct Sizes { tiny: u8, small: u32, medium: u64, } const TWO_POW_8: u128 = 0x100; const TWO_POW_40: u128 = 0x10000000000; const MASK_8: u128 = 0xff; const MASK_32: u128 = 0xffffffff; impl SizesStorePacking of StorePacking<Sizes, u128> { fn pack(value: Sizes) -> u128 { value.tiny.into() + (value.small.into() * TWO_POW_8) + (value.medium.into() * TWO_POW_40) } fn unpack(value: u128) -> Sizes { let tiny = value & MASK_8; let small = (value / TWO_POW_8) & MASK_32; let medium = (value / TWO_POW_40); Sizes { tiny: tiny.try_into().unwrap(), small: small.try_into().unwrap(), medium: medium.try_into().unwrap(), } } } #[starknet::contract] mod SizeFactory { use super::Sizes; use super::SizesStorePacking; //don't forget to import it! #[storage] struct Storage { remaining_sizes: Sizes } #[external(v0)] fn update_sizes(ref self: ContractState, sizes: Sizes) { // This will automatically pack the // struct into a single u128 self.remaining_sizes.write(sizes); } #[external(v0)] fn get_sizes(ref self: ContractState) -> Sizes { // this will automatically unpack the // packed-representation into the Sizes struct self.remaining_sizes.read() } } }
Optimizing storage by implementing the StorePacking trait
The pack function combines all three fields into a single u128 value by performing bitshift and additions. The unpack reverses this process to extract the original fields back into a struct.
If you're not familiar with bit operations, here's an explanation of the operations performed in the example:
The goal is to pack the tiny, small, and medium fields into a single u128 value.
First, when packing:
tinyis au8so we just convert it directly to au128with.into(). This creates au128value with the low 8 bits set totiny's value.smallis au32so we first shift it left by 8 bits (add 8 bits with the value 0 to the left) to create room for the 8 bites taken bytiny. Then we addtinytosmallto combine them into a singleu128value. The value oftinynow takes bits 0-7 and the value of small takes bits 8-39.- Similarly
mediumis au64so we shift it left by 40 (8 + 32) bits (TWO_POW_40) to make space for the previous fields. This takes bits 40-103.
When unpacking:
- First we extract
tinyby bitwise ANDing (&) with a bitmask of 8 ones (& MASK_8). This isolates the lowest 8 bits of the packed value, which istiny's value. - For
small, we right shift by 8 bits (/ TWO_POW_8) to align it with the bitmask, then use bitwise AND with the 32 ones bitmask. - For
mediumwe right shift by 40 bits. Since it is the last value packed, we don't need to apply a bitmask as the higher bits are already 0.
This technique can be used for any group of fields that fit within the bit size of the packed storage type. For example, if you have a struct with multiple fields whose bit sizes add up to 256 bits, you can pack them into a single u256 variable. If the bit sizes add up to 512 bits, you can pack them into a single u512 variable, and so on. You can define your own structs and logic to pack and unpack them.
The rest of the work is done magically by the compiler - if a type implements the StorePacking trait, then the compiler will know it can use the StoreUsingPacking implementation of the Store trait in order to pack before writing and unpack after reading from storage.
One important detail, however, is that the type that StorePacking::pack spits out also has to implement Store for StoreUsingPacking to work. Most of the time, we will want to pack into a felt252 or u256 - but if you want to pack into a type of your own, make sure that this one implements the Store trait.
Components: Lego-Like Building Blocks for Smart Contracts
Developing contracts sharing a common logic and storage can be painful and bug-prone, as this logic can hardly be reused and needs to be reimplemented in each contract. But what if there was a way to snap in just the extra functionality you need inside your contract, separating the core logic of your contract from the rest?
Components provide exactly that. They are modular add-ons encapsulating reusable logic, storage, and events that can be incorporated into multiple contracts. They can be used to extend a contract's functionality, without having to reimplement the same logic over and over again.
Think of components as Lego blocks. They allow you to enrich your contracts by plugging in a module that you or someone else wrote. This module can be a simple one, like an ownership component, or more complex like a full-fledged ERC20 token.
A component is a separate module that can contain storage, events, and functions. Unlike a contract, a component cannot be declared or deployed. Its logic will eventually be part of the contract’s bytecode it has been embedded in.
What's in a Component?
A component is very similar to a contract. It can contain:
- Storage variables
- Events
- External and internal functions
Unlike a contract, a component cannot be deployed on its own. The component's code becomes part of the contract it's embedded to.
Creating Components
To create a component, first define it in its own module decorated with a
#[starknet::component] attribute. Within this module, you can declare a Storage struct and Event enum, as usually done in
Contracts.
The next step is to define the component interface, containing the signatures of
the functions that will allow external access to the component's logic. You can
define the interface of the component by declaring a trait with the
#[starknet::interface] attribute, just as you would with contracts. This
interface will be used to enable external access to the component's functions
using the
Dispatcher
pattern.
The actual implementation of the component's external logic is done in an impl
block marked as #[embeddable_as(name)]. Usually, this impl block will be an
implementation of the trait defining the interface of the component.
Note:
nameis the name that we’ll be using in the contract to refer to the component. It is different than the name of your impl.
You can also define internal functions that will not be accessible externally,
by simply omitting the #[embeddable_as(name)] attribute above the internal
impl block. You will be able to use these internal functions inside the
contract you embed the component in, but not interact with it from outside, as
they're not a part of the abi of the contract.
Functions within these impl block expect arguments like ref self: ComponentState<TContractState> (for state-modifying functions) or self: @ComponentState<TContractState> (for view functions). This makes the impl
generic over TContractState, allowing us to use this component in any
contract.
Example: an Ownable component
⚠️ The example shown below has not been audited and is not intended for production use. The authors are not responsible for any damages caused by the use of this code.
The interface of the Ownable component, defining the methods available externally to manage ownership of a contract, would look like this:
#![allow(unused)] fn main() { #[starknet::interface] trait IOwnable<TContractState> { fn owner(self: @TContractState) -> ContractAddress; fn transfer_ownership(ref self: TContractState, new_owner: ContractAddress); fn renounce_ownership(ref self: TContractState); } }
The component itself is defined as:
#![allow(unused)] fn main() { #[starknet::component] mod ownable_component { use starknet::ContractAddress; use starknet::get_caller_address; use super::Errors; #[storage] struct Storage { owner: ContractAddress } #[event] #[derive(Drop, starknet::Event)] enum Event { OwnershipTransferred: OwnershipTransferred } #[derive(Drop, starknet::Event)] struct OwnershipTransferred { previous_owner: ContractAddress, new_owner: ContractAddress, } #[embeddable_as(Ownable)] impl OwnableImpl< TContractState, +HasComponent<TContractState> > of super::IOwnable<ComponentState<TContractState>> { fn owner(self: @ComponentState<TContractState>) -> ContractAddress { self.owner.read() } fn transfer_ownership( ref self: ComponentState<TContractState>, new_owner: ContractAddress ) { assert(!new_owner.is_zero(), Errors::ZERO_ADDRESS_OWNER); self.assert_only_owner(); self._transfer_ownership(new_owner); } fn renounce_ownership(ref self: ComponentState<TContractState>) { self.assert_only_owner(); self._transfer_ownership(Zeroable::zero()); } } #[generate_trait] impl InternalImpl< TContractState, +HasComponent<TContractState> > of InternalTrait<TContractState> { fn initializer(ref self: ComponentState<TContractState>, owner: ContractAddress) { self._transfer_ownership(owner); } fn assert_only_owner(self: @ComponentState<TContractState>) { let owner: ContractAddress = self.owner.read(); let caller: ContractAddress = get_caller_address(); assert(!caller.is_zero(), Errors::ZERO_ADDRESS_CALLER); assert(caller == owner, Errors::NOT_OWNER); } fn _transfer_ownership( ref self: ComponentState<TContractState>, new_owner: ContractAddress ) { let previous_owner: ContractAddress = self.owner.read(); self.owner.write(new_owner); self .emit( OwnershipTransferred { previous_owner: previous_owner, new_owner: new_owner } ); } } } }
This syntax is actually quite similar to the syntax used for contracts. The only
differences relate to the #[embeddable_as] attribute above the impl and the
genericity of the impl block that we will dissect in details.
As you can see, our component has two impl blocks: one corresponding to the
implementation of the interface trait, and one containing methods that should
not be exposed externally and are only meant for internal use. Exposing the
assert_only_owner as part of the interface wouldn't make sense, as it's only
meant to be used internally by a contract embedding the component.
A closer look at the impl block
#![allow(unused)] fn main() { #[embeddable_as(Ownable)] impl OwnableImpl< TContractState, +HasComponent<TContractState> > of super::IOwnable<ComponentState<TContractState>> { }
The #[embeddable_as] attribute is used to mark the impl as embeddable inside a
contract. It allows us to specify the name of the impl that will be used in the
contract to refer to this component. In this case, the component will be
referred to as Ownable in contracts embedding it.
The implementation itself is generic over ComponentState<TContractState>, with
the added restriction that TContractState must implement the HasComponent<T>
trait. This allows us to use the component in any contract, as long as the
contract implements the HasComponent trait. Understanding this mechanism in
details is not required to use components, but if you're curious about the inner
workings, you can read more in the Components under the
hood section.
One of the major differences from a regular smart contract is that access to
storage and events is done via the generic ComponentState<TContractState> type
and not ContractState. Note that while the type is different, accessing
storage or emitting events is done similarly via self.storage_var_name.read()
or self.emit(...).
Note: To avoid the confusion between the embeddable name and the impl name, we recommend keeping the suffix
Implin the impl name.
Migrating a Contract to a Component
Since both contracts and components share a lot of similarities, it's actually very easy to migrate from a contract to a component. The only changes required are:
- Adding the
#[starknet::component]attribute to the module. - Adding the
#[embeddable_as(name)]attribute to theimplblock that will be embedded in another contract. - Adding generic parameters to the
implblock:- Adding
TContractStateas a generic parameter. - Adding
+HasComponent<TContractState>as an impl restriction.
- Adding
- Changing the type of the
selfargument in the functions inside theimplblock toComponentState<TContractState>instead ofContractState.
For traits that do not have an explicit definition and are generated using
#[generate_trait], the logic is the same - but the trait is generic over
TContractState instead of ComponentState<TContractState>, as demonstrated in
the example with the InternalTrait.
Using components inside a contract
The major strength of components is how it allows reusing already built primitives inside your contracts with a restricted amount of boilerplate. To integrate a component into your contract, you need to:
-
Declare it with the
component!()macro, specifying- The path to the component
path::to::component. - The name of the variable in your contract's storage referring to this
component's storage (e.g.
ownable). - The name of the variant in your contract's event enum referring to this
component's events (e.g.
OwnableEvent).
- The path to the component
-
Add the path to the component's storage and events to the contract's
StorageandEvent. They must match the names provided in step 1 (e.g.ownable: ownable_component::StorageandOwnableEvent: ownable_component::Event).The storage variable MUST be annotated with the
#[substorage(v0)]attribute. -
Embed the component's logic defined inside your contract, by instantiating the component's generic impl with a concrete
ContractStateusing an impl alias. This alias must be annotated with#[abi(embed_v0)]to externally expose the component's functions.As you can see, the InternalImpl is not marked with
#[abi(embed_v0)]. Indeed, we don't want to expose externally the functions defined in this impl. However, we might still want to access them internally.
For example, to embed the Ownable component defined above, we would do the
following:
#![allow(unused)] fn main() { #[starknet::contract] mod OwnableCounter { use listing_01_ownable::component::ownable_component; component!(path: ownable_component, storage: ownable, event: OwnableEvent); #[abi(embed_v0)] impl OwnableImpl = ownable_component::Ownable<ContractState>; impl OwnableInternalImpl = ownable_component::InternalImpl<ContractState>; #[storage] struct Storage { counter: u128, #[substorage(v0)] ownable: ownable_component::Storage } #[event] #[derive(Drop, starknet::Event)] enum Event { OwnableEvent: ownable_component::Event } #[external(v0)] fn foo(ref self: ContractState) { self.ownable.assert_only_owner(); self.counter.write(self.counter.read() + 1); } } }
The component's logic is now seamlessly part of the contract! We can interact
with the components functions externally by calling them using the
IOwnableDispatcher instantiated with the contract's address.
#![allow(unused)] fn main() { #[starknet::interface] trait IOwnable<TContractState> { fn owner(self: @TContractState) -> ContractAddress; fn transfer_ownership(ref self: TContractState, new_owner: ContractAddress); fn renounce_ownership(ref self: TContractState); } }
Stacking Components for Maximum Composability
The composability of components really shines when combining multiple of them together. Each adds its features onto the contract. You will be able to rely on Openzeppelin's future implementation of components to quickly plug-in all the common functionalities you need a contract to have.
Developers can focus on their core contract logic while relying on battle-tested and audited components for everything else.
Components can even depend on other components by restricting the
TContractstate they're generic on to implement the trait of another component.
Before we dive into this mechanism, let's first look at how components work
under the hood.
Troubleshooting
You might encounter some errors when trying to implement components. Unfortunately, some of them lack meaningful error messages to help debug. This section aims to provide you with some pointers to help you debug your code.
-
Trait not found. Not a trait.This error can occur when you're not importing the component's impl block correctly in your contract. Make sure to respect the following syntax:
#![allow(unused)] fn main() { #[abi(embed_v0)] impl IMPL_NAME = upgradeable::EMBEDDED_NAME<ContractState> }Referring to our previous example, this would be:
#![allow(unused)] fn main() { #[abi(embed_v0)] impl OwnableImpl = upgradeable::Ownable<ContractState> } -
Plugin diagnostic: name is not a substorage member in the contract's Storage. Consider adding to Storage: (...)The compiler helps you a lot debugging this by giving you recommendation on the action to take. Basically, you forgot to add the component's storage to your contract's storage. Make sure to add the path to the component's storage annotated with the
#[substorage(v0)]attribute to your contract's storage. -
Plugin diagnostic: name is not a nested event in the contract's Event enum. Consider adding to the Event enum:Similar to the previous error, the compiler, you forgot to add the component's events to your contract's events. Make sure to add the path to the component's events to your contract's events.
-
Components functions are not accessible externally
This can happen if you forgot to annotate the component's impl block with
#[abi(embed_v0)]. Make sure to add this annotation when embedding the component's impl in your contract.
Components under the hood
Components provide powerful modularity to Starknet contracts. But how does this magic actually happen behind the scenes?
This chapter will dive deep into the compiler internals to explain the mechanisms that enable component composability.
A Primer on Embeddable Impls
Before digging into components, we need to understand embeddable impls.
An impl of a Starknet interface trait (marked with #[starknet::interface]) can
be made embeddable. Embeddable impls can be injected into any contract, adding
new entry points and modifying the ABI of the contract.
Let's look at an example to see this in action:
#![allow(unused)] fn main() { #[starknet::interface] trait SimpleTrait<TContractState> { fn ret_4(self: @TContractState) -> u8; } #[starknet::embeddable] impl SimpleImpl<TContractState> of SimpleTrait<TContractState> { fn ret_4(self: @TContractState) -> u8 { 4 } } #[starknet::contract] mod simple_contract { #[storage] struct Storage {} #[abi(embed_v0)] impl MySimpleImpl = super::SimpleImpl<ContractState>; } }
By embedding SimpleImpl, we externally expose ret4 in the contract's ABI.
Now that we’re more familiar with the embedding mechanism, we can now see how components build on this.
Inside Components: Generic Impls
Recall the impl block syntax used in components:
#![allow(unused)] fn main() { #[embeddable_as(Ownable)] impl OwnableImpl< TContractState, +HasComponent<TContractState> > of super::IOwnable<ComponentState<TContractState>> { }
The key points:
-
OwnableImplrequires the implementation of theHasComponent<TContractState>trait by the underlying contract, which is automatically generated with thecomponent!()macro when using a component inside a contract.The compiler will generate an impl that wraps any function in
OwnableImpl, replacing theself: ComponentState<TContractState>argument withself: TContractState, where access to the component state is made via theget_componentfunction in theHasComponent<TContractState>trait.For each component, the compiler generates a
HasComponenttrait. This trait defines the interface to bridge between the actualTContractStateof a generic contract, andComponentState<TContractState>.#![allow(unused)] fn main() { // generated per component trait HasComponent<TContractState> { fn get_component(self: @TContractState) -> @ComponentState<TContractState>; fn get_component_mut(ref self: TContractState) -> ComponentState<TContractState>; fn get_contract(self: @ComponentState<TContractState>) -> @TContractState; fn get_contract_mut(ref self: ComponentState<TContractState>) -> TContractState; fn emit<S, impl IntoImp: traits::Into<S, Event>>(ref self: ComponentState<TContractState>, event: S); } }In our context
ComponentState<TContractState>is a type specific to the ownable component, i.e. it has members based on the storage variables defined inownable_component::Storage. Moving from the genericTContractStatetoComponentState<TContractState>will allow us to embedOwnablein any contract that wants to use it. The opposite direction (ComponentState<TContractState>toContractState) is useful for dependencies (see theUpgradeablecomponent depending on anIOwnableimplementation example in the Components dependencies section.To put it briefly, one should think of an implementation of the above
HasComponent<T>as saying: “Contract whose state T has the upgradeable component”. -
Ownableis annotated with theembeddable_as(<name>)attribute:embeddable_asis similar toembeddable; it only applies toimplsofstarknet::interfacetraits and allows embedding this impl in a contract module. That said,embeddable_as(<name>)has another role in the context of components. Eventually, when embeddingOwnableImplin some contract, we expect to get an impl with the following functions:#![allow(unused)] fn main() { fn owner(self: @TContractState) -> ContractAddress; fn transfer_ownership(ref self: TContractState, new_owner: ContractAddress); fn renounce_ownership(ref self: TContractState); }Note that while starting with a function receiving the generic type
ComponentState<TContractState>, we want to end up with a function receivingContractState. This is whereembeddable_as(<name>)comes in. To see the full picture, we need to see what is the impl generated by the compiler due to theembeddable_as(Ownable)annotation:#![allow(unused)] fn main() { #[starknet::embeddable] impl Ownable< TContractState, +HasComponent<TContractState> , impl TContractStateDrop: Drop<TContractState> > of super::IOwnable<TContractState> { fn owner(self: @TContractState) -> ContractAddress { let component = HasComponent::get_component(self); OwnableImpl::owner(component, ) } fn transfer_ownership(ref self: TContractState, new_owner: ContractAddress ) { let mut component = HasComponent::get_component_mut(ref self); OwnableImpl::transfer_ownership(ref component, new_owner, ) } fn renounce_ownership(ref self: TContractState) { let mut component = HasComponent::get_component_mut(ref self); OwnableImpl::renounce_ownership(ref component, ) } } }Note that thanks to having an impl of
HasComponent<TContractState>, the compiler was able to wrap our functions in a new impl that doesn’t directly know about theComponentStatetype.Ownable, whose name we chose when writingembeddable_as(Ownable), is the impl that we will embed in a contract that wants ownership.
Contract Integration
We've seen how generic impls enable component reusability. Next let's see how a contract integrates a component.
The contract uses an impl alias to instantiate the component's generic impl
with the concrete ContractState of the contract.
#![allow(unused)] fn main() { #[abi(embed_v0)] impl OwnableImpl = ownable_component::Ownable<ContractState>; impl OwnableInternalImpl = ownable_component::InternalImpl<ContractState>; }
The above lines use the Cairo impl embedding mechanism alongside the impl alias
syntax. We’re instantiating the generic OwnableImpl<TContractState> with the
concrete type ContractState. Recall that OwnableImpl<TContractState> has the
HasComponent<TContractState> generic impl parameter. An implementation of this
trait is generated by the component! macro.
Note that only the using contract could have implemented this trait since only it knows about both the contract state and the component state.
This glues everything together to inject the component logic into the contract.
Key Takeaways
- Embeddable impls allow injecting components logic into contracts by adding entry points and modifying the contract ABI.
- The compiler automatically generates a
HasComponenttrait implementation when a component is used in a contract. This creates a bridge between the contract's state and the component's state, enabling interaction between the two. - Components encapsulate reusable logic in a generic, contract-agnostic way.
Contracts integrate components through impl aliases and access them via the
generated
HasComponenttrait. - Components build on embeddable impls by defining generic component logic that can be integrated into any contract wanting to use that component. Impl aliases instantiate these generic impls with the contract's concrete storage types.
Component dependencies
Testing components
Testing components is a bit different than testing contracts.
Contracts need to be tested against a specific state, which can be achieved by either deploying the contract in a test, or by simply getting the ContractState object and modifying it in the context of your tests.
Components are a generic construct, meant to be integrated in contracts, that can't be deployed on their own and don't have a ContractState object that we could use. So how do we test them?
Let's consider that we want to test a very simple component called "Counter", that will allow each contract to have a counter that can be incremented. The component is defined as follows:
#[starknet::component]
mod CounterComponent {
#[storage]
struct Storage {
value: u32
}
#[embeddable_as(CounterImpl)]
impl Counter<
TContractState, +HasComponent<TContractState>
> of super::ICounter<ComponentState<TContractState>> {
fn get_counter(self: @ComponentState<TContractState>) -> u32 {
self.value.read()
}
fn increment(ref self: ComponentState<TContractState>) {
self.value.write(self.value.read() + 1);
}
}
}Testing the component by deploying a mock contract
The easiest way to test a component is to integrate it within a mock contract. This mock contract is only used for testing purposes, and only integrates the component you want to test. This allows you to test the component in the context of a contract, and to use a Dispatcher to call the component's entry points.
We can define such a mock contract as follows:
#[starknet::contract]
mod MockContract {
use super::counter::CounterComponent;
component!(path: CounterComponent, storage: counter, event: CounterEvent);
#[storage]
struct Storage {
#[substorage(v0)]
counter: CounterComponent::Storage,
}
#[event]
#[derive(Drop, starknet::Event)]
enum Event {
CounterEvent: CounterComponent::Event
}
#[abi(embed_v0)]
impl CounterImpl = CounterComponent::CounterImpl<ContractState>;
}This contract is entirely dedicated to testing the Counter component. It embeds the component with the component! macro, exposes the component's entry points by annotating the impl aliases with #[abi(embed_v0)].
We also need to define an interface that will be required to interact externally with this mock contract.
#[starknet::interface]
trait ICounter<TContractState> {
fn get_counter(self: @TContractState) -> u32;
fn increment(ref self: TContractState);
}We can now write tests for the component by deploying this mock contract and calling its entry points, as we would with a typical contract.
use core::traits::TryInto;
use super::MockContract;
use super::counter::{ICounterDispatcher, ICounterDispatcherTrait};
use starknet::deploy_syscall;
use starknet::SyscallResultTrait;
fn setup_counter() -> ICounterDispatcher {
let (address, _) = deploy_syscall(
MockContract::TEST_CLASS_HASH.try_into().unwrap(), 0, array![].span(), false
)
.unwrap_syscall();
ICounterDispatcher { contract_address: address }
}
#[test]
#[available_gas(20000000)]
fn test_constructor() {
let counter = setup_counter();
assert_eq!(counter.get_counter(), 0);
}
#[test]
#[available_gas(20000000)]
fn test_increment() {
let counter = setup_counter();
counter.increment();
assert_eq!(counter.get_counter(), 1);
}Testing components without deploying a contract
In Components under the hood, we saw that components leveraged genericity to define storage and logic that could be embedded in multiple contracts. If a contract embeds a component, a HasComponent trait is created in this contract, and the component methods are made available.
This informs us that if we can provide a concrete TContractState that implements the HasComponent trait to the ComponentState struct, should be able to directly invoke the methods of the component using this concrete ComponentState object, without having to deploy a mock.
Let's see how we can do that by using type aliases. We still need to define a mock contract - let's use the same as above - but this time, we won't need to deploy it.
First, we need to define a concrete implementation of the generic ComponentState type using a type alias. We will use the MockContract::ContractState type to do so.
use super::counter::{CounterComponent};
use super::MockContract;
use CounterComponent::{CounterImpl};
type TestingState = CounterComponent::ComponentState<MockContract::ContractState>;
// You can derive even `Default` on this type alias
impl TestingStateDefault of Default<TestingState> {
fn default() -> TestingState {
CounterComponent::component_state_for_testing()
}
}
#[test]
#[available_gas(2000000)]
fn test_increment() {
let mut counter: TestingState = Default::default();
counter.increment();
counter.increment();
assert_eq!(counter.get_counter(), 2);
}
We defined the TestingState type as an alias of the CounterComponent::ComponentState<MockContract::ContractState> type. By passing the MockContract::ContractState type as a concrete type for ComponentState, we aliased a concrete implementation of the ComponentState struct to TestingState.
Because MockContract embeds CounterComponent, the methods of CounterComponent defined in the CounterImpl block can now be used on a TestingState object.
Now that we have made these methods available, we need to instantiate an object of type TestingState, that we will use to test the component. We can do so by calling the component_state_for_testing function, which automatically infers that it should return an object of type TestingState.
We can even implement this as part of the Default trait, which allows us to return an empty TestingState with the Default::default() syntax.
Let's summarize what we've done so far:
- We defined a mock contract that embeds the component we want to test.
- We defined a concrete implementation of
ComponentState<TContractState>using a type alias withMockContract::ContractState, that we namedTestingState. - We defined a function that uses
component_state_for_testingto return aTestingStateobject.
We can now write tests for the component by calling its functions directly, without having to deploy a mock contract. This approach is more lightweight than the previous one, and it allows testing internal functions of the component that are not exposed to the outside world trivially.
use super::counter::{CounterComponent};
use super::MockContract;
use CounterComponent::{CounterImpl};
type TestingState = CounterComponent::ComponentState<MockContract::ContractState>;
// You can derive even `Default` on this type alias
impl TestingStateDefault of Default<TestingState> {
fn default() -> TestingState {
CounterComponent::component_state_for_testing()
}
}
#[test]
#[available_gas(2000000)]
fn test_increment() {
let mut counter: TestingState = Default::default();
counter.increment();
counter.increment();
assert_eq!(counter.get_counter(), 2);
}
Starknet contracts: ABIs and cross-contract interactions
Interactions between smart contracts are an important feature when creating complex decentralized applications, as it allows for composability and separation of concerns. This chapter sheds light on how to make contracts interact with each other.
Specifically, you'll learn about ABIs, contract interfaces, the contract and library dispatchers and their low-level system call equivalents!
ABIs and Contract Interfaces
Cross-contract interactions between smart contracts on a blockchain is a common practice which enables us to build flexible contracts that can speak with each other.
Achieving this on Starknet requires something we call an interface.
ABI - Application Binary Interface
On Starknet, the ABI of a contract is a JSON representation of the contract's functions and structures, giving anyone (or any other contract) the ability to form encoded calls to it. It is a blueprint that instructs how functions should be called, what input parameters they expect, and in what format.
While we write our smart contract logics in high-level Cairo, they are stored on the VM as executable bytecodes which are in binary formats. Since this bytecode is not human readable, it requires interpretation to be understood. This is where ABIs come into play, defining specific methods which can be called to a smart contract for execution. Without an ABI, it becomes practically impossible for external actors to understand how to interact with a contract.
ABIs are typically used in dApps frontends, allowing it to format data correctly, making it understandable by the smart contract and vice versa. When you interact with a smart contract through a block explorer like Voyager or Starkscan, they use the contract's ABI to format the data you send to the contract and the data it returns.
Interface
The interface of a contract is a list of the functions it exposes publicly. It specifies the function signatures (name, parameters, visibility and return value) contained in a smart contract without including the function body.
Contract interfaces in Cairo are traits annotated with the #[starknet::interface] attribute. If you are new to traits, check out the dedicated chapter on traits.
One important specification is that this trait must be generic over the TContractState type. This is required for functions to access the contract's storage, so that they can read and write to it.
Note: The contract constructor is not part of the interface. Nor are internal functions part of the interface.
Here's a sample interface for an ERC20 token contract. As you can see, it's a generic trait over the TContractState type. view functions have a self parameter of type @TContractState, while external functions have a self parameter of type passed by reference ref self: TContractState.
use starknet::ContractAddress;
#[starknet::interface]
trait IERC20<TContractState> {
fn name(self: @TContractState) -> felt252;
fn symbol(self: @TContractState) -> felt252;
fn decimals(self: @TContractState) -> u8;
fn total_supply(self: @TContractState) -> u256;
fn balance_of(self: @TContractState, account: ContractAddress) -> u256;
fn allowance(self: @TContractState, owner: ContractAddress, spender: ContractAddress) -> u256;
fn transfer(ref self: TContractState, recipient: ContractAddress, amount: u256) -> bool;
fn transfer_from(
ref self: TContractState, sender: ContractAddress, recipient: ContractAddress, amount: u256
) -> bool;
fn approve(ref self: TContractState, spender: ContractAddress, amount: u256) -> bool;
}Listing 99-4: A simple ERC20 Interface
In the next chapter, we will see how we can call contracts from other smart contracts using dispatchers and syscalls .
Interacting with other contracts and classes using Dispatchers and syscalls
Each time a contract interface is defined, two dispatchers are automatically created and exported by the compiler. Let's consider an interface that we named IERC20, these would be:
- The Contract Dispatcher
IERC20Dispatcher - The Library Dispatcher
IERC20LibraryDispatcher
The compiler also generates a trait IERC20DispatcherTrait, allowing us to call the functions defined in the interface on the dispatcher struct.
In this chapter, we are going to discuss what these are, how they work and how to use them.
To effectively break down the concepts in this chapter, we are going to be using the IERC20 interface from the previous chapter (refer to Listing 99-4):
Contract Dispatcher
As mentioned previously, traits annotated with the #[starknet::interface] attribute automatically generate a dispatcher and a trait on compilation.
Our IERC20 interface is expanded into something like this:
Note: The expanded code for our IERC20 interface is a lot longer, but to keep this chapter concise and straight to the point, we focused on one view function name, and one external function transfer.
use starknet::{ContractAddress};
trait IERC20DispatcherTrait<T> {
fn name(self: T) -> felt252;
fn transfer(self: T, recipient: ContractAddress, amount: u256);
}
#[derive(Copy, Drop, starknet::Store, Serde)]
struct IERC20Dispatcher {
contract_address: ContractAddress,
}
impl IERC20DispatcherImpl of IERC20DispatcherTrait<IERC20Dispatcher> {
fn name(
self: IERC20Dispatcher
) -> felt252 { // starknet::call_contract_syscall is called in here
}
fn transfer(
self: IERC20Dispatcher, recipient: ContractAddress, amount: u256
) { // starknet::call_contract_syscall is called in here
}
}Listing 99-5: An expanded form of the IERC20 trait
As you can see, the "classic" dispatcher is just a struct that wraps a contract address and implements the DispatcherTrait generated by the compiler, allowing us to call functions from another contract. This means that we can instantiate a struct with the address of the contract we want to call, and then simply call the functions defined in the interface on the dispatcher struct as if they were methods of that type.
It's also worthy of note that all these are abstracted behind the scenes thanks to the power of Cairo plugins.
Calling Contracts using the Contract Dispatcher
This is an example of a contract named TokenWrapper using a dispatcher to call functions defined on an ERC-20 token. Calling transfer_token will modify the state of the contract deployed at contract_address.
use starknet::ContractAddress;
#[starknet::interface]
trait IERC20<TContractState> {
fn name(self: @TContractState) -> felt252;
fn symbol(self: @TContractState) -> felt252;
fn decimals(self: @TContractState) -> u8;
fn total_supply(self: @TContractState) -> u256;
fn balance_of(self: @TContractState, account: ContractAddress) -> u256;
fn allowance(self: @TContractState, owner: ContractAddress, spender: ContractAddress) -> u256;
fn transfer(ref self: TContractState, recipient: ContractAddress, amount: u256) -> bool;
fn transfer_from(
ref self: TContractState, sender: ContractAddress, recipient: ContractAddress, amount: u256
) -> bool;
fn approve(ref self: TContractState, spender: ContractAddress, amount: u256) -> bool;
}
#[starknet::interface]
trait ITokenWrapper<TContractState> {
fn token_name(self: @TContractState, contract_address: ContractAddress) -> felt252;
fn transfer_token(
ref self: TContractState,
contract_address: ContractAddress,
recipient: ContractAddress,
amount: u256
) -> bool;
}
//**** Specify interface here ****//
#[starknet::contract]
mod TokenWrapper {
use super::IERC20DispatcherTrait;
use super::IERC20Dispatcher;
use super::ITokenWrapper;
use starknet::ContractAddress;
#[storage]
struct Storage {}
impl TokenWrapper of ITokenWrapper<ContractState> {
fn token_name(self: @ContractState, contract_address: ContractAddress) -> felt252 {
IERC20Dispatcher { contract_address }.name()
}
fn transfer_token(
ref self: ContractState,
contract_address: ContractAddress,
recipient: ContractAddress,
amount: u256
) -> bool {
IERC20Dispatcher { contract_address }.transfer(recipient, amount)
}
}
}
Listing 99-6: A sample contract which uses the Contract Dispatcher
As you can see, we had to first import IERC20DispatcherTrait and IERC20Dispatcher generated by the compiler, which allows us to make calls to the methods implemented for the IERC20Dispatcher struct (name, transfer, etc), passing in the contract_address of the contract we want to call in the IERC20Dispatcher struct.
Library Dispatcher
The key difference between the contract dispatcher and the library dispatcher lies in the execution context of the logic defined in the class. While regular dispatchers are used to call functions from contracts (with an associated state), library dispatchers are used to call classes (stateless).
Let's consider two contracts A and B.
When A uses IBDispatcher to call functions from the contract B, the execution context of the logic defined in B is that of B. This means that the value returned by get_caller_address() in B will return the address of A, and updating a storage variable in B will update the storage of B.
When A uses IBLibraryDispatcher to call functions from the class of B, the execution context of the logic defined in B's class is that of A. This means that the value returned by get_caller_address() variable in B will return the address of the caller of A, and updating a storage variable in B's class will update the storage of A (remember that the class of B is stateless; there is no state that can be updated!)
The expanded form of the struct and trait generated by the compiler look like:
use starknet::ContractAddress;
trait IERC20DispatcherTrait<T> {
fn name(self: T) -> felt252;
fn transfer(self: T, recipient: ContractAddress, amount: u256);
}
#[derive(Copy, Drop, starknet::Store, Serde)]
struct IERC20LibraryDispatcher {
class_hash: starknet::ClassHash,
}
impl IERC20LibraryDispatcherImpl of IERC20DispatcherTrait<IERC20LibraryDispatcher> {
fn name(
self: IERC20LibraryDispatcher
) -> felt252 { // starknet::syscalls::library_call_syscall is called in here
}
fn transfer(
self: IERC20LibraryDispatcher, recipient: ContractAddress, amount: u256
) { // starknet::syscalls::library_call_syscall is called in here
}
}Notice that the main difference between the regular contract dispatcher and the library dispatcher is that the former uses call_contract_syscall while the latter uses library_call_syscall.
Listing 99-7: An expanded form of the IERC20 trait
Calling Contracts using the Library Dispatcher
Below's a sample code for calling contracts using the Library Dispatcher.
use starknet::ContractAddress;
#[starknet::interface]
trait IContractB<TContractState> {
fn set_value(ref self: TContractState, value: u128);
fn get_value(self: @TContractState) -> u128;
}
#[starknet::contract]
mod ContractA {
use super::{IContractBDispatcherTrait, IContractBLibraryDispatcher};
use starknet::ContractAddress;
#[storage]
struct Storage {
value: u128
}
#[generate_trait]
#[external(v0)]
impl ContractA of IContractA {
fn set_value(ref self: ContractState, value: u128) {
IContractBLibraryDispatcher { class_hash: starknet::class_hash_const::<0x1234>() }
.set_value(value)
}
fn get_value(self: @ContractState) -> u128 {
self.value.read()
}
}
}Listing 99-8: A sample contract using the Library Dispatcher
As you can see, we had to first import in our contract the IContractBDispatcherTrait and IContractBLibraryDispatcher which were generated from our interface by the compiler. Then, we can create an instance of IContractBLibraryDispatcher passing in the class_hash of the class we want to make library calls to. From there, we can call the functions defined in that class, executing its logic in the context of our contract. When we call set_value on ContractA, it will make a library call to the set_value function in ContractB, updating the value of the storage variable value in ContractA.
Using low-level syscalls
Another way to call other contracts and classes is to use the starknet::call_contract_syscalland starknet::library_call_syscall system calls. The dispatchers we described in the previous sections are high-level syntaxes for these low-level system calls.
Using these syscalls can be handy for customized error handling or to get more control over the serialization/deserialization of the call data and the returned data. Here's an example demonstrating how to use a call_contract_sycall to call the transfer function of an ERC20 contract:
use starknet::ContractAddress;
#[starknet::interface]
trait ITokenWrapper<TContractState> {
fn transfer_token(
ref self: TContractState,
address: ContractAddress,
sender: ContractAddress,
recipient: ContractAddress,
amount: u256
) -> bool;
}
#[starknet::contract]
mod TokenWrapper {
use super::ITokenWrapper;
use serde::Serde;
use starknet::SyscallResultTrait;
use starknet::ContractAddress;
#[storage]
struct Storage {}
impl TokenWrapper of ITokenWrapper<ContractState> {
fn transfer_token(
ref self: ContractState,
address: ContractAddress,
sender: ContractAddress,
recipient: ContractAddress,
amount: u256
) -> bool {
let mut call_data: Array<felt252> = ArrayTrait::new();
Serde::serialize(@sender, ref call_data);
Serde::serialize(@recipient, ref call_data);
Serde::serialize(@amount, ref call_data);
let mut res = starknet::call_contract_syscall(
address, selector!("transferFrom"), call_data.span()
)
.unwrap_syscall();
Serde::<bool>::deserialize(ref res).unwrap()
}
}
}
Listing 99-9: A sample contract using syscalls
To use this syscall, we passed in the contract address, the selector of the function we want to call, and the call arguments.
The call arguments must be provided as an array of felt252. To build this array, we serialize the expected function parameters into an Array<felt252> using the Serde trait, and then pass this array as calldata. At the end, we are returned a serialized value which we'll need to deserialize ourselves!
Other examples
This section contains additional examples of Starknet smart contracts, utilizing various features of the Cairo programming language. Your contributions are welcome and encouraged, as we aim to gather as many diverse examples as possible.
Deploying and Interacting with a Voting contract
The Vote contract in Starknet begins by registering voters through the contract's constructor. Three voters are initialized at this stage, and their addresses are passed to an internal function _register_voters. This function adds the voters to the contract's state, marking them as registered and eligible to vote.
Within the contract, the constants YES and NO are defined to represent the voting options (1 and 0, respectively). These constants facilitate the voting process by standardizing the input values.
Once registered, a voter is able to cast a vote using the vote function, selecting either the 1 (YES) or 0 (NO) as their vote. When voting, the state of the contract is updated, recording the vote and marking the voter as having voted. This ensures that the voter is not able to cast a vote again within the same proposal. The casting of a vote triggers the VoteCast event, logging the action.
The contract also monitors unauthorized voting attempts. If an unauthorized action is detected, such as a non-registered user attempting to vote or a user trying to vote again, the UnauthorizedAttempt event is emitted.
Together, these functions, states, constants, and events create a structured voting system, managing the lifecycle of a vote from registration to casting, event logging, and result retrieval within the Starknet environment. Constants like YES and NO help streamline the voting process, while events play a vital role in ensuring transparency and traceability.
/// @dev Core Library Imports for the Traits outside the Starknet Contract
use starknet::ContractAddress;
/// @dev Trait defining the functions that can be implemented or called by the Starknet Contract
#[starknet::interface]
trait VoteTrait<T> {
/// @dev Function that returns the current vote status
fn get_vote_status(self: @T) -> (u8, u8, u8, u8);
/// @dev Function that checks if the user at the specified address is allowed to vote
fn voter_can_vote(self: @T, user_address: ContractAddress) -> bool;
/// @dev Function that checks if the specified address is registered as a voter
fn is_voter_registered(self: @T, address: ContractAddress) -> bool;
/// @dev Function that allows a user to vote
fn vote(ref self: T, vote: u8);
}
/// @dev Starknet Contract allowing three registered voters to vote on a proposal
#[starknet::contract]
mod Vote {
use starknet::ContractAddress;
use starknet::get_caller_address;
const YES: u8 = 1_u8;
const NO: u8 = 0_u8;
/// @dev Structure that stores vote counts and voter states
#[storage]
struct Storage {
yes_votes: u8,
no_votes: u8,
can_vote: LegacyMap::<ContractAddress, bool>,
registered_voter: LegacyMap::<ContractAddress, bool>,
}
/// @dev Contract constructor initializing the contract with a list of registered voters and 0 vote count
#[constructor]
fn constructor(
ref self: ContractState,
voter_1: ContractAddress,
voter_2: ContractAddress,
voter_3: ContractAddress
) {
// Register all voters by calling the _register_voters function
self._register_voters(voter_1, voter_2, voter_3);
// Initialize the vote count to 0
self.yes_votes.write(0_u8);
self.no_votes.write(0_u8);
}
/// @dev Event that gets emitted when a vote is cast
#[event]
#[derive(Drop, starknet::Event)]
enum Event {
VoteCast: VoteCast,
UnauthorizedAttempt: UnauthorizedAttempt,
}
/// @dev Represents a vote that was cast
#[derive(Drop, starknet::Event)]
struct VoteCast {
voter: ContractAddress,
vote: u8,
}
/// @dev Represents an unauthorized attempt to vote
#[derive(Drop, starknet::Event)]
struct UnauthorizedAttempt {
unauthorized_address: ContractAddress,
}
/// @dev Implementation of VoteTrait for ContractState
#[external(v0)]
impl VoteImpl of super::VoteTrait<ContractState> {
/// @dev Returns the voting results
fn get_vote_status(self: @ContractState) -> (u8, u8, u8, u8) {
let (n_yes, n_no) = self._get_voting_result();
let (yes_percentage, no_percentage) = self._get_voting_result_in_percentage();
(n_yes, n_no, yes_percentage, no_percentage)
}
/// @dev Check whether a voter is allowed to vote
fn voter_can_vote(self: @ContractState, user_address: ContractAddress) -> bool {
self.can_vote.read(user_address)
}
/// @dev Check whether an address is registered as a voter
fn is_voter_registered(self: @ContractState, address: ContractAddress) -> bool {
self.registered_voter.read(address)
}
/// @dev Submit a vote
fn vote(ref self: ContractState, vote: u8) {
assert(vote == NO || vote == YES, 'VOTE_0_OR_1');
let caller: ContractAddress = get_caller_address();
self._assert_allowed(caller);
self.can_vote.write(caller, false);
if (vote == NO) {
self.no_votes.write(self.no_votes.read() + 1_u8);
}
if (vote == YES) {
self.yes_votes.write(self.yes_votes.read() + 1_u8);
}
self.emit(VoteCast { voter: caller, vote: vote, });
}
}
/// @dev Internal Functions implementation for the Vote contract
#[generate_trait]
impl InternalFunctions of InternalFunctionsTrait {
/// @dev Registers the voters and initializes their voting status to true (can vote)
fn _register_voters(
ref self: ContractState,
voter_1: ContractAddress,
voter_2: ContractAddress,
voter_3: ContractAddress
) {
self.registered_voter.write(voter_1, true);
self.can_vote.write(voter_1, true);
self.registered_voter.write(voter_2, true);
self.can_vote.write(voter_2, true);
self.registered_voter.write(voter_3, true);
self.can_vote.write(voter_3, true);
}
}
/// @dev Asserts implementation for the Vote contract
#[generate_trait]
impl AssertsImpl of AssertsTrait {
// @dev Internal function that checks if an address is allowed to vote
fn _assert_allowed(ref self: ContractState, address: ContractAddress) {
let is_voter: bool = self.registered_voter.read((address));
let can_vote: bool = self.can_vote.read((address));
if (can_vote == false) {
self.emit(UnauthorizedAttempt { unauthorized_address: address, });
}
assert(is_voter == true, 'USER_NOT_REGISTERED');
assert(can_vote == true, 'USER_ALREADY_VOTED');
}
}
/// @dev Implement the VotingResultTrait for the Vote contract
#[generate_trait]
impl VoteResultFunctionsImpl of VoteResultFunctionsTrait {
// @dev Internal function to get the voting results (yes and no vote counts)
fn _get_voting_result(self: @ContractState) -> (u8, u8) {
let n_yes: u8 = self.yes_votes.read();
let n_no: u8 = self.no_votes.read();
(n_yes, n_no)
}
// @dev Internal function to calculate the voting results in percentage
fn _get_voting_result_in_percentage(self: @ContractState) -> (u8, u8) {
let n_yes: u8 = self.yes_votes.read();
let n_no: u8 = self.no_votes.read();
let total_votes: u8 = n_yes + n_no;
if (total_votes == 0_u8) {
return (0, 0);
}
let yes_percentage: u8 = (n_yes * 100_u8) / (total_votes);
let no_percentage: u8 = (n_no * 100_u8) / (total_votes);
(yes_percentage, no_percentage)
}
}
}Voting smart contract
Deploying, calling and invoking the Voting Contract
Part of the Starknet experience is deploying and interacting with smart contracts.
Once the contract is deployed, we can interact with it by calling and invoking its functions:
- Calling contracts: Interacting with external functions that only read from the state. These functions do not alter the state of the network, so they don't require fees or signing.
- Invoking contracts: Interacting with external functions that can write to the state. These functions do alter the state of the network and require fees and signing.
We will setup a local development node using katana to deploy the voting contract. Then, we'll interact with the contract by calling and invoking its functions. You can also use the Goerli Testnet instead of katana. However, we recommend using katana for local development and testing. You can find the complete tutorial for katana in the Local Development with Katana chapter of the Starknet Book.
The katana local Starknet node
katana is designed to support local development by the Dojo team. It will allow you to do everything you need to do with Starknet, but locally. It is a great tool for development and testing.
To install katana from the source code, please refer to the Local Development with Katana chapter of the Starknet Book.
Once you have katana installed, you can start the local Starknet node with:
katana --accounts 3 --seed 0 --gas-price 250
This command will start a local Starknet node with 3 deployed accounts. We will use these accounts to deploy and interact with the voting contract:
...
PREFUNDED ACCOUNTS
==================
| Account address | 0x03ee9e18edc71a6df30ac3aca2e0b02a198fbce19b7480a63a0d71cbd76652e0
| Private key | 0x0300001800000000300000180000000000030000000000003006001800006600
| Public key | 0x01b7b37a580d91bc3ad4f9933ed61f3a395e0e51c9dd5553323b8ca3942bb44e
| Account address | 0x033c627a3e5213790e246a917770ce23d7e562baa5b4d2917c23b1be6d91961c
| Private key | 0x0333803103001800039980190300d206608b0070db0012135bd1fb5f6282170b
| Public key | 0x04486e2308ef3513531042acb8ead377b887af16bd4cdd8149812dfef1ba924d
| Account address | 0x01d98d835e43b032254ffbef0f150c5606fa9c5c9310b1fae370ab956a7919f5
| Private key | 0x07ca856005bee0329def368d34a6711b2d95b09ef9740ebf2c7c7e3b16c1ca9c
| Public key | 0x07006c42b1cfc8bd45710646a0bb3534b182e83c313c7bc88ecf33b53ba4bcbc
...
Before we can interact with the voting contract, we need to prepare the voter and admin accounts on Starknet. Each voter account must be registered and sufficiently funded for voting. For a more detailed understanding of how accounts operate with Account Abstraction, refer to the Account Abstraction chapter of the Starknet Book.
Smart wallets for voting
Aside from Scarb you will need to have Starkli installed. Starkli is a command line tool that allows you to interact with Starknet. You can find the installation instructions in the Environment setup chapter of the Starknet Book.
For each smart wallet we'll use, we must create a Signer within the encrypted keystore and an Account Descriptor. This process is also detailed in the Environment setup chapter of the Starknet Book.
We can create Signers and Account Descriptors for the accounts we want to use for voting. Let's create a smart wallet for voting in our smart contract.
Firstly, we create a signer from a private key:
starkli signer keystore from-key ~/.starkli-wallets/deployer/account0_keystore.json
Then, we create the Account Descriptor by fetching the katana account we want to use:
starkli account fetch <KATANA ACCOUNT ADDRESS> --rpc http://0.0.0.0:5050 --output ~/.starkli-wallets/deployer/account0_account.json
This command will create a new account0_account.json file containing the following details:
{
"version": 1,
"variant": {
"type": "open_zeppelin",
"version": 1,
"public_key": "<SMART_WALLET_PUBLIC_KEY>"
},
"deployment": {
"status": "deployed",
"class_hash": "<SMART_WALLET_CLASS_HASH>",
"address": "<SMART_WALLET_ADDRESS>"
}
}
You can retrieve the smart wallet class hash (it will be the same for all your smart wallets) with the following command. Notice the use of the --rpc flag and the RPC endpoint provided by katana:
starkli class-hash-at <SMART_WALLET_ADDRESS> --rpc http://0.0.0.0:5050
For the public key, you can use the starkli signer keystore inspect command with the directory of the keystore json file:
starkli signer keystore inspect ~/.starkli-wallets/deployer/account0_keystore.json
This process is identical for account_1 and account_2 in case you want to have a second and a third voter.
Contract Deployment
Before deploying, we need to declare the contract. We can do this with the starkli declare command:
starkli declare target/dev/starknetbook_chapter_2_Vote.sierra.json --rpc http://0.0.0.0:5050 --account ~/.starkli-wallets/deployer/account0_account.json --keystore ~/.starkli-wallets/deployer/account0_keystore.json
If the compiler version you're using is older than the one used by Starkli and you encounter a compiler-version error while using the command above, you can specify a compiler version to use in the command by adding the --compiler-version x.y.z flag.
If you're still encountering issues with the compiler version, try upgrading Starkli using the command: starkliup to make sure you're using the latest version of starkli.
The class hash of the contract is: 0x06974677a079b7edfadcd70aa4d12aac0263a4cda379009fca125e0ab1a9ba52. You can find it on any block explorer.
The --rpc flag specifies the RPC endpoint to use (the one provided by katana). The --account flag specifies the account to use for signing the transaction. The account we use here is the one we created in the previous step. The --keystore flag specifies the keystore file to use for signing the transaction.
Since we are using a local node, the transaction will achieve finality immediately. If you are using the Goerli Testnet, you will need to wait for the transaction to be final, which usually takes a few seconds.
The following command deploys the voting contract and registers voter_0, voter_1, and voter_2 as eligible voters. These are the constructor arguments, so add a voter account that you can later vote with.
starkli deploy <class_hash_of_the_contract_to_be_deployed> <voter_0_address> <voter_1_address> <voter_2_address> --rpc http://0.0.0.0:5050 --account ~/.starkli-wallets/deployer/account0_account.json --keystore ~/.starkli-wallets/deployer/account0_keystore.json
An example command:
starkli deploy 0x06974677a079b7edfadcd70aa4d12aac0263a4cda379009fca125e0ab1a9ba52 0x03ee9e18edc71a6df30ac3aca2e0b02a198fbce19b7480a63a0d71cbd76652e0 0x033c627a3e5213790e246a917770ce23d7e562baa5b4d2917c23b1be6d91961c 0x01d98d835e43b032254ffbef0f150c5606fa9c5c9310b1fae370ab956a7919f5 --rpc http://0.0.0.0:5050 --account ~/.starkli-wallets/deployer/account0_account.json --keystore ~/.starkli-wallets/deployer/account0_keystore.json
In this case, the contract has been deployed at an specific address: 0x05ea3a690be71c7fcd83945517f82e8861a97d42fca8ec9a2c46831d11f33349. This address will be different for you. We will use this address to interact with the contract.
Voter Eligibility Verification
In our voting contract, we have two functions to validate voter eligibility, voter_can_vote and is_voter_registered. These are external read functions, which mean they don't alter the state of the contract but only read the current state.
The is_voter_registered function checks whether a particular address is registered as an eligible voter in the contract. The voter_can_vote function, on the other hand, checks whether the voter at a specific address is currently eligible to vote, i.e., they are registered and haven't voted already.
You can call these functions using the starkli call command. Note that the call command is used for read functions, while the invoke command is used for functions that can also write to storage. The call command does not require signing, while the invoke command does.
starkli call 0x05ea3a690be71c7fcd83945517f82e8861a97d42fca8ec9a2c46831d11f33349 voter_can_vote 0x03ee9e18edc71a6df30ac3aca2e0b02a198fbce19b7480a63a0d71cbd76652e0 --rpc http://0.0.0.0:5050
First we added the address of the contract, then the function we want to call, and finally the input for the function. In this case, we are checking whether the voter at the address 0x03ee9e18edc71a6df30ac3aca2e0b02a198fbce19b7480a63a0d71cbd76652e0 can vote.
Since we provided a registered voter address as an input, the result is 1 (boolean true), indicating the voter is eligible to vote.
Next, let's call the is_voter_registered function using an unregistered account address to observe the output:
starkli call 0x05ea3a690be71c7fcd83945517f82e8861a97d42fca8ec9a2c46831d11f33349 is_voter_registered 0x44444444444444444 --rpc http://0.0.0.0:5050
With an unregistered account address, the terminal output is 0 (i.e., false), confirming that the account is not eligible to vote.
Casting a Vote
Now that we have established how to verify voter eligibility, we can vote! To vote, we interact with the vote function, which is flagged as external, necessitating the use of the starknet invoke command.
The invoke command syntax resembles the call command, but for voting, we submit either 1 (for Yes) or 0 (for No) as our input. When we invoke the vote function, we are charged a fee, and the transaction must be signed by the voter; we are writing to the contract's storage.
//Voting Yes
starkli invoke 0x05ea3a690be71c7fcd83945517f82e8861a97d42fca8ec9a2c46831d11f33349 vote 1 --rpc http://0.0.0.0:5050 --account ~/.starkli-wallets/deployer/account0_account.json --keystore ~/.starkli-wallets/deployer/account0_keystore.json
//Voting No
starkli invoke 0x05ea3a690be71c7fcd83945517f82e8861a97d42fca8ec9a2c46831d11f33349 vote 0 --rpc http://0.0.0.0:5050 --account ~/.starkli-wallets/deployer/account0_account.json --keystore ~/.starkli-wallets/deployer/account0_keystore.json
You will be prompted to enter the password for the signer. Once you enter the password, the transaction will be signed and submitted to the Starknet network. You will receive the transaction hash as output. With the starkli transaction command, you can get more details about the transaction:
starkli transaction <TRANSACTION_HASH> --rpc http://0.0.0.0:5050
This returns:
{
"transaction_hash": "0x5604a97922b6811060e70ed0b40959ea9e20c726220b526ec690de8923907fd",
"max_fee": "0x430e81",
"version": "0x1",
"signature": [
"0x75e5e4880d7a8301b35ff4a1ed1e3d72fffefa64bb6c306c314496e6e402d57",
"0xbb6c459b395a535dcd00d8ab13d7ed71273da4a8e9c1f4afe9b9f4254a6f51"
],
"nonce": "0x3",
"type": "INVOKE",
"sender_address": "0x3ee9e18edc71a6df30ac3aca2e0b02a198fbce19b7480a63a0d71cbd76652e0",
"calldata": [
"0x1",
"0x5ea3a690be71c7fcd83945517f82e8861a97d42fca8ec9a2c46831d11f33349",
"0x132bdf85fc8aa10ac3c22f02317f8f53d4b4f52235ed1eabb3a4cbbe08b5c41",
"0x0",
"0x1",
"0x1",
"0x1"
]
}
If you try to vote twice with the same signer you will get an error:
Error: code=ContractError, message="Contract error"
The error is not very informative, but you can get more details when looking at the output in the terminal where you started katana (our local Starknet node):
...
Transaction execution error: "Error in the called contract (0x03ee9e18edc71a6df30ac3aca2e0b02a198fbce19b7480a63a0d71cbd76652e0):
Error at pc=0:81:
Got an exception while executing a hint: Custom Hint Error: Execution failed. Failure reason: \"USER_ALREADY_VOTED\".
...
The key for the error is USER_ALREADY_VOTED.
assert(can_vote == true, 'USER_ALREADY_VOTED');
We can repeat the process to create Signers and Account Descriptors for the accounts we want to use for voting. Remember that each Signer must be created from a private key, and each Account Descriptor must be created from a public key, a smart wallet address, and the smart wallet class hash (which is the same for each voter).
starkli invoke 0x05ea3a690be71c7fcd83945517f82e8861a97d42fca8ec9a2c46831d11f33349 vote 0 --rpc http://0.0.0.0:5050 --account ~/.starkli-wallets/deployer/account1_account.json --keystore ~/.starkli-wallets/deployer/account1_keystore.json
starkli invoke 0x05ea3a690be71c7fcd83945517f82e8861a97d42fca8ec9a2c46831d11f33349 vote 1 --rpc http://0.0.0.0:5050 --account ~/.starkli-wallets/deployer/account2_account.json --keystore ~/.starkli-wallets/deployer/account2_keystore.json
Visualizing Vote Outcomes
To examine the voting results, we invoke the get_vote_status function, another view function, through the starknet call command.
starkli call 0x05ea3a690be71c7fcd83945517f82e8861a97d42fca8ec9a2c46831d11f33349 get_vote_status --rpc http://0.0.0.0:5050
The output reveals the tally of "Yes" and "No" votes along with their relative percentages.
L1-L2 Messaging
A crucial feature of a Layer 2 is its ability to interact with Layer 1.
Starknet has its own L1-L2 Messaging system, which is different from its consensus mechanism and the submission of state updates on L1. Messaging is a way for smart-contracts on L1 to interact with smart-contracts on L2 (or the other way around), allowing us to do "cross-chain" transactions. For example, we can do some computations on a chain and use the result of this computation on the other chain.
Bridges on Starknet all use L1-L2 messaging. Let's say that you want to bridge tokens from Ethereum to Starknet. You will simply have to deposit your tokens in the L1 bridge contract, which will automatically trigger the minting of the same token on L2. Another good use case for L1-L2 messaging would be DeFi pooling.
On Starknet, it's important to note that the messaging system is asynchronous and asymmetric.
- Asynchronous: this means that in your contract code (being solidity or cairo), you can't wait the result of the message being sent on the other chain within your contract code execution.
- Asymmetric: sending a message from Ethereum to Starknet (
L1->L2) is fully automatized by the Starknet sequencer, which means that the message is being automatically delivered to the target contract on L2. However, when sending a message from Starknet to Ethereum (L2->L1), only the hash of the message is sent on L1 by the Starknet sequencer. You must then consume the message manually via a transaction on L1.
Let's dive into the details.
The StarknetMessaging Contract
The crucial component of the L1-L2 Messaging system is the StarknetCore contract. It is a set of Solidity contracts deployed on Ethereum that allows Starknet to function properly. One of the contracts of StarknetCore is called StarknetMessaging and it is the contract responsible for passing messages between Starknet and Ethereum. StarknetMessaging follows an interface with functions allowing to send message to L2, receiving messages on L1 from L2 and canceling messages.
interface IStarknetMessaging is IStarknetMessagingEvents {
function sendMessageToL2(
uint256 toAddress,
uint256 selector,
uint256[] calldata payload
) external returns (bytes32);
function consumeMessageFromL2(uint256 fromAddress, uint256[] calldata payload)
external
returns (bytes32);
function startL1ToL2MessageCancellation(
uint256 toAddress,
uint256 selector,
uint256[] calldata payload,
uint256 nonce
) external;
function cancelL1ToL2Message(
uint256 toAddress,
uint256 selector,
uint256[] calldata payload,
uint256 nonce
) external;
}
Starknet messaging contract interface
In the case of L1->L2 messages, the Starknet sequencer is constantly listening to the logs emitted by the StarknetMessaging contract on Ethereum.
Once a message is detected in a log, the sequencer prepares and executes a L1HandlerTransaction to call the function on the target L2 contract. This takes up to 1-2 minutes to be done (few seconds for ethereum block to be mined, and then the sequencer must build and execute the transaction).
L2->L1 messages are prepared by contracts execution on L2 and are part of the block produced. When the sequencer produces a block, it sends the hash of each message prepared by contracts execution
to the StarknetCore contract on L1, where they can then be consumed once the block they belong to is proven and verified on Ethereum (which for now is around 3-4 hours).
Sending messages from Ethereum to Starknet
If you want to send messages from Ethereum to Starknet, your Solidity contracts must call the sendMessageToL2 function of the StarknetMessaging contract. To receive these messages on Starknet, you will need to annotate functions that can be called from L1 with the #[l1_handler] attribute.
Let's take a simple contract taken from this tutorial where we want to send a message to Starknet.
The _snMessaging is a state variable already initialized with the address of the StarknetMessaging contract. You can check those addresses here.
// Sends a message on Starknet with a single felt.
function sendMessageFelt(
uint256 contractAddress,
uint256 selector,
uint256 myFelt
)
external
payable
{
// We "serialize" here the felt into a payload, which is an array of uint256.
uint256[] memory payload = new uint256[](1);
payload[0] = myFelt;
// msg.value must always be >= 20_000 wei.
_snMessaging.sendMessageToL2{value: msg.value}(
contractAddress,
selector,
payload
);
}
The function sends a message with a single felt value to the StarknetMessaging contract.
Please note that if you want to send more complex data you can. Just be aware that your cairo contract will only understand felt252 data type. So you must ensure that the serialization of your data into the uint256 array follow the cairo serialization scheme.
It's important to note that we have {value: msg.value}. In fact, the minimum value we've to send here is 20k wei, due to the fact that the StarknetMessaging contract will register
the hash of our message in the storage of Ethereum.
Additionally to those 20k wei, as the L1HandlerTransaction that will be executed by the sequencer is not bound to any account (the message originates from L1), you must also ensure
that you pay enough fees on L1 for your message to be deserialized and processed on L2.
The fees of the L1HandlerTransaction are computed in a regular manner as it would be done for an Invoke transaction. For this, you can profile
the gas consumption using starkli or snforge to estimate the cost of your message execution.
The signature of the sendMessageToL2 is:
function sendMessageToL2(
uint256 toAddress,
uint256 selector,
uint256[] calldata payload
) external override returns (bytes32);
The parameters are as follow:
toAddress: The contract address on L2 that will be called.selector: The selector of the function of this contract attoAddress. This selector (function) must have the#[l1_handler]attribute to be callable.payload: The payload is always an array offelt252(which are represented byuint256in solidity). For this reason we've inserted the inputmyFeltinto the array. This is why we need to insert the input data into an array.
On the Starknet side, to receive this message, we have:
#![allow(unused)] fn main() { #[l1_handler] fn msg_handler_felt(ref self: ContractState, from_address: felt252, my_felt: felt252) { assert(from_address == self.allowed_message_sender.read(), 'Invalid message sender'); // You can now use the data, automatically deserialized from the message payload. assert(my_felt == 123, 'Invalid value'); } }
We need to add the #[l1_handler] attribute to our function. L1 handlers are special functions that can only be executed by a L1HandlerTransaction. There is nothing particular to do to receive transactions from L1, as the message is relayed by the sequencer automatically. In your #[l1_handler] functions, it is important to verify the sender of the L1 message to ensure that our contract can only receive messages from a trusted L1 contract.
Sending messages from Starknet to Ethereum
When sending messages from Starknet to Ethereum, you will have to use the send_message_to_l1 syscall in your Cairo contracts. This syscall allows you to send messages to the StarknetMessaging contract on L1. Unlike L1->L2 messages, L2->L1 messages must be consumed manually, which means that you will need your Solidity contract to call the consumeMessageFromL2 function of the StarknetMessaging contract explicitly in order to consume the message.
To send a message from L2 to L1, what we would do on Starknet is:
#![allow(unused)] fn main() { fn send_message_felt(ref self: ContractState, to_address: EthAddress, my_felt: felt252) { // Note here, we "serialize" my_felt, as the payload must be // a `Span<felt252>`. starknet::send_message_to_l1_syscall(to_address.into(), array![my_felt].span()) .unwrap(); } }
We simply build the payload and pass it, along with the L1 contract address, to the syscall function.
On L1, the important part is to build the same payload as on L2. Then you call consumeMessageFromL2 by passing the L2 contract address and the payload.
Please be aware that the L2 contract address expected by the consumeMessageFromL2 is the contract address of the account that sends the transaction on L2,
and not the address of the contract executing the send_message_to_l1_syscall.
function consumeMessageFelt(
uint256 fromAddress,
uint256[] calldata payload
)
external
{
let messageHash = _snMessaging.consumeMessageFromL2(fromAddress, payload);
// You can use the message hash if you want here.
// We expect the payload to contain only a felt252 value (which is a uint256 in solidity).
require(payload.length == 1, "Invalid payload");
uint256 my_felt = payload[0];
// From here, you can safely use `my_felt` as the message has been verified by StarknetMessaging.
require(my_felt > 0, "Invalid value");
}
As you can see, in this context we don't have to verify which contract from L2 is sending the message. But we are actually using the consumeMessageFromL2 to validate the inputs (the sender address on L2 and the payload) to ensure we are only consuming valid messages.
It is important to remember that on L1 we are sending a payload of uint256, but the basic data type on Starknet is felt252; however, felt252 are approximately 4 bits smaller than uint256. So we have to pay attention to the values contained in the payload of the messages we are sending. If, on L1, we build a message with values above the maximum felt252, the message will be stuck and never consumed on L2.
Cairo Serde
Before sending messages between L1 and L2, you must remember that Starknet contracts, written in Cairo, can only understand serialized data. And serialized data is always an array of felt252.
On solidity, we have uint256 type, and felt252 are approximately 4 bits smaller than uint256. So we have to pay attention to the values contained in the payload of the messages we are sending.
If, on L1, we build a message with values above the maximum felt252, the message will be stuck and never consumed on L2.
So for instance, an actual uint256 value in Cairo is represented by a struct like:
#![allow(unused)] fn main() { struct u256 { low: u128, high: u128, } }
which will be serialized as TWO felts, one for the low, and one for the high. This means that to send only one u256 to Cairo, you'll need to send a payload from L1 with TWO values.
uint256[] memory payload = new uint256[](2);
// Let's send the value 1 as a u256 in cairo: low = 1, high = 0.
payload[0] = 1;
payload[1] = 0;
If you want to learn more about the messaging mechanism, you can visit the Starknet documentation.
You can also find a detailed guide here to test the messaging in local.
Security Considerations
When developing software, ensuring it functions as intended is usually straightforward. However, preventing unintended usage and vulnerabilities can be more challenging.
In smart contract development, security is very important. A single error can result in the loss of valuable assets or the improper functioning of certain features.
Smart contracts are executed in a public environment where anyone can examine the code and interact with it. Any errors or vulnerabilities in the code can be exploited by malicious actors.
This chapter presents general recommendations for writing secure smart contracts. By incorporating these concepts during development, you can create robust and reliable smart contracts. This reduces the chances of unexpected behavior or vulnerabilities.
Disclaimer
This chapter does not provide an exhaustive list of all possible security issues, and it does not guarantee that your contracts will be completely secure.
If you are developing smart contracts for production use, it is highly recommended to conduct external audits performed by security experts.
Mindset
Cairo is a highly safe language inspired by rust. It is designed in a way that force you to cover all possible cases. Security issues on Starknet mostly arise from the way smart contracts flows are designed, not much from the language itself.
Adopting a security mindset is the initial step in writing secure smart contracts. Try to always consider all possible scenarios when writing code.
Viewing smart contract as Finite State Machines
Transactions in smart contracts are atomic, meaning they either succeed or fail without making any changes.
Think of smart contracts as state machines: they have a set of initial states defined by the constructor constraints, and external function represents a set of possible state transitions. A transaction is nothing more than a state transition.
The assert or panic functions can be used to validate conditions before performing specific actions. You can learn more about these on the Unrecoverable Errors with panic page.
These validations can include:
- Inputs provided by the caller
- Execution requirements
- Invariants (conditions that must always be true)
- Return values from other function calls
For example, you could use the assert function to validate that a user has enough funds to perform a withdraw transaction. If the condition is not met, the transaction will fail and the state of the contract will not change.
impl Contract of IContract<ContractState> {
fn withdraw(ref self: ContractState, amount: u256) {
let current_balance = self.balance.read();
assert(self.balance.read() >= amount, 'Insufficient funds');
self.balance.write(current_balance - amount);
}Using these functions to check conditions adds constraints that help clearly define the boundaries of possible state transitions for each function in your smart contract. These checks ensure that the behavior of the contract stays within the expected limits.
Recommendations
Checks Effects Interactions Pattern
The Checks Effects Interactions pattern is a common design pattern used to prevent reentrancy attacks on Ethereum. While reentrancy is harder to achieve in Starknet, it is still recommended to use this pattern in your smart contracts.
The pattern consists of following a specific order of operations in your functions:
- Checks: Validate all conditions and inputs before performing any state changes.
- Effects: Perform all state changes.
- Interactions: All external calls to other contracts should be made at the end of the function.
Access control
Access control is the process of restricting access to certain features or resources. It is a common security mechanism used to prevent unauthorized access to sensitive information or actions. In smart contracts, some functions may often be restricted to specific users or roles.
You can implement the access control pattern to easily manage permissions. This pattern consists of defining a set of roles and assigning them to specific users. Each function can then be restricted to specific roles.
#[starknet::contract]
mod access_control_contract {
use starknet::ContractAddress;
use starknet::get_caller_address;
trait IContract<TContractState> {
fn is_owner(self: @TContractState) -> bool;
fn is_role_a(self: @TContractState) -> bool;
fn only_owner(self: @TContractState);
fn only_role_a(self: @TContractState);
fn only_allowed(self: @TContractState);
fn set_role_a(ref self: TContractState, _target: ContractAddress, _active: bool);
fn role_a_action(ref self: ContractState);
fn allowed_action(ref self: ContractState);
}
#[storage]
struct Storage {
// Role 'owner': only one address
owner: ContractAddress,
// Role 'role_a': a set of addresses
role_a: LegacyMap::<ContractAddress, bool>
}
#[constructor]
fn constructor(ref self: ContractState) {
self.owner.write(get_caller_address());
}
// Guard functions to check roles
impl Contract of IContract<ContractState> {
#[inline(always)]
fn is_owner(self: @ContractState) -> bool {
self.owner.read() == get_caller_address()
}
#[inline(always)]
fn is_role_a(self: @ContractState) -> bool {
self.role_a.read(get_caller_address())
}
#[inline(always)]
fn only_owner(self: @ContractState) {
assert(Contract::is_owner(self), 'Not owner');
}
#[inline(always)]
fn only_role_a(self: @ContractState) {
assert(Contract::is_role_a(self), 'Not role A');
}
// You can easily combine guards to perform complex checks
fn only_allowed(self: @ContractState) {
assert(Contract::is_owner(self) || Contract::is_role_a(self), 'Not allowed');
}
// Functions to manage roles
fn set_role_a(ref self: ContractState, _target: ContractAddress, _active: bool) {
Contract::only_owner(@self);
self.role_a.write(_target, _active);
}
// You can now focus on the business logic of your contract
// and reduce the complexity of your code by using guard functions
fn role_a_action(ref self: ContractState) {
Contract::only_role_a(@self);
// ...
}
fn allowed_action(ref self: ContractState) {
Contract::only_allowed(@self);
// ...
}
}
}
Static analysis tool
Static analysis refers to the process of examining code without its execution, focusing on its structure, syntax, and properties. It involves analyzing the source code to identify potential issues, vulnerabilities, or violations of specified rules.
By defining rules, such as coding conventions or security guidelines, developers can utilize static analysis tools to automatically check the code against these standards.
Reference:
Appendix
The following sections contain reference material you may find useful in your Cairo journey.
Appendix A: Keywords
The following list contains keywords that are reserved for current or future use by the Cairo language.
There are two keyword categories:
- strict
- reserved
There is a third category, which are functions from the core library. While their names are not reserved, they are not recommended to be used as names of any items to follow good practices.
Strict keywords
These keywords can only be used in their correct contexts. They cannot be used as names of any items.
as- Rename importbreak- Exit a loop immediatelyconst- Define constant itemscontinue- Continue to the next loop iterationelse- Fallback forifandif letcontrol flow constructsenum- Define an enumerationextern- Function defined at the compiler level using hint available at cairo1 level with this declarationfalse- Boolean false literalfn- Define a functionif- Branch based on the result of a conditional expressionimpl- Implement inherent or trait functionalityimplicits- Special kind of function parameters that are required to perform certain actionslet- Bind a variableloop- Loop unconditionallymatch- Match a value to patternsmod- Define a modulemut- Denote variable mutabilitynopanic- Functions marked with this notation mean that the function will never panic.of- Implementation a traitref- Parameter passed implicitly returned at the end of a functionreturn- Return from functionstruct- Define a structuretrait- Define a traittrue- Boolean true literaltype- Define a type aliasuse- Bring symbols into scope
Reserved keywords
These keywords aren't used yet, but they are reserved for future use. They have the same restrictions as strict keywords. The reasoning behind this is to make current programs forward compatible with future versions of Cairo by forbidding them to use these keywords.
Selfassertdodynforhintinmacromovepubstatic_assertselfstaticsupertrytypeofunsafewherewhilewithyield
Built-in functions
The Cairo programming language provides several specific functions that serve a special purpose. We will not cover all of them in this book, but using the names of these functions as names of other items is not recommended.
-assert - This function checks a boolean expression, and if it evaluates to false, it triggers the panic function. -panic - This function terminates the program.
Appendix B: Operators and Symbols
This appendix includes a glossary of Cairo's syntax.
Operators
Table B-1 contains the operators in Cairo, an example of how the operator would appear in context, a short explanation, and whether that operator is overloadable. If an operator is overloadable, the relevant trait to use to overload that operator is listed.
Table B-1: Operators
| Operator | Example | Explanation | Overloadable? |
|---|---|---|---|
! | !expr | Bitwise or logical complement | Not |
!= | expr != expr | Non-equality comparison | PartialEq |
% | expr % expr | Arithmetic remainder | Rem |
%= | var %= expr | Arithmetic remainder and assignment | RemEq |
& | expr & expr | Bitwise AND | BitAnd |
&& | expr && expr | Short-circuiting logical AND | |
* | expr * expr | Arithmetic multiplication | Mul |
*= | var *= expr | Arithmetic multiplication and assignment | MulEq |
@ | @var | Snapshot | |
* | *var | Desnap | |
+ | expr + expr | Arithmetic addition | Add |
+= | var += expr | Arithmetic addition and assignment | AddEq |
, | expr, expr | Argument and element separator | |
- | -expr | Arithmetic negation | Neg |
- | expr - expr | Arithmetic subtraction | Sub |
-= | var -= expr | Arithmetic subtraction and assignment | SubEq |
-> | fn(...) -> type, |...| -> type | Function and closure return type | |
. | expr.ident | Member access | |
/ | expr / expr | Arithmetic division | Div |
/= | var /= expr | Arithmetic division and assignment | DivEq |
: | pat: type, ident: type | Constraints | |
: | ident: expr | Struct field initializer | |
; | expr; | Statement and item terminator | |
< | expr < expr | Less than comparison | PartialOrd |
<= | expr <= expr | Less than or equal to comparison | PartialOrd |
= | var = expr | Assignment | |
== | expr == expr | Equality comparison | PartialEq |
=> | pat => expr | Part of match arm syntax | |
> | expr > expr | Greater than comparison | PartialOrd |
>= | expr >= expr | Greater than or equal to comparison | PartialOrd |
^ | expr ^ expr | Bitwise exclusive OR | BitXor |
| | expr | expr | Bitwise OR | BitOr |
|| | expr || expr | Short-circuiting logical OR |
Non Operator Symbols
The following list contains all symbols that are not used as operators; that is, they do not have the same behavior as a function or method call.
Table B-2 shows symbols that appear on their own and are valid in a variety of locations.
Table B-2: Stand-Alone Syntax
| Symbol | Explanation |
|---|---|
..._u8, ..._usize, etc. | Numeric literal of specific type |
'...' | Short string |
_ | “Ignored” pattern binding; also used to make integer literals readable |
Table B-3 shows symbols that are used within the context of a module hierarchy path to access an item.
Table B-3: Path-Related Syntax
| Symbol | Explanation |
|---|---|
ident::ident | Namespace path |
super::path | Path relative to the parent of the current module |
trait::method(...) | Disambiguating a method call by naming the trait that defines it |
Table B-4 shows symbols that appear in the context of using generic type parameters.
Table B-4: Generics
| Symbol | Explanation |
|---|---|
path<...> | Specifies parameters to generic type in a type (e.g., Vec<u8>) |
path::<...>, method::<...> | Specifies parameters to generic type, function, or method in an expression; often referred to as turbofish |
fn ident<...> ... | Define generic function |
struct ident<...> ... | Define generic structure |
enum ident<...> ... | Define generic enumeration |
impl<...> ... | Define generic implementation |
Table B-5 shows symbols that appear in the context of calling or defining macros and specifying attributes on an item.
Table B-5: Macros and Attributes
| Symbol | Explanation |
|---|---|
#[meta] | Outer attribute |
Table B-6 shows symbols that create comments.
Table B-6: Comments
| Symbol | Explanation |
|---|---|
// | Line comment |
Table B-7 shows symbols that appear in the context of using tuples.
Table B-7: Tuples
| Symbol | Explanation |
|---|---|
() | Empty tuple (aka unit), both literal and type |
(expr) | Parenthesized expression |
(expr,) | Single-element tuple expression |
(type,) | Single-element tuple type |
(expr, ...) | Tuple expression |
(type, ...) | Tuple type |
expr(expr, ...) | Function call expression; also used to initialize tuple structs and tuple enum variants |
Table B-8 shows the contexts in which curly braces are used.
Table B-8: Curly Brackets
| Context | Explanation |
|---|---|
{...} | Block expression |
Type {...} | struct literal |
Appendix C: Derivable Traits
In various places in the book, we’ve discussed the derive attribute, which you can apply to a struct or enum definition. The derive attribute generates code to implement a default trait on the type you’ve annotated with the derive syntax.
In this appendix, we provide a comprehensive reference detailing all the traits in the standard library compatible with the derive attribute.
These traits listed here are the only ones defined by the core library that can be implemented on your types using derive. Other traits defined in the standard library don’t have sensible default behavior, so it’s up to you to implement them in the way that makes sense for what you’re trying to accomplish.
The list of derivable traits provided in this appendix does not encompass all possibilities: external libraries can implement derive for their own traits, expanding the list of traits compatible with derive.
PartialEq for equality comparison
The PartialEq trait allows for comparison between instances of a type for equality, thereby enabling the == and != operators.
When PartialEq is derived on structs, two instances are equal only if all fields are equal, and the instances are not equal if any fields are not equal. When derived on enums, each variant is equal to itself and not equal to the other variants.
Example:
#[derive(PartialEq, Drop)] struct A { item: felt252 } fn main() { let first_struct = A { item: 2 }; let second_struct = A { item: 2 }; assert(first_struct == second_struct, 'Structs are different'); }
Clone and Copy for Duplicating Values
The Clone trait provides the functionality to explicitly create a deep copy of a value.
Deriving Clone implements the clone method, which, in turn, calls clone on each of the type's components. This means all the fields or values in the type must also implement Clone to derive Clone.
Example:
use clone::Clone; #[derive(Clone, Drop)] struct A { item: felt252 } fn main() { let first_struct = A { item: 2 }; let second_struct = first_struct.clone(); assert(second_struct.item == 2, 'Not equal'); }
The Copy trait allows for the duplication of values. You can derive Copy on any type whose parts all implement Copy.
Example:
#[derive(Copy, Drop)] struct A { item: felt252 } fn main() { let first_struct = A { item: 2 }; let second_struct = first_struct; assert(second_struct.item == 2, 'Not equal'); assert(first_struct.item == 2, 'Not Equal'); // Copy Trait prevents firs_struct from moving into second_struct }
Serializing with Serde
Serde provides trait implementations for serialize and deserialize functions for data structures defined in your crate. It allows you to transform your structure into an array (or the opposite).
Example:
use serde::Serde; use array::ArrayTrait; #[derive(Serde, Drop)] struct A { item_one: felt252, item_two: felt252, } fn main() { let first_struct = A { item_one: 2, item_two: 99, }; let mut output_array = ArrayTrait::new(); let serialized = first_struct.serialize(ref output_array); panic(output_array); }
Output:
Run panicked with [2 (''), 99 ('c'), ].
We can see here that our struct A has been serialized into the output array.
Also, we can use deserialize function to convert the serialized array back into our A struct.
Example:
use serde::Serde; use array::ArrayTrait; use option::OptionTrait; #[derive(Serde, Drop)] struct A { item_one: felt252, item_two: felt252, } fn main() { let first_struct = A { item_one: 2, item_two: 99, }; let mut output_array = ArrayTrait::new(); let mut serialized = first_struct.serialize(ref output_array); let mut span_array = output_array.span(); let deserialized_struct: A = Serde::<A>::deserialize(ref span_array).unwrap(); }
Here we are converting a serialized array span back to the struct A. deserialize returns an Option so we need to unwrap it. When using deserialize we also need to specify the type we want to deserialize into.
Drop and Destruct
When moving out of scope, variables need to be moved first. This is where the Drop trait intervenes. You can find more details about its usage here.
Moreover Dictionary need to be squashed before going out of scope. Calling manually the squash method on each of them can be quickly redundant. Destruct trait allows Dictionaries to be automatically squashed when they get out of scope. You can also find more information about Destruct here.
Store
Storing a user-defined struct in a storage variable within a Starknet contract requires the Store trait to be implemented for this type. You can automatically derive the store trait for all structs that do not contain complex types like Dictionaries or Arrays.
Example:
#[starknet::contract]
mod contract {
#[derive(Drop, starknet::Store)]
struct A {
item_one: felt252,
item_two: felt252,
}
#[storage]
struct Storage {
my_storage: A,
}
}
Here we demonstrate the implementation of a struct A that derives the Store trait. This struct A is subsequently used
as a storage variable in the contract.
PartialOrd and Ord for Ordering Comparisons
In addition to the PartialEq trait, the standard library also provides the PartialOrd and Ord traits to compare values for ordering.
The PartialOrd trait allows for comparison between instances of a type for ordering, thereby enabling the <, <=, >, and >= operators.
When PartialOrd is derived on structs, two instances are ordered by comparing each field in turn.
Appendix D - Useful Development Tools
In this appendix, we talk about some useful development tools that the Cairo project provides. We’ll look at automatic formatting, quick ways to apply warning fixes, a linter, and integrating with IDEs.
Automatic Formatting with scarb fmt
Scarb projects can be formatted using the scarb fmt command.
If you're using the cairo binaries directly, you can run cairo-format instead.
Many collaborative projects use scarb fmt to prevent arguments about which
style to use when writing Cairo: everyone formats their code using the tool.
To format any Cairo project, enter the following:
IDE Integration Using cairo-language-server
To help IDE integration, the Cairo community recommends using the
cairo-language-server. This tool is a set of
compiler-centric utilities that speaks the Language Server Protocol, which is a specification for IDEs and programming languages to
communicate with each other. Different clients can use cairo-language-server, such as
the Cairo extension for Visual Studio Code.
Visit the vscode-cairo page
to install it on VSCode. You will get abilities such as autocompletion, jump to
definition, and inline errors.
Note: If you have Scarb installed, it should work out of the box with the Cairo VSCode extension, without a manual installation of the language server.
Appendix E - Common Types & Traits and the Cairo Prelude
Prelude
The Cairo prelude is a collection of commonly used modules, functions, data types, and traits that are automatically brought into scope of every module in a Cairo crate without needing explicit import statements. Cairo's prelude provides the basic building blocks developers need to start Cairo programs and writing smart contracts.
The core library prelude is defined in the
lib.cairo
file of the corelib crate and contains Cairo's primitive data types, traits,
operators, and utility functions. This includes: Data types - felts, bools,
arrays, dicts, etc. Traits - behaviors for arithmetic, comparison, serialization
Operators - arithmetic, logical, bitwise Utility functions - helpers for arrays,
maps, boxing, etc. The core library prelude delivers the fundamental programming
constructs and operations needed for basic Cairo programs, without requiring the
explicit import of elements. Since the core library prelude is automatically
imported, its contents are available for use in any Cairo crate without explicit
imports. This prevents repetition and provides a better devX. This is what
allows you to use ArrayTrait::append() or the Default trait without bringing
them explicitly into scope.
List of common types and traits
The following section provides a brief overview of commonly used types and traits when developing Cairo programs. Most of these are included in the prelude and not required to be imported explicitly - but not all of them.
| Import | Path | Usage |
|---|---|---|
OptionTrait | core::option::OptionTrait | OptionTrait<T> defines a set of methods required to manipulate optional value. |
ResultTrait | core::result::ResultTrait | ResultTrait<T, E> Type for Starknet contract address, a value in the range [0, 2 ** 251). |
ContractAddress | starknet::ContractAddress | ContractAddress is a type to represent the smart contract address |
ContractAddressZeroable | starknet::contract_address::ContractAddressZeroable | ContractAddressZeroable is the implementation of the trait Zeroable for the ContractAddress type. It is required to check whether a value of t:ContractAddress is zero or not. |
contract_address_const | starknet::contract_address_const | The contract_address_const! it's a function that allows instantiating constant contract address values. |
Into | traits::Into; | Into<T> is a trait used for conversion between types. If there is an implementation of Into<T,S> for the types T and S, you can convert T into S. |
TryInto | traits::TryInto; | TryInto<T> is a trait used for conversion between types.If there is an implementation of TryInto<T,S> for the types T and S, you can convert T into S. |
get_caller_address | starknet::get_caller_address | get_caller_address() is a function that returns the address of the caller of the contract. It can be used to identify the caller of a contract function. |
get_contract_address | starknet::info::get_contract_address | get_contract_address() is a function that returns the address of the current contract. It can be used to obtain the address of the contract being executed. |
This is not an exhaustive list, but it covers some of the commonly used types and traits in contract development. For more details, refer to the official documentation and explore the available libraries and frameworks.
Appendix F: Installing the Cairo binaries
If you want to have access to the Cairo binaries, for anything that you could not achieve by purely using Scarb you can install them by following the instructions below.
The first step is to install Cairo. We will download Cairo manually, using cairo repository or with an installation script. You’ll need an internet connection for the download.
Prerequisites
First you will need to have Rust and Git installed.
# Install stable Rust
rustup override set stable && rustup update
Install Git.
Installing Cairo with a Script (Installer by Fran)
Install
If you wish to install a specific release of Cairo rather than the latest head, set the CAIRO_GIT_TAG environment variable (e.g. export CAIRO_GIT_TAG=v2.2.0).
curl -L https://github.com/franalgaba/cairo-installer/raw/main/bin/cairo-installer | bash
After installing, follow these instructions to set up your shell environment.
Update
rm -fr ~/.cairo
curl -L https://github.com/franalgaba/cairo-installer/raw/main/bin/cairo-installer | bash
Uninstall
Cairo is installed within $CAIRO_ROOT (default: ~/.cairo). To uninstall, just remove it:
rm -fr ~/.cairo
then remove these three lines from .bashrc:
export PATH="$HOME/.cairo/target/release:$PATH"
and finally, restart your shell:
exec $SHELL
Set up your shell environment for Cairo
- Define environment variable
CAIRO_ROOTto point to the path where Cairo will store its data.$HOME/.cairois the default. If you installed Cairo via Git checkout, we recommend to set it to the same location as where you cloned it. - Add the
cairo-*executables to yourPATHif it's not already there
The below setup should work for the vast majority of users for common use cases.
-
For bash:
Stock Bash startup files vary widely between distributions in which of them source which, under what circumstances, in what order and what additional configuration they perform. As such, the most reliable way to get Cairo in all environments is to append Cairo configuration commands to both
.bashrc(for interactive shells) and the profile file that Bash would use (for login shells).First, add the commands to
~/.bashrcby running the following in your terminal:echo 'export CAIRO_ROOT="$HOME/.cairo"' >> ~/.bashrc echo 'command -v cairo-compile >/dev/null || export PATH="$CAIRO_ROOT/target/release:$PATH"' >> ~/.bashrcThen, if you have
~/.profile,~/.bash_profileor~/.bash_login, add the commands there as well. If you have none of these, add them to~/.profile.-
to add to
~/.profile:echo 'export CAIRO_ROOT="$HOME/.cairo"' >> ~/.profile echo 'command -v cairo-compile >/dev/null || export PATH="$CAIRO_ROOT/target/release:$PATH"' >> ~/.profile -
to add to
~/.bash_profile:echo 'export CAIRO_ROOT="$HOME/.cairo"' >> ~/.bash_profile echo 'command -v cairo-compile >/dev/null || export PATH="$CAIRO_ROOT/target/release:$PATH"' >> ~/.bash_profile
-
-
For Zsh:
echo 'export CAIRO_ROOT="$HOME/.cairo"' >> ~/.zshrc echo 'command -v cairo-compile >/dev/null || export PATH="$CAIRO_ROOT/target/release:$PATH"' >> ~/.zshrcIf you wish to get Cairo in non-interactive login shells as well, also add the commands to
~/.zprofileor~/.zlogin. -
For Fish shell:
If you have Fish 3.2.0 or newer, execute this interactively:
set -Ux CAIRO_ROOT $HOME/.cairo fish_add_path $CAIRO_ROOT/target/releaseOtherwise, execute the snippet below:
set -Ux CAIRO_ROOT $HOME/.cairo set -U fish_user_paths $CAIRO_ROOT/target/release $fish_user_paths
In MacOS, you might also want to install Fig which provides alternative shell completions for many command line tools with an IDE-like popup interface in the terminal window. (Note that their completions are independent from Cairo's codebase so they might be slightly out of sync for bleeding-edge interface changes.)
Restart your shell
for the PATH changes to take effect.
exec "$SHELL"
Installing Cairo Manually (Guide by Abdel)
Step 1: Install Cairo 1.0
If you are using an x86 Linux system and can use the release binary, download Cairo here: https://github.com/starkware-libs/cairo/releases.
For everyone else, we recommend compiling Cairo from source as follows:
# Start by defining environment variable CAIRO_ROOT
export CAIRO_ROOT="${HOME}/.cairo"
# Create .cairo folder if it doesn't exist yet
mkdir $CAIRO_ROOT
# Clone the Cairo compiler in $CAIRO_ROOT (default root)
cd $CAIRO_ROOT && git clone git@github.com:starkware-libs/cairo.git .
# OPTIONAL/RECOMMENDED: If you want to install a specific version of the compiler
# Fetch all tags (versions)
git fetch --all --tags
# View tags (you can also do this in the cairo compiler repository)
git describe --tags `git rev-list --tags`
# Checkout the version you want
git checkout tags/v2.2.0
# Generate release binaries
cargo build --all --release
.
NOTE: Keeping Cairo up to date
Now that your Cairo compiler is in a cloned repository, all you will need to do is pull the latest changes and rebuild as follows:
cd $CAIRO_ROOT && git fetch && git pull && cargo build --all --release
Step 2: Add Cairo 1.0 executables to your path
export PATH="$CAIRO_ROOT/target/release:$PATH"
NOTE: If installing from a Linux binary, adapt the destination path accordingly.
Step 3: Setup Language Server
VS Code Extension
- If you have the previous Cairo 0 extension installed, you can disable/uninstall it.
- Install the Cairo 1 extension for proper syntax highlighting and code navigation. You can find the link to the extension here, or just search for "Cairo 1.0" in the VS Code marketplace.
- The extension will work out of the box once you will have Scarb installed.
Cairo Language Server without Scarb
If you don't want to depend on Scarb, you can still use the Cairo Language Server with the compiler binary.
From Step 1, the cairo-language-server binary should be built and executing this command will copy its path into your clipboard.
which cairo-language-server | pbcopy
Update the cairo1.languageServerPath of the Cairo 1.0 extension by pasting the path.